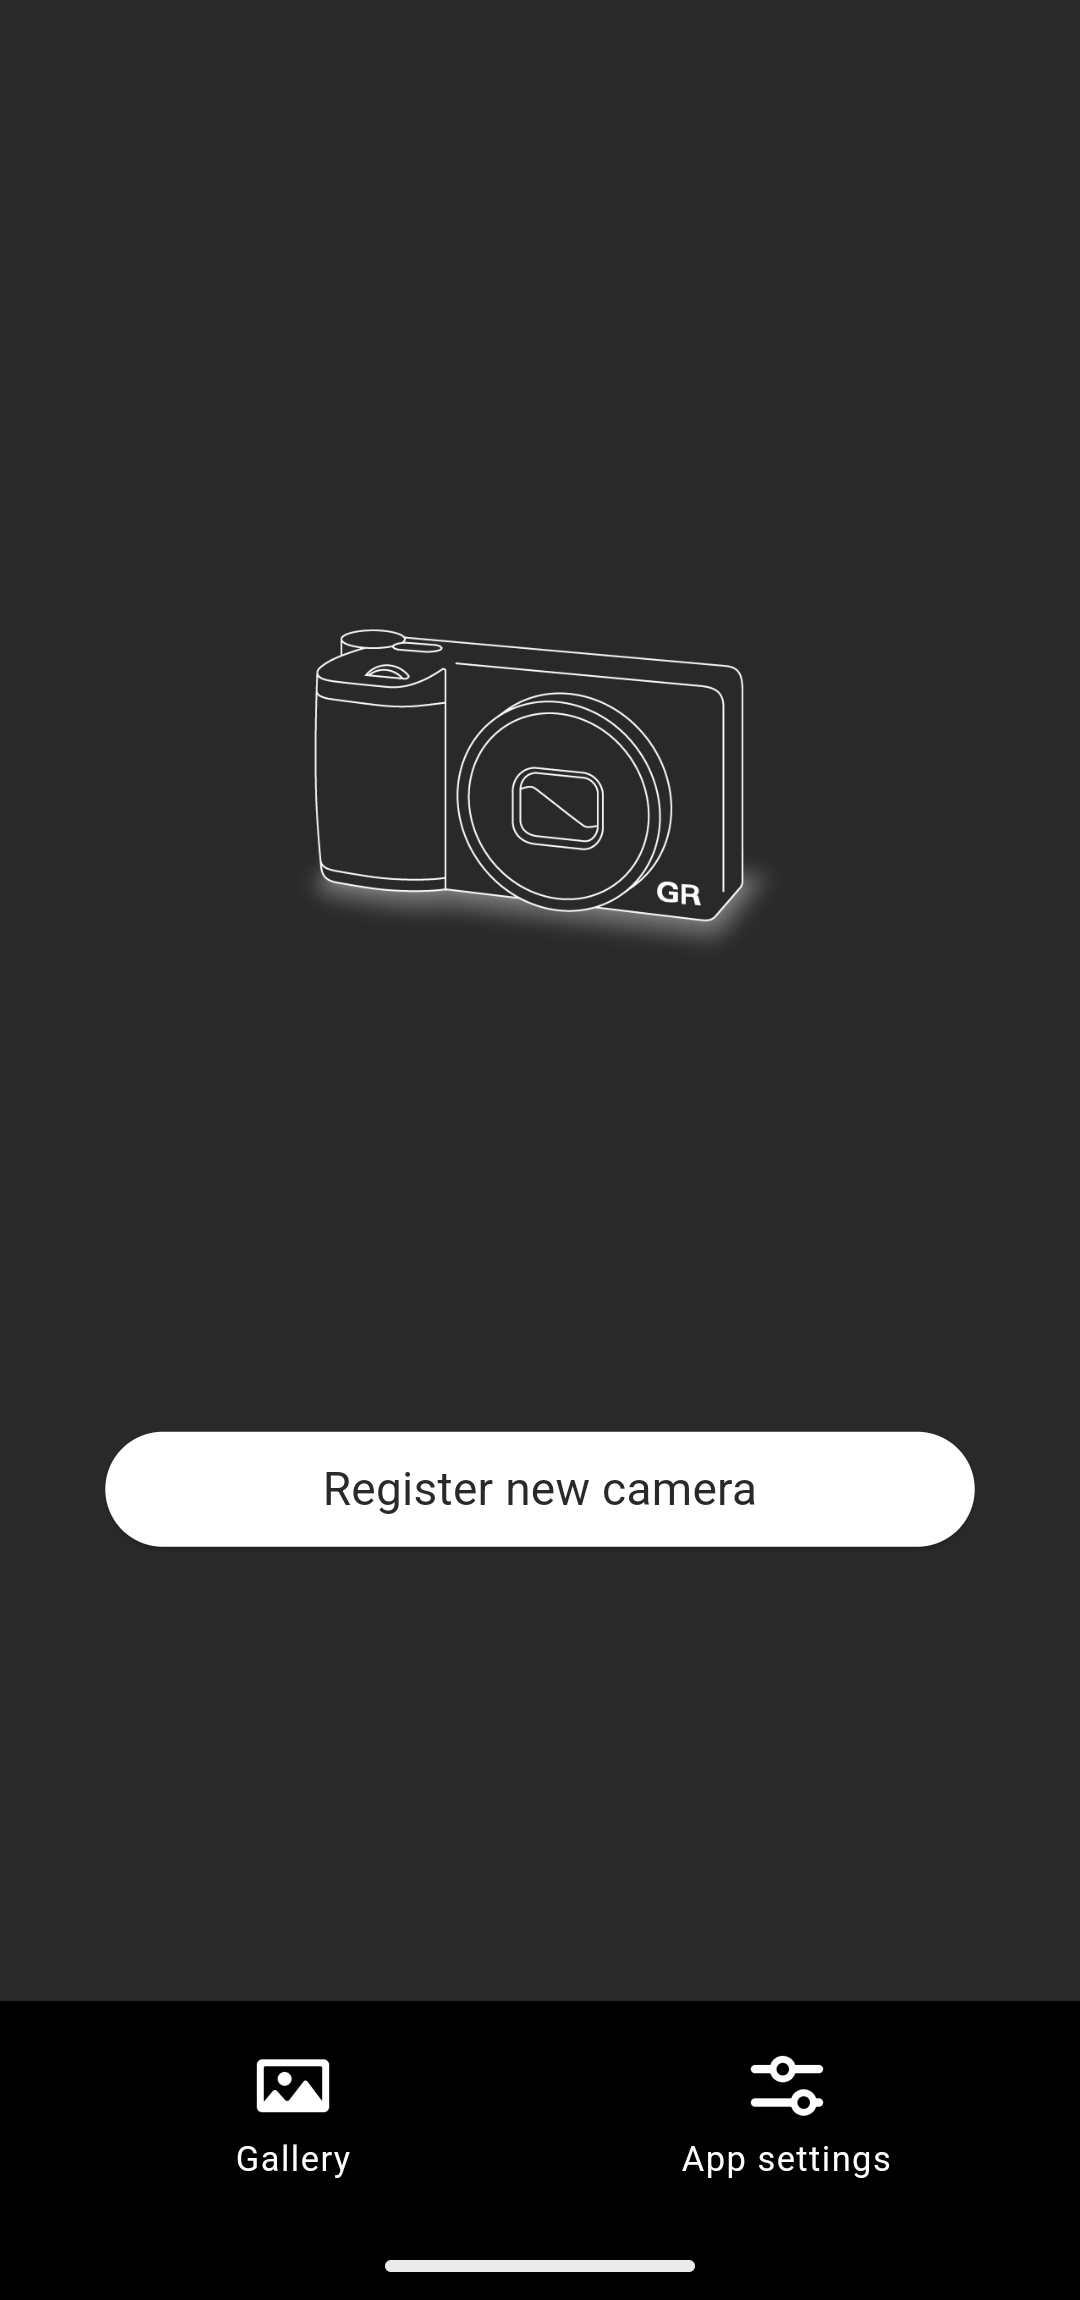
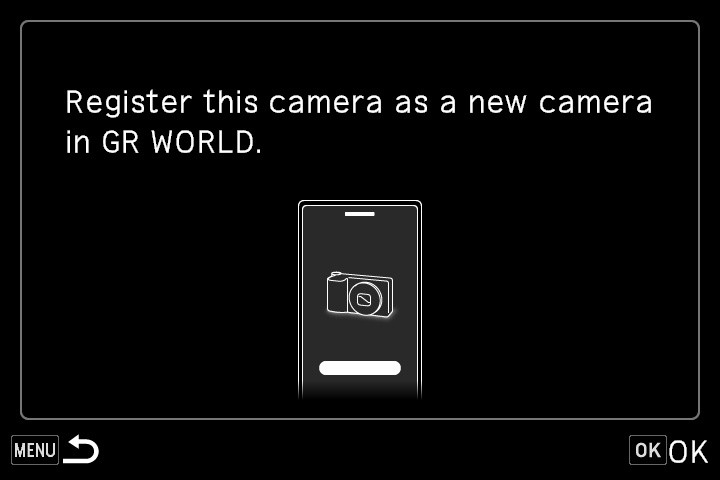
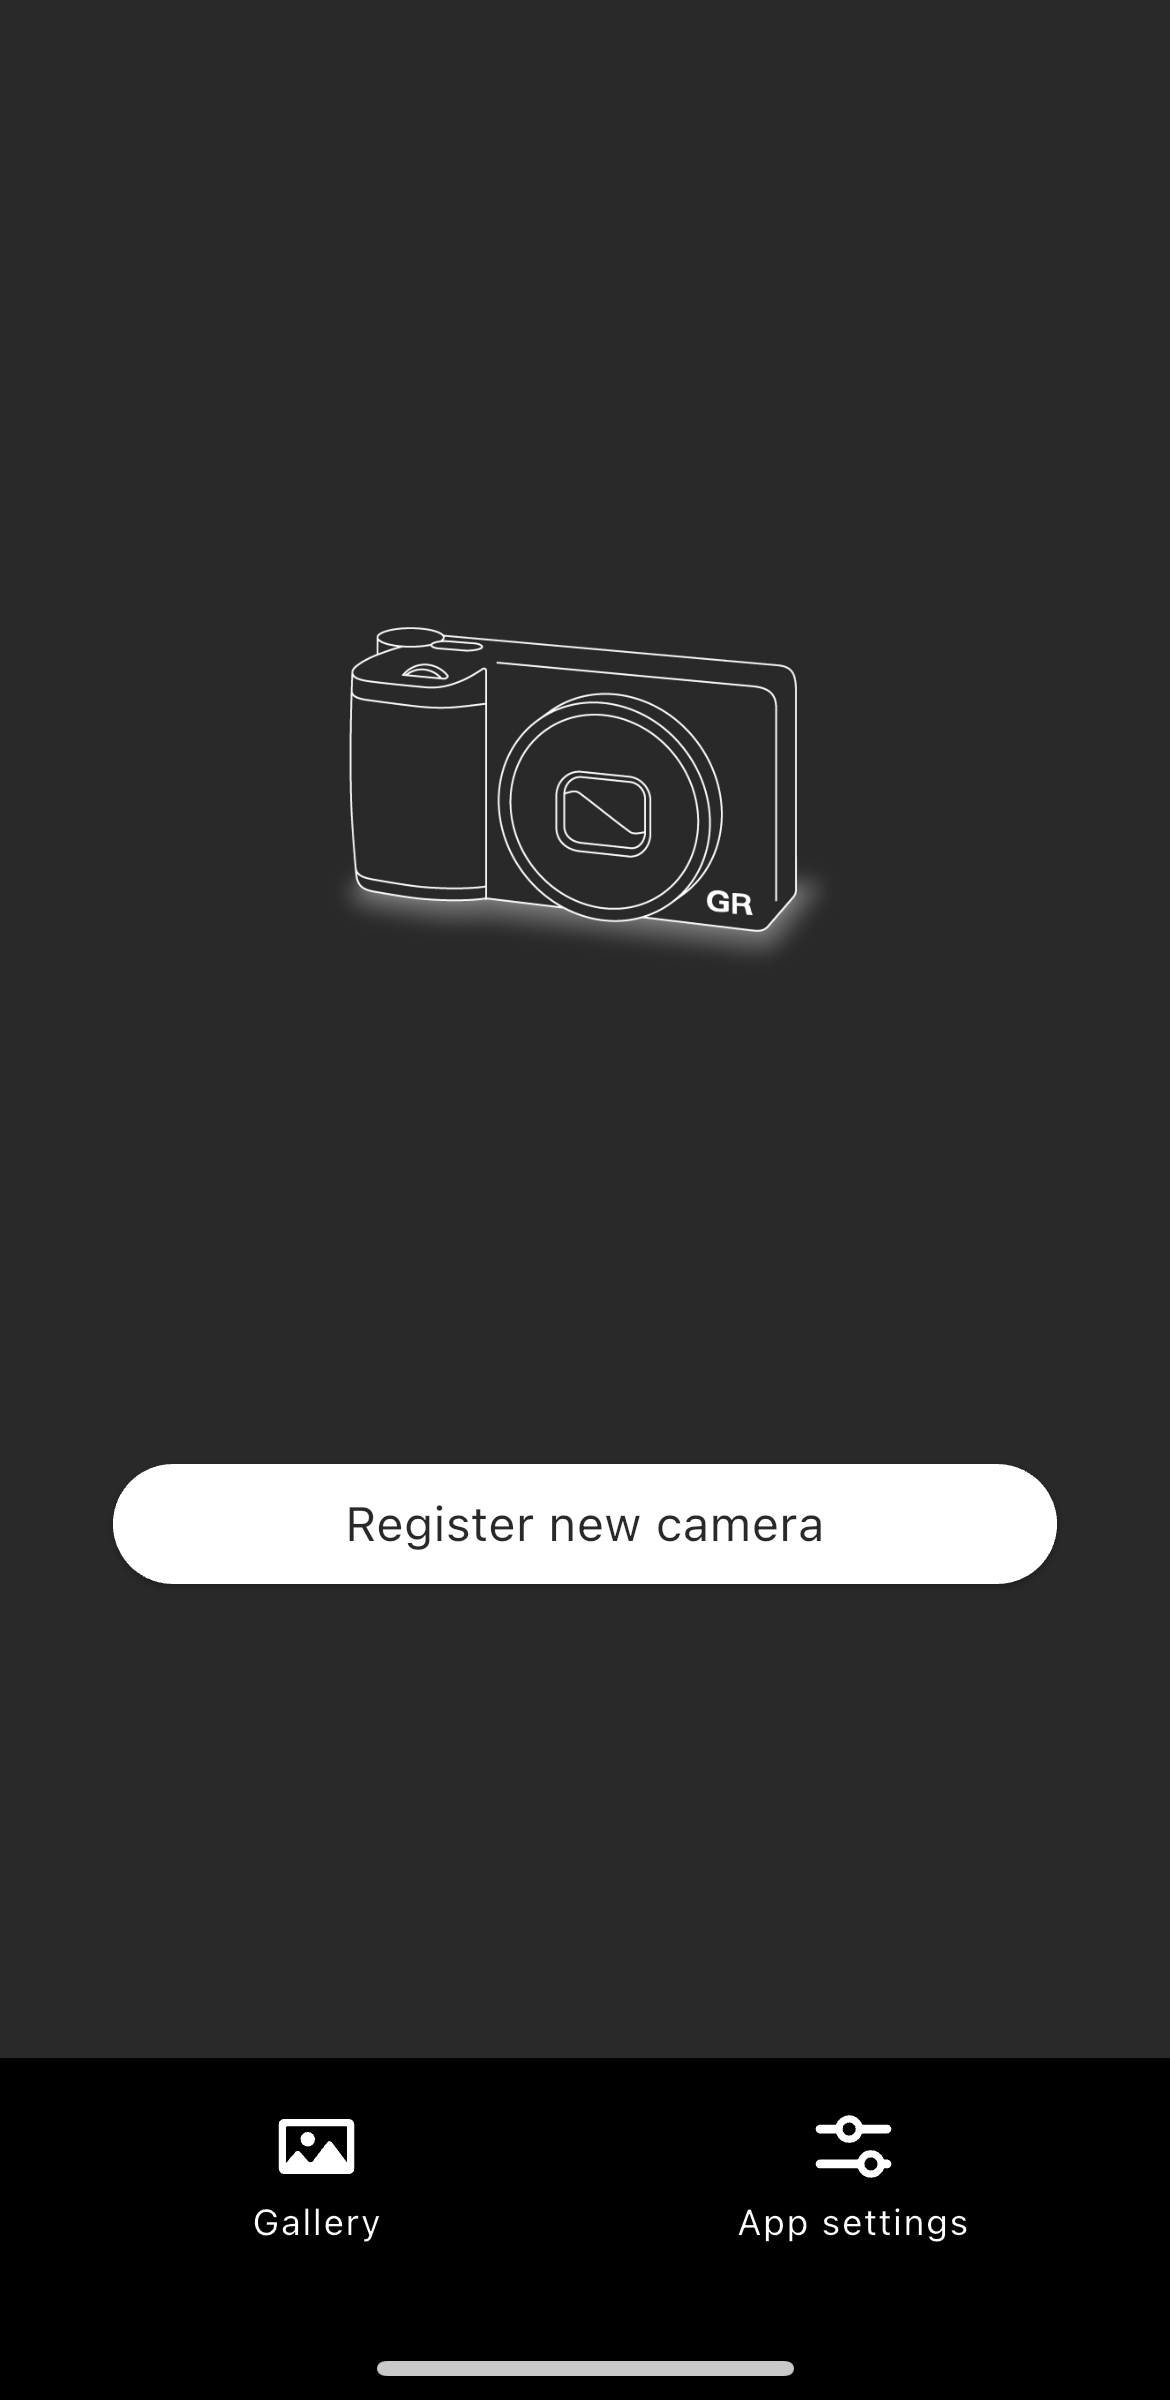
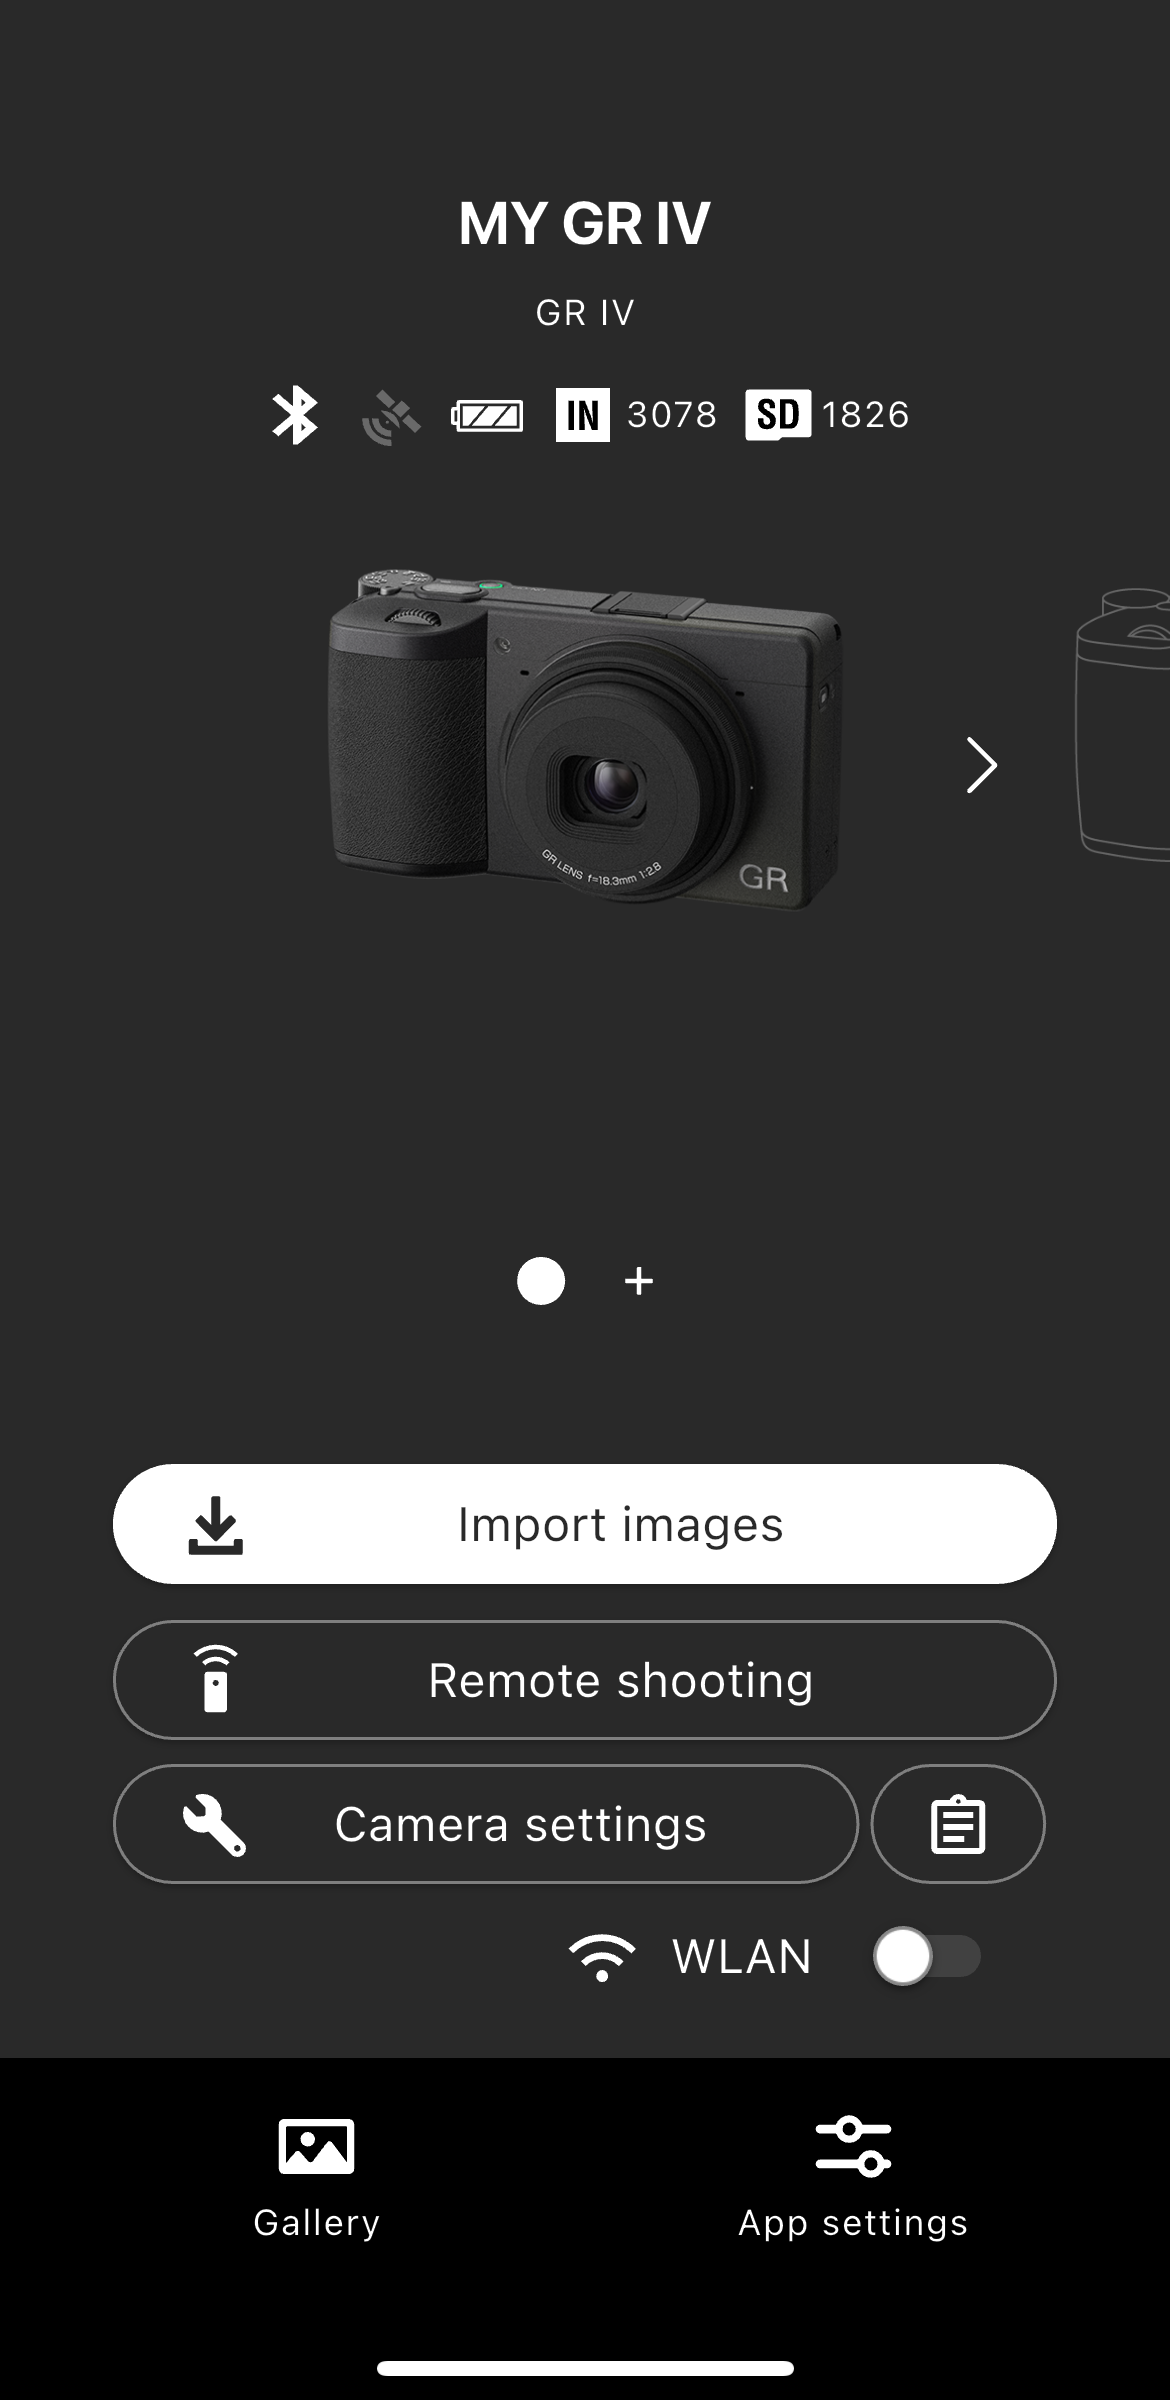
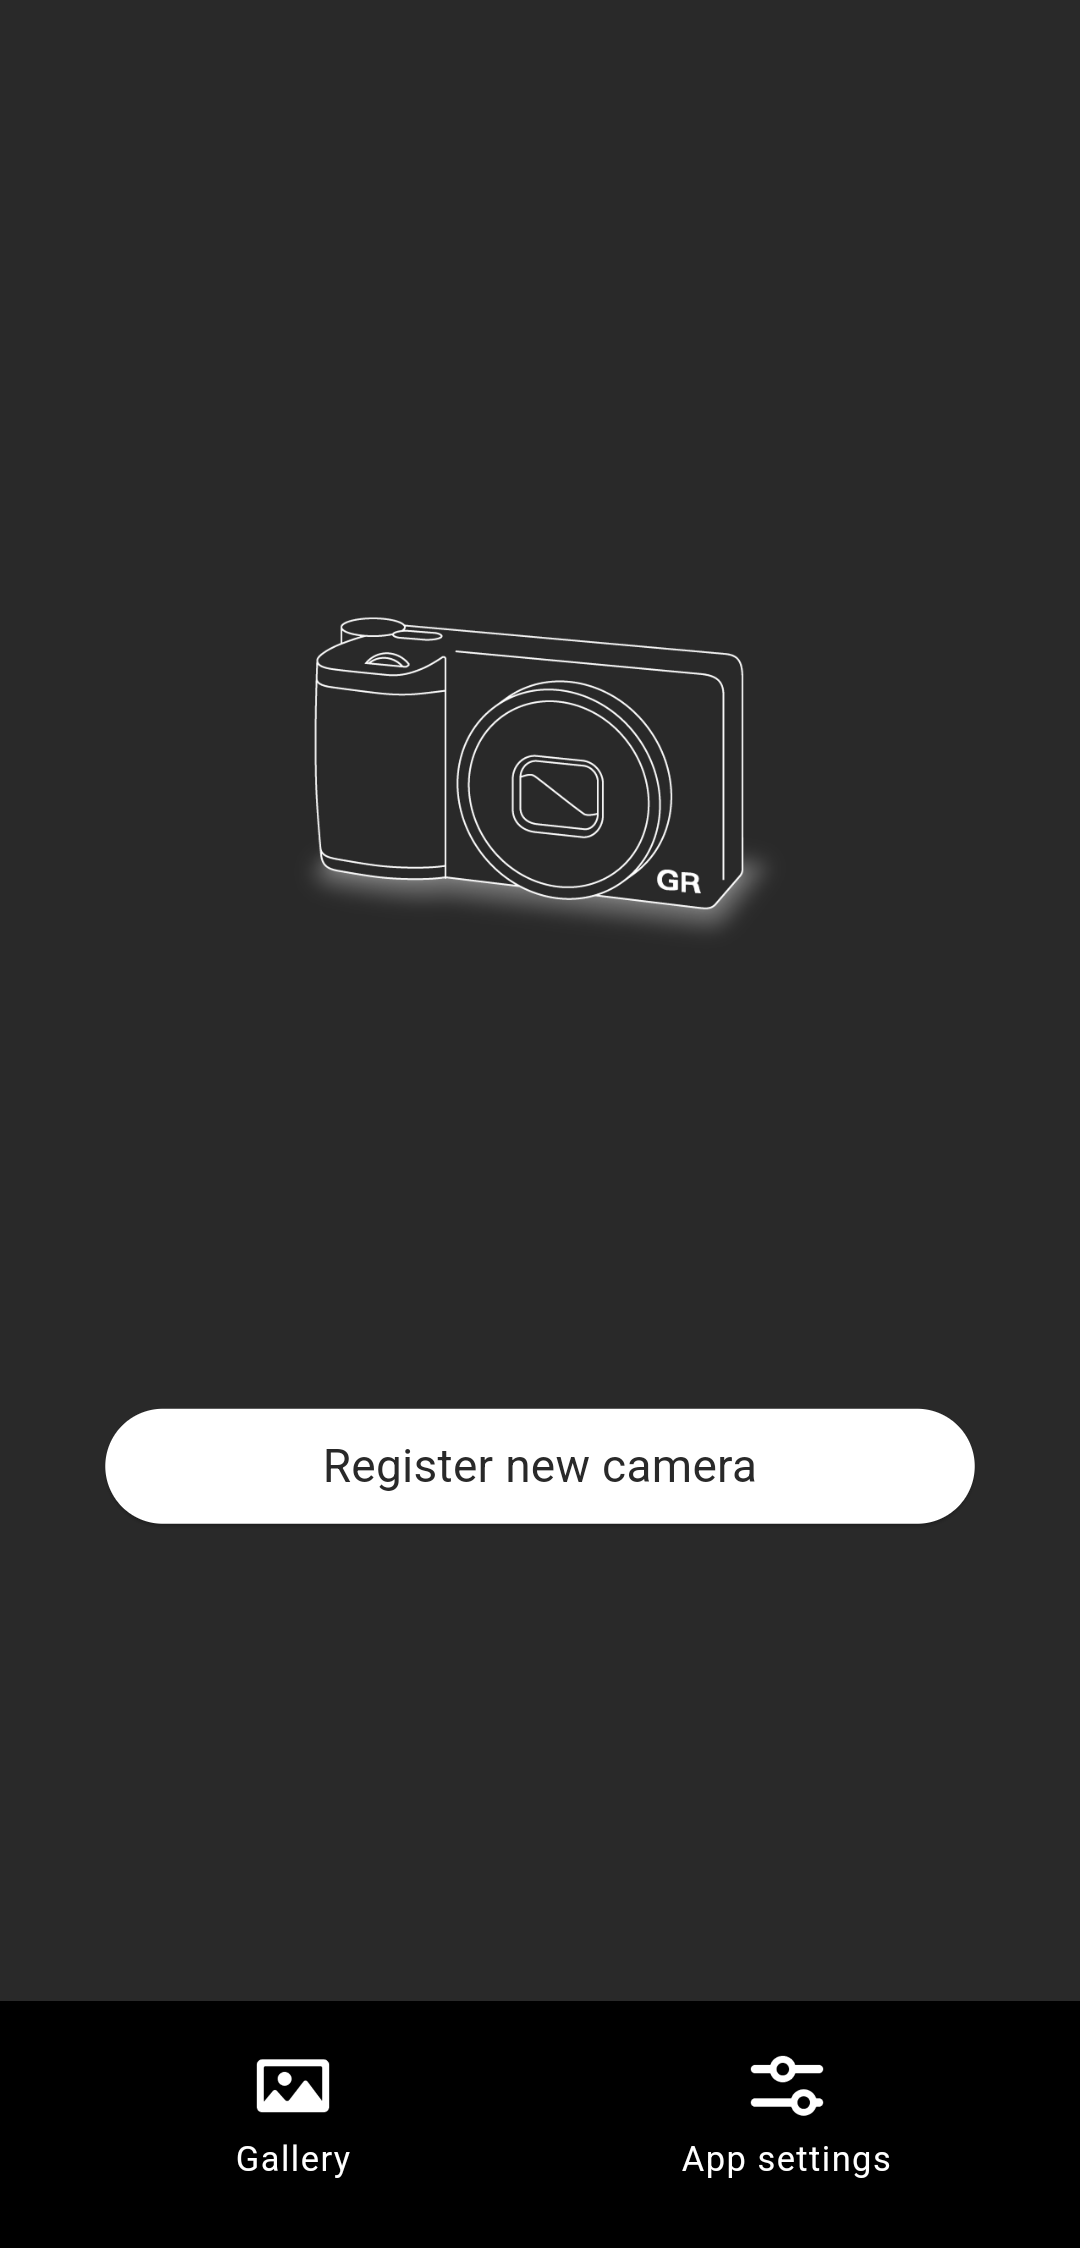
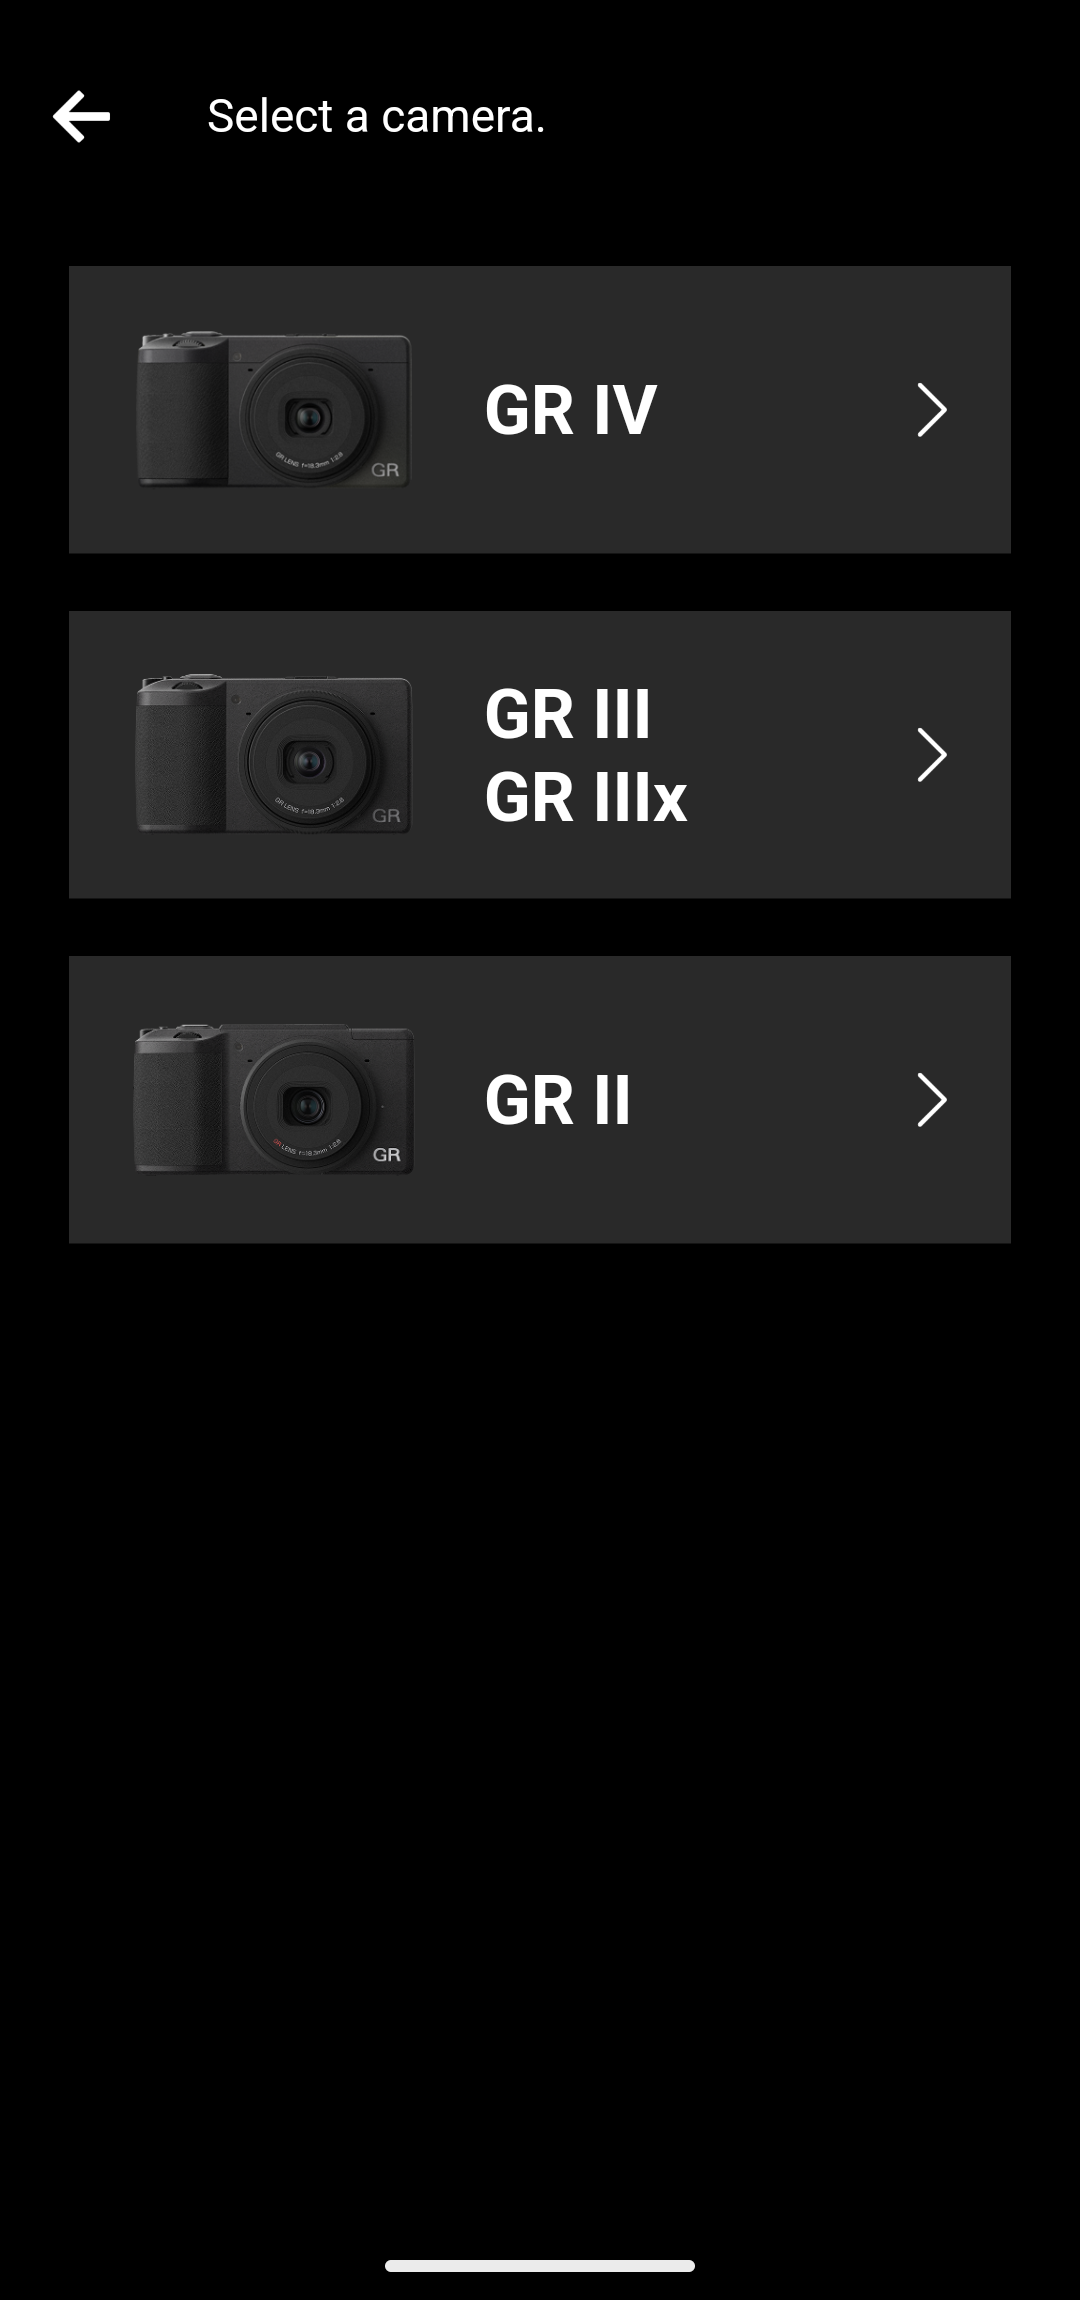
1. Tap “Register new camera”.
* Make sure that the Bluetooth function and location information function of the smartphone are turned on.
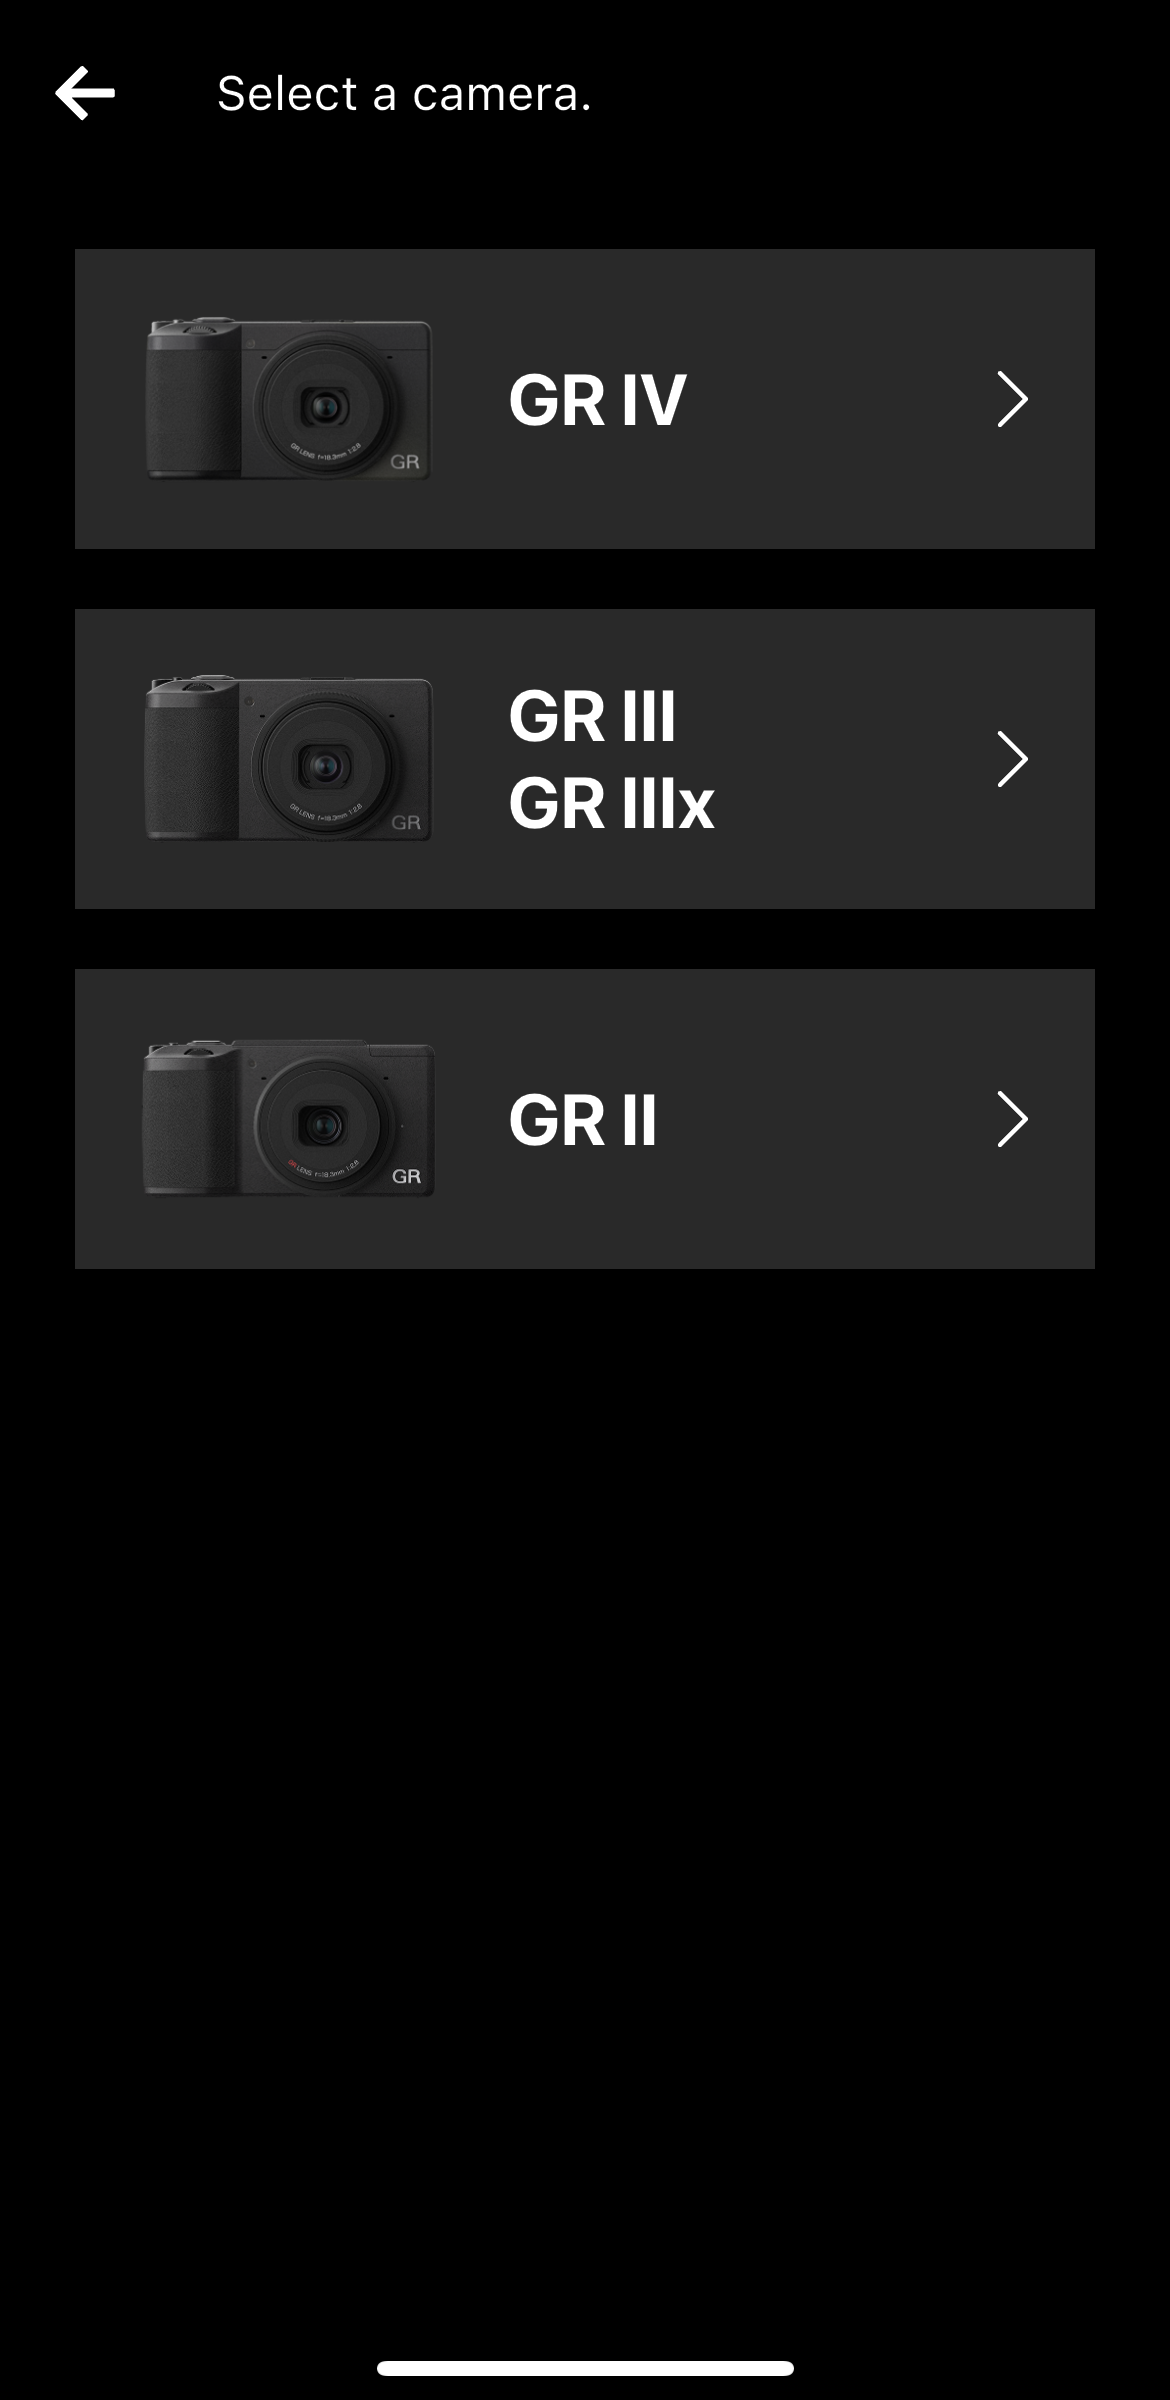
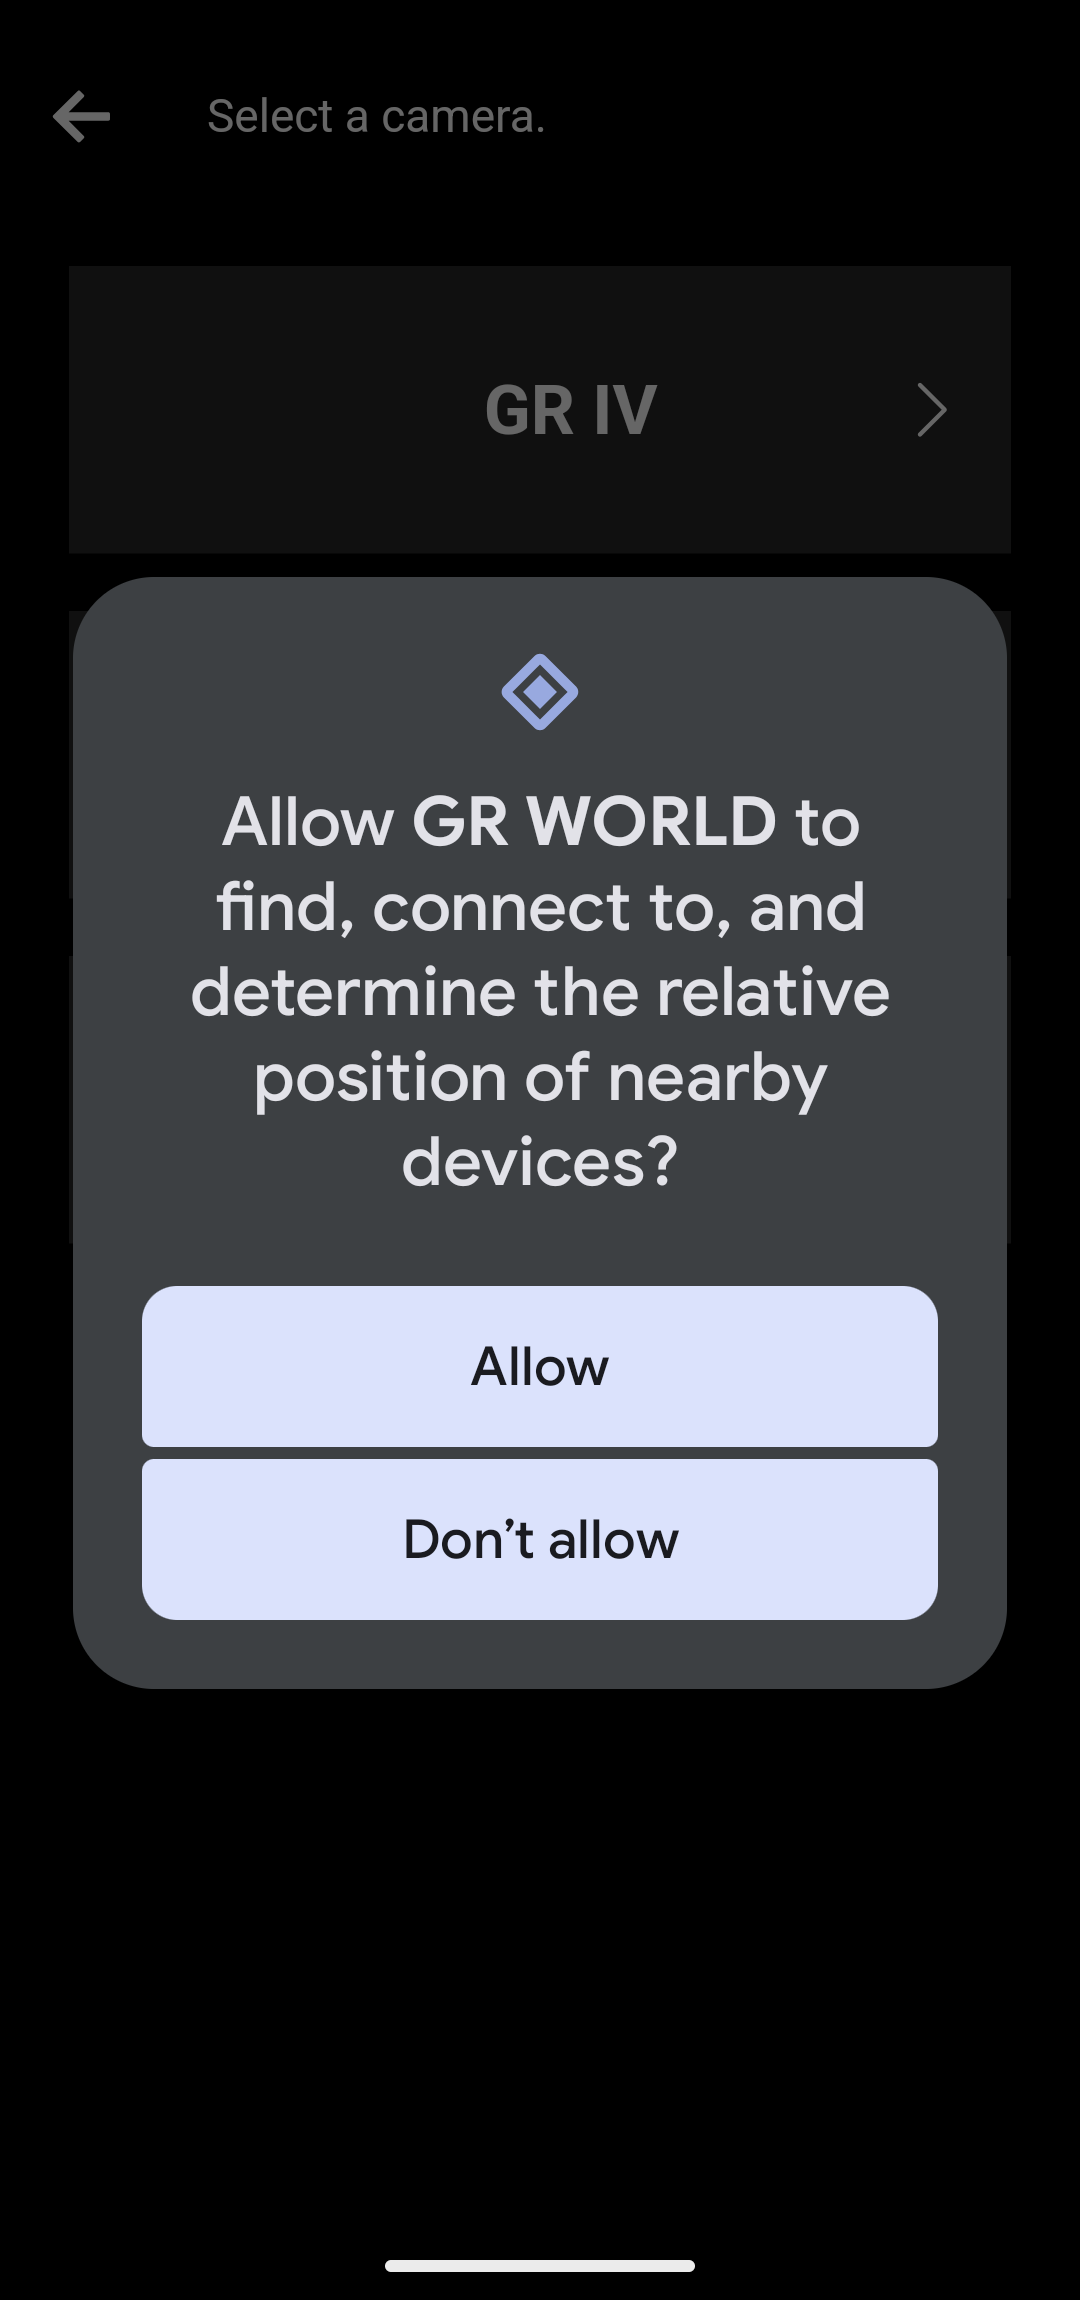
GR IV
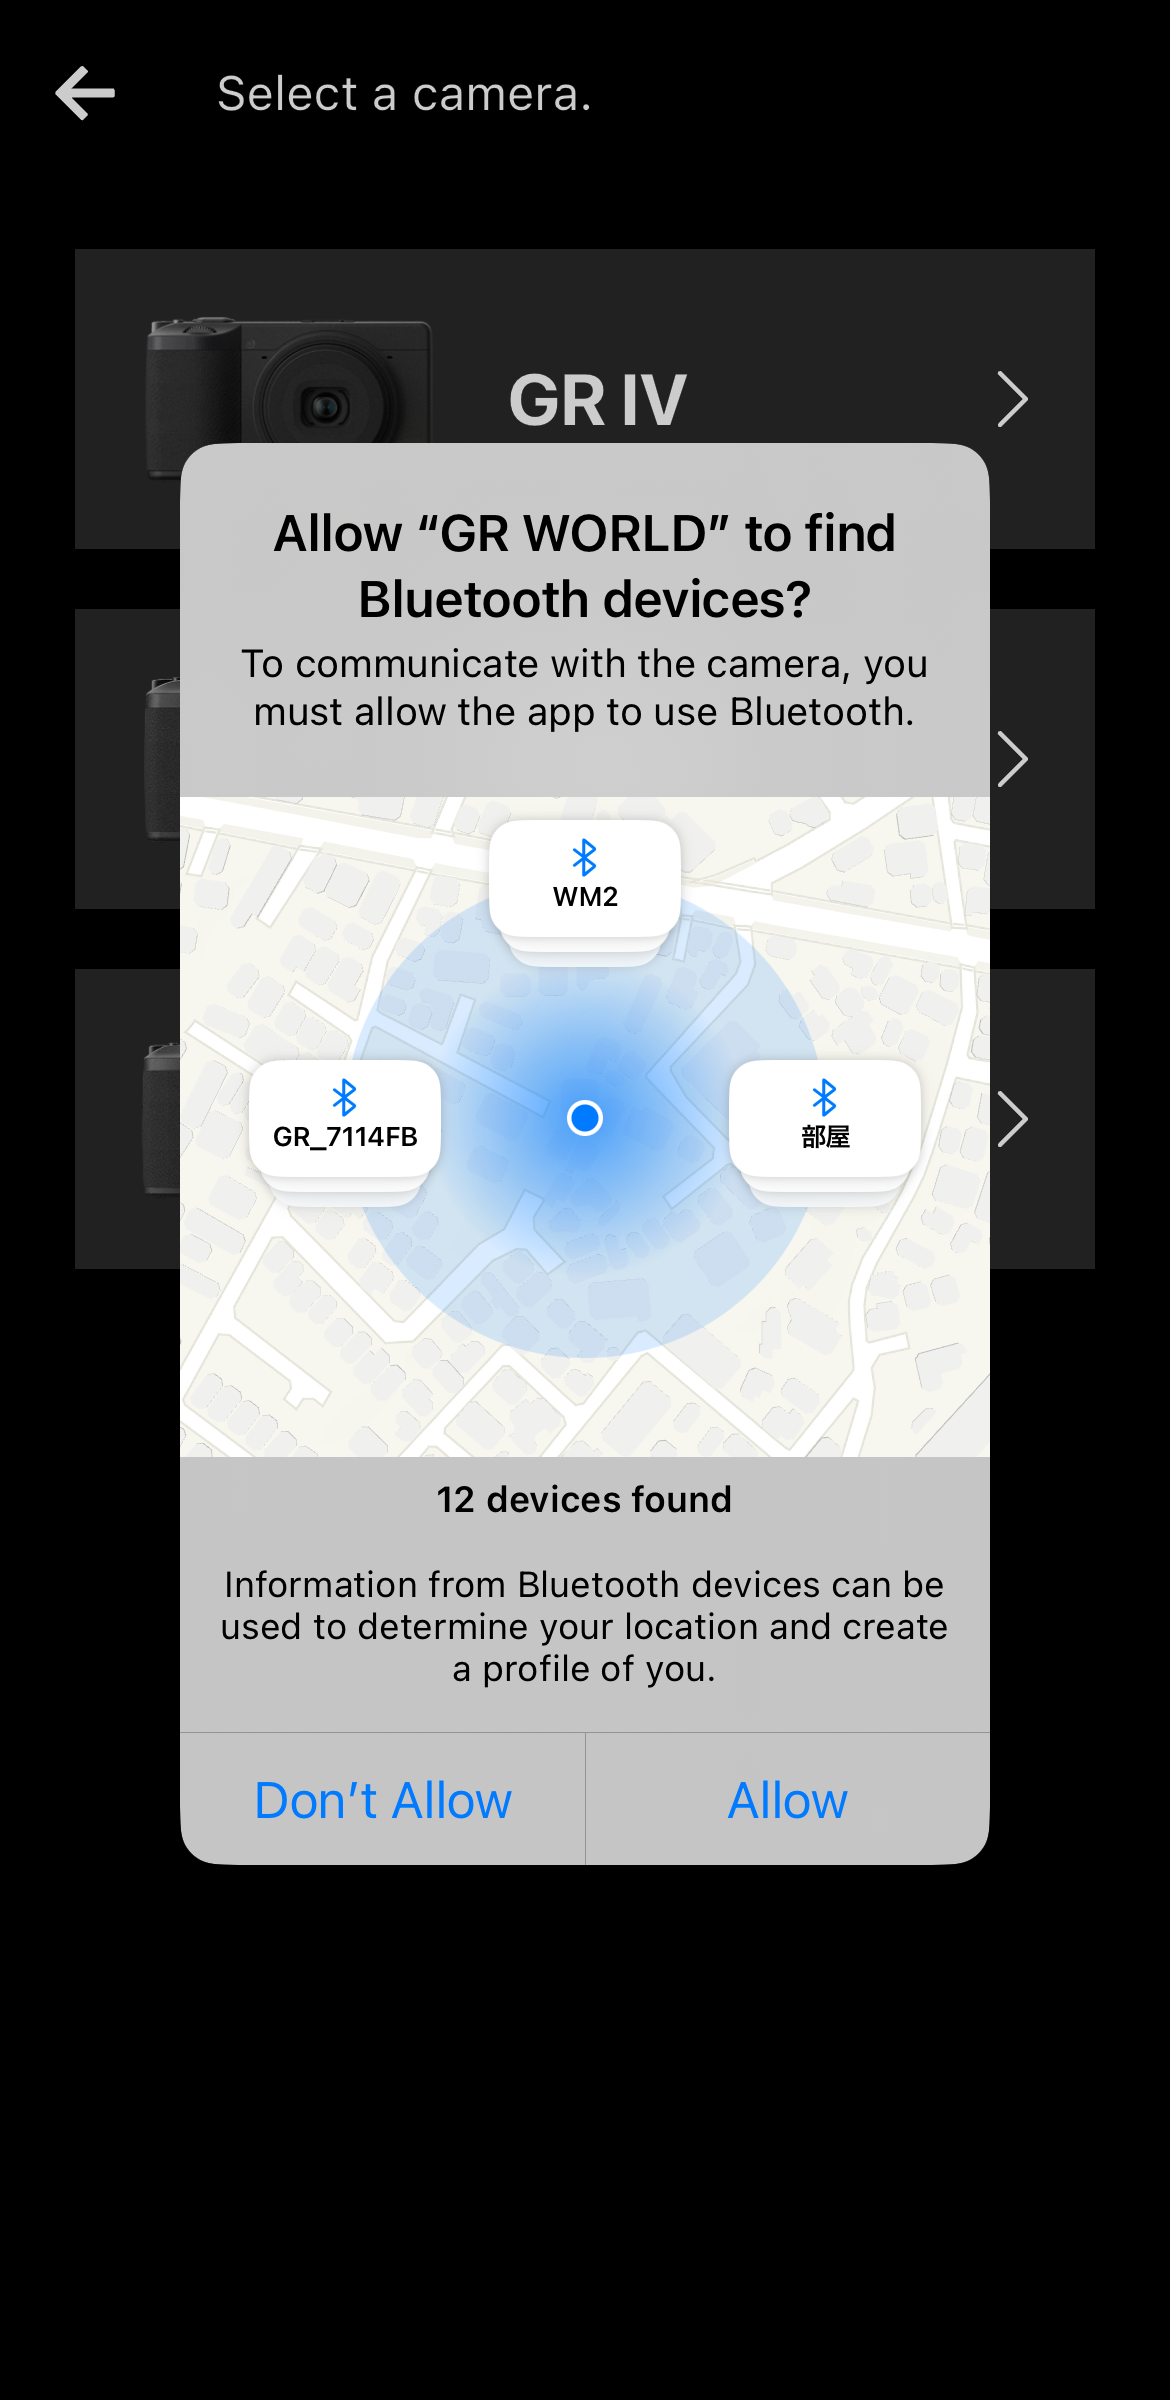
* Make sure that the Bluetooth function and location information function of the smartphone are turned on.


* By allowing this, the smartphone will be able to find and connect to nearby cameras. If this is not allowed, the smartphone will not be able to connect to the camera, and functions such as image import and remote shooting will not be available.
* The screen design and displayed message may vary slightly depending on the smartphone model and OS version.

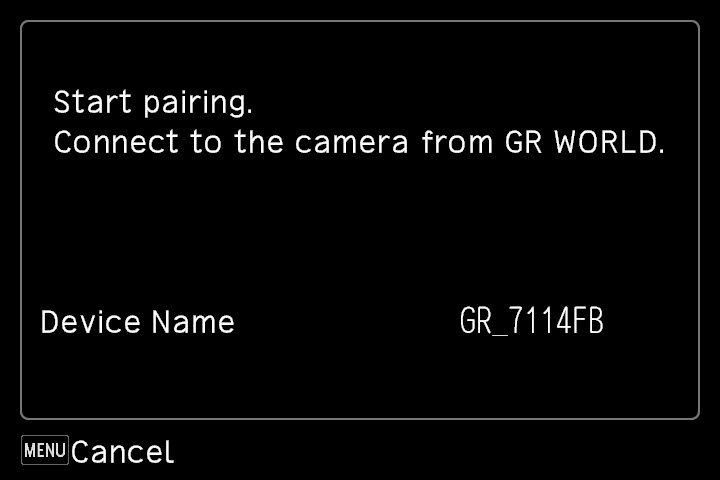
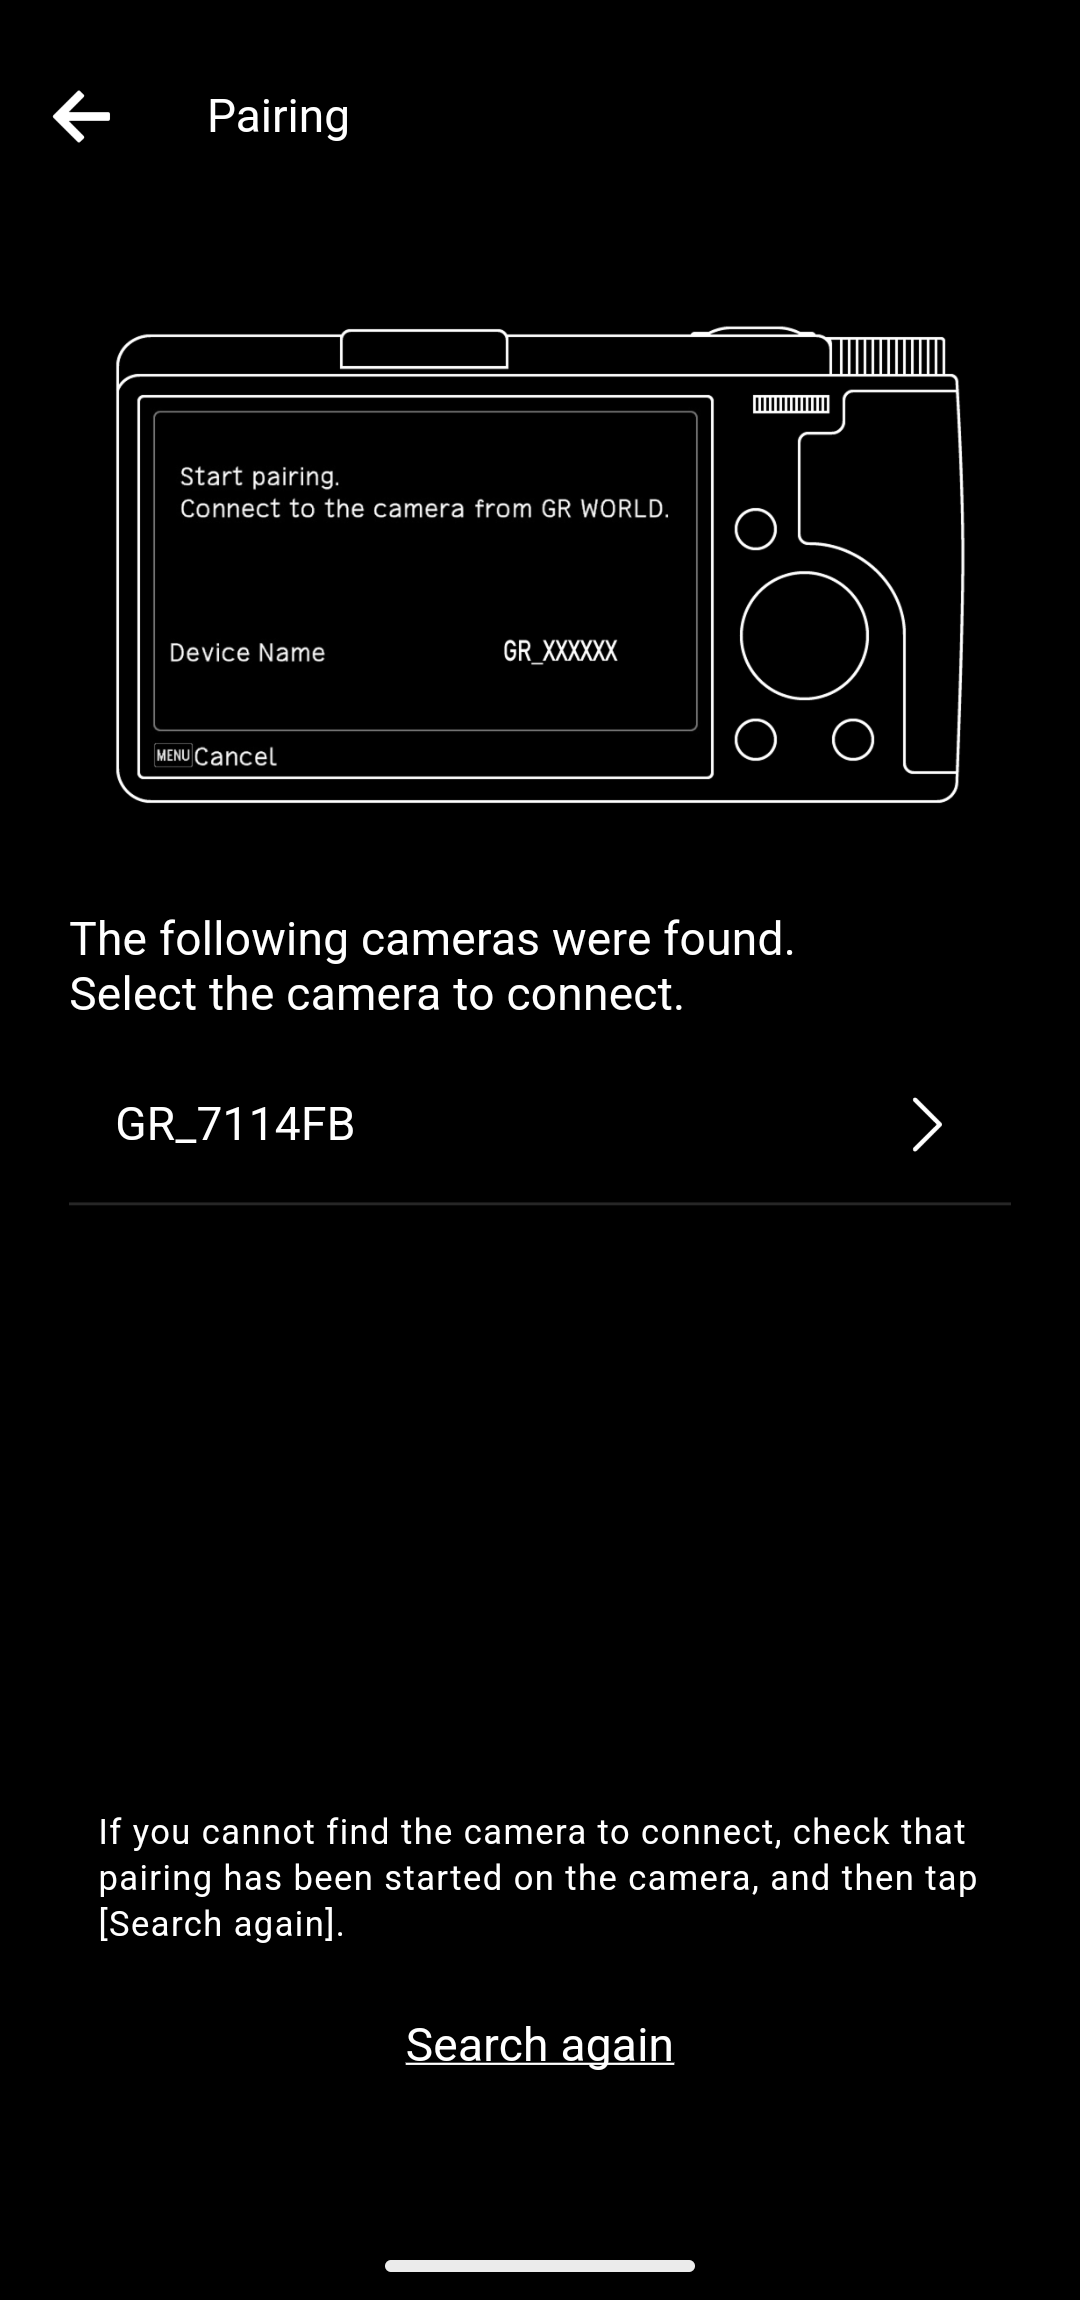
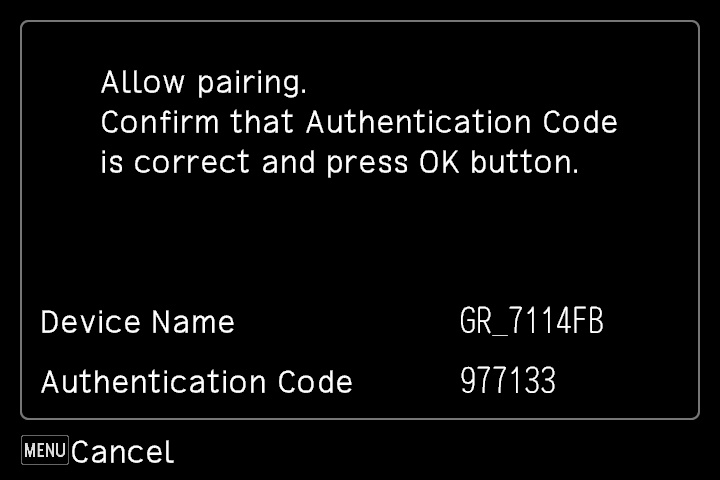
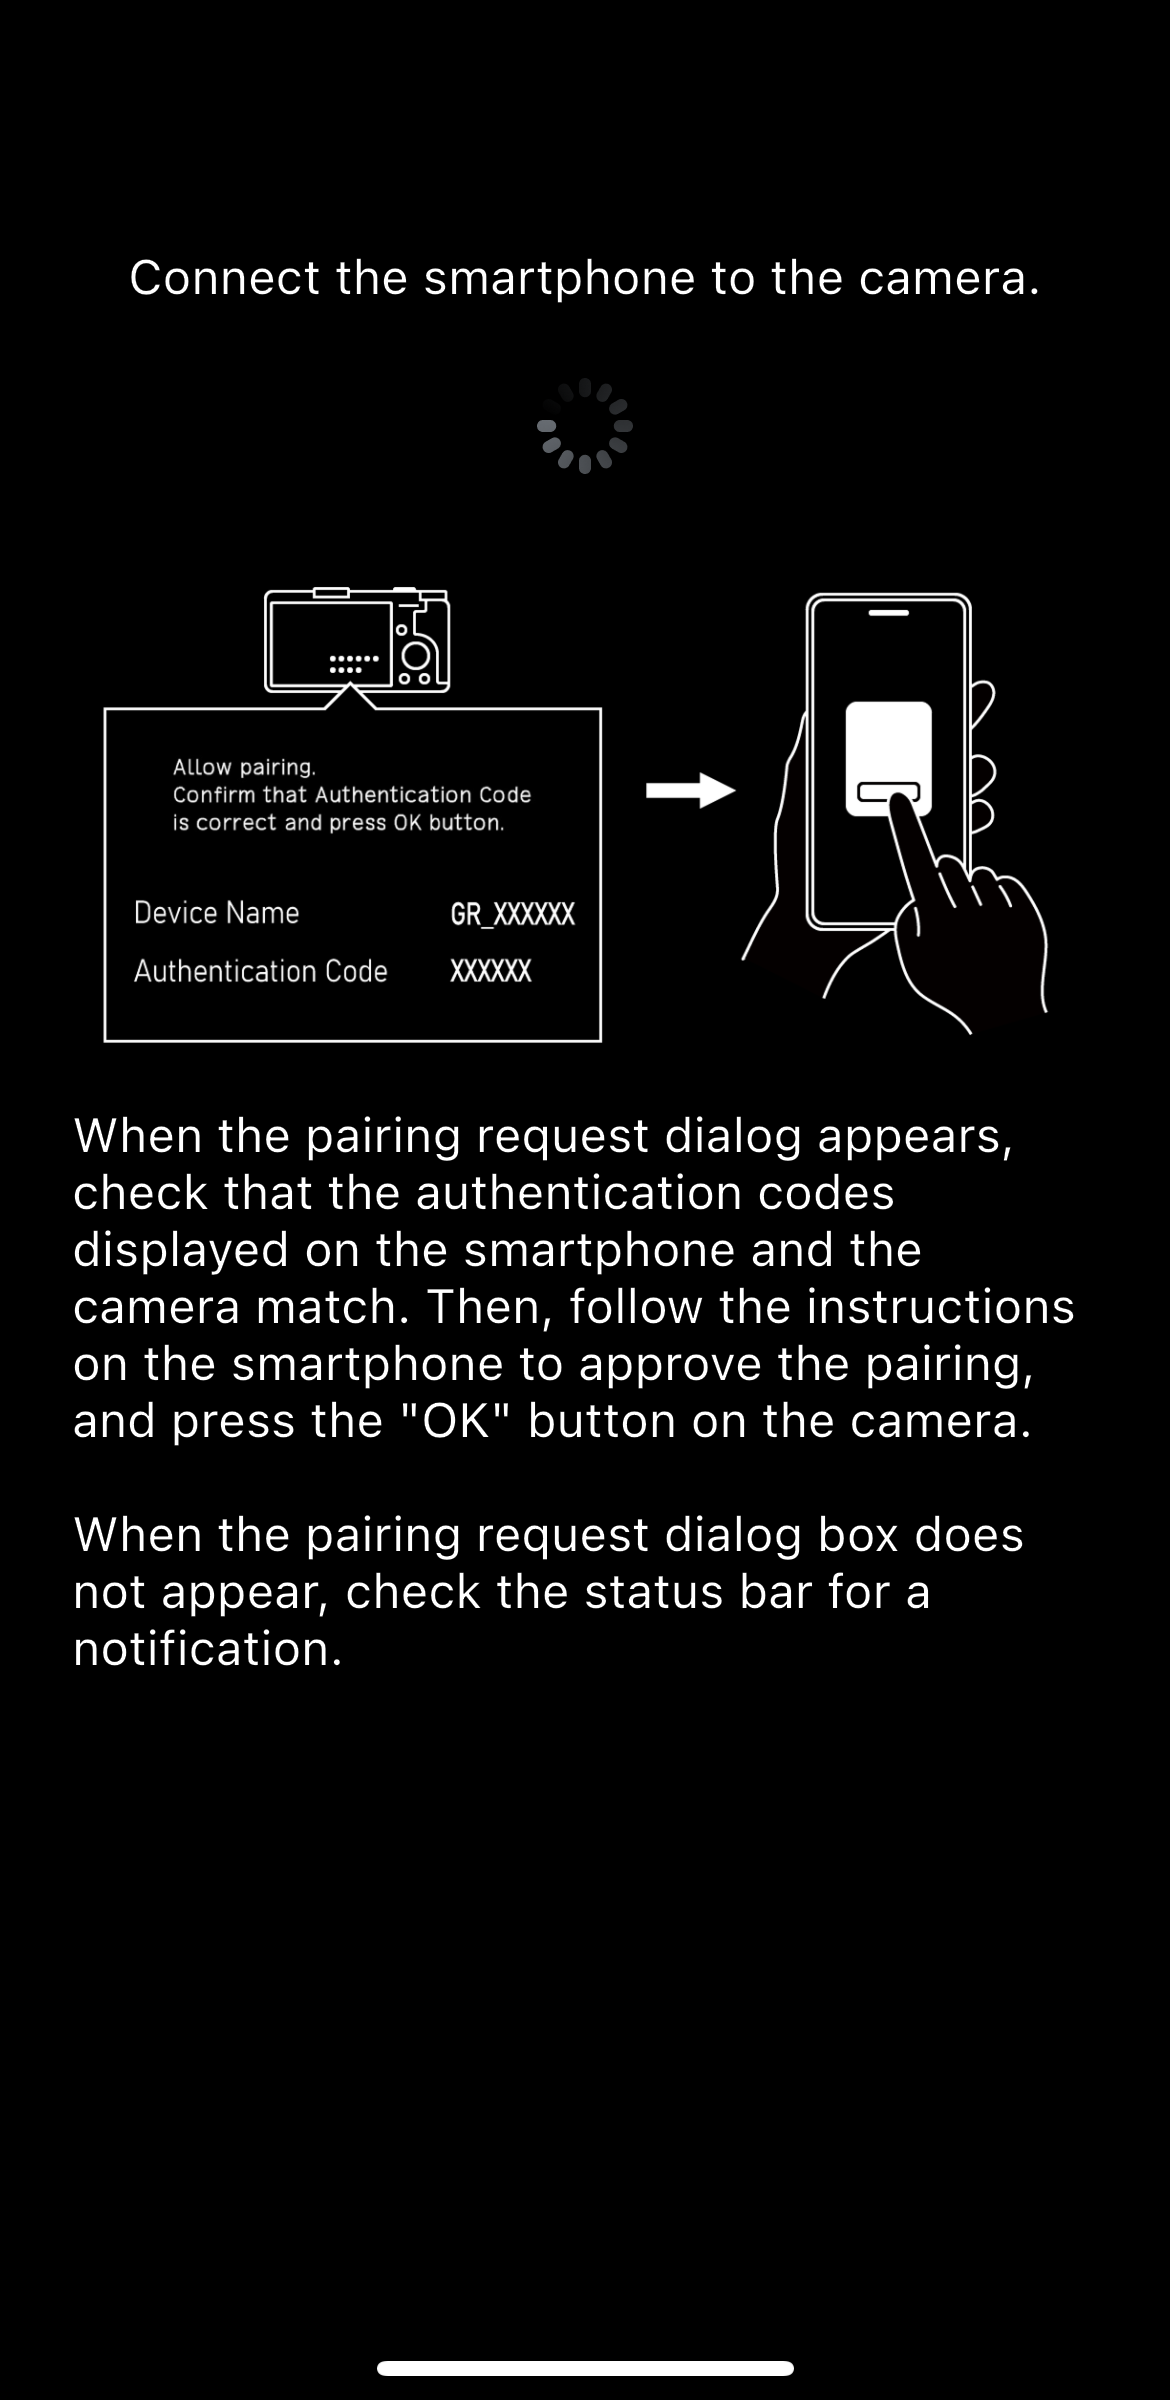
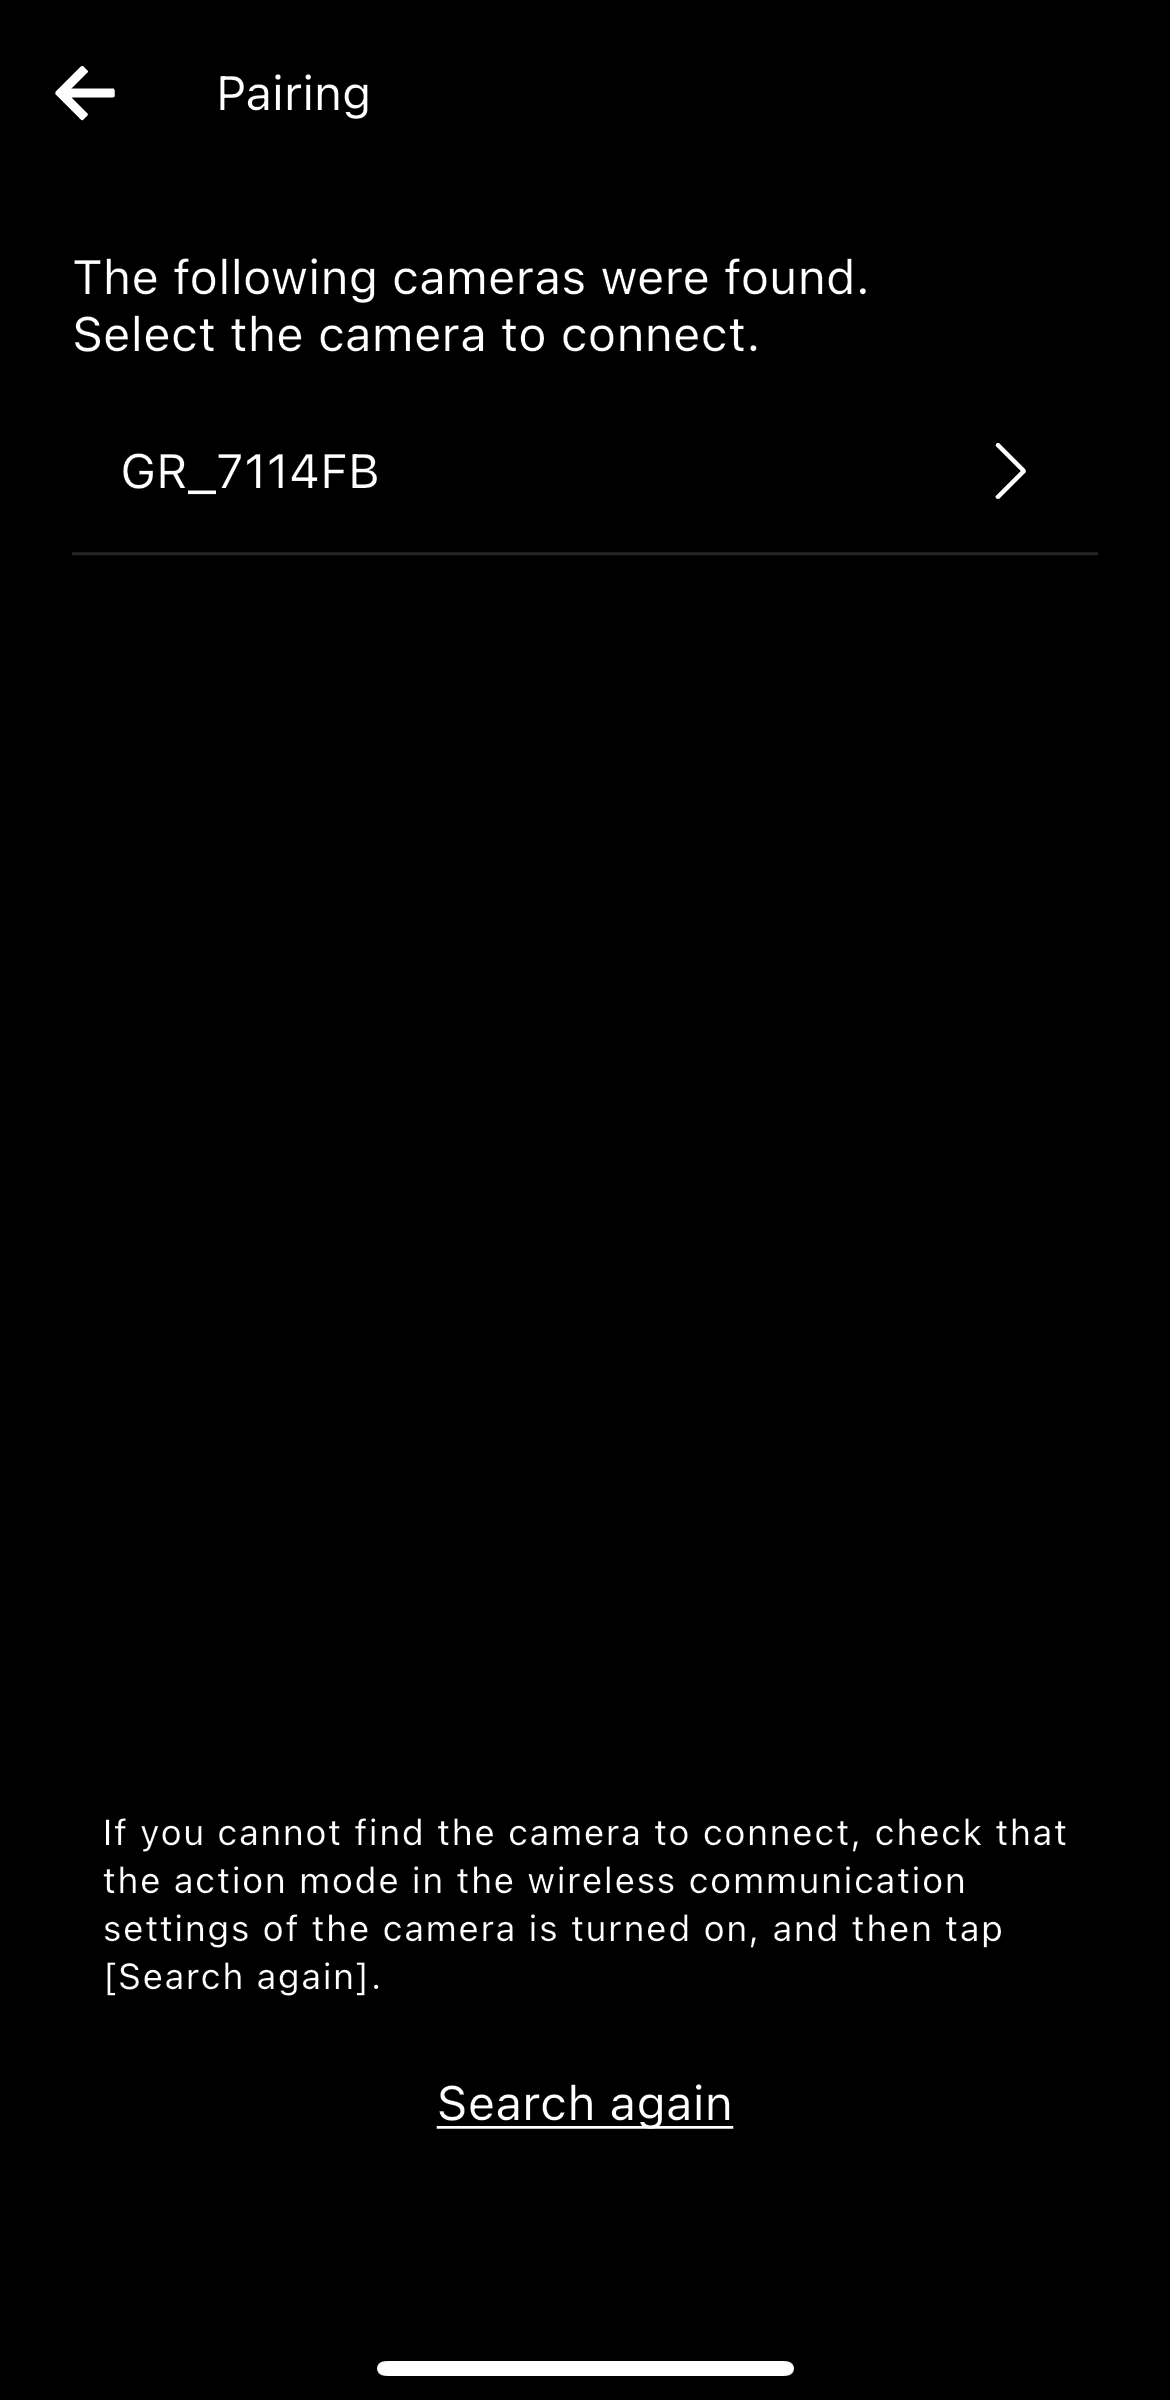
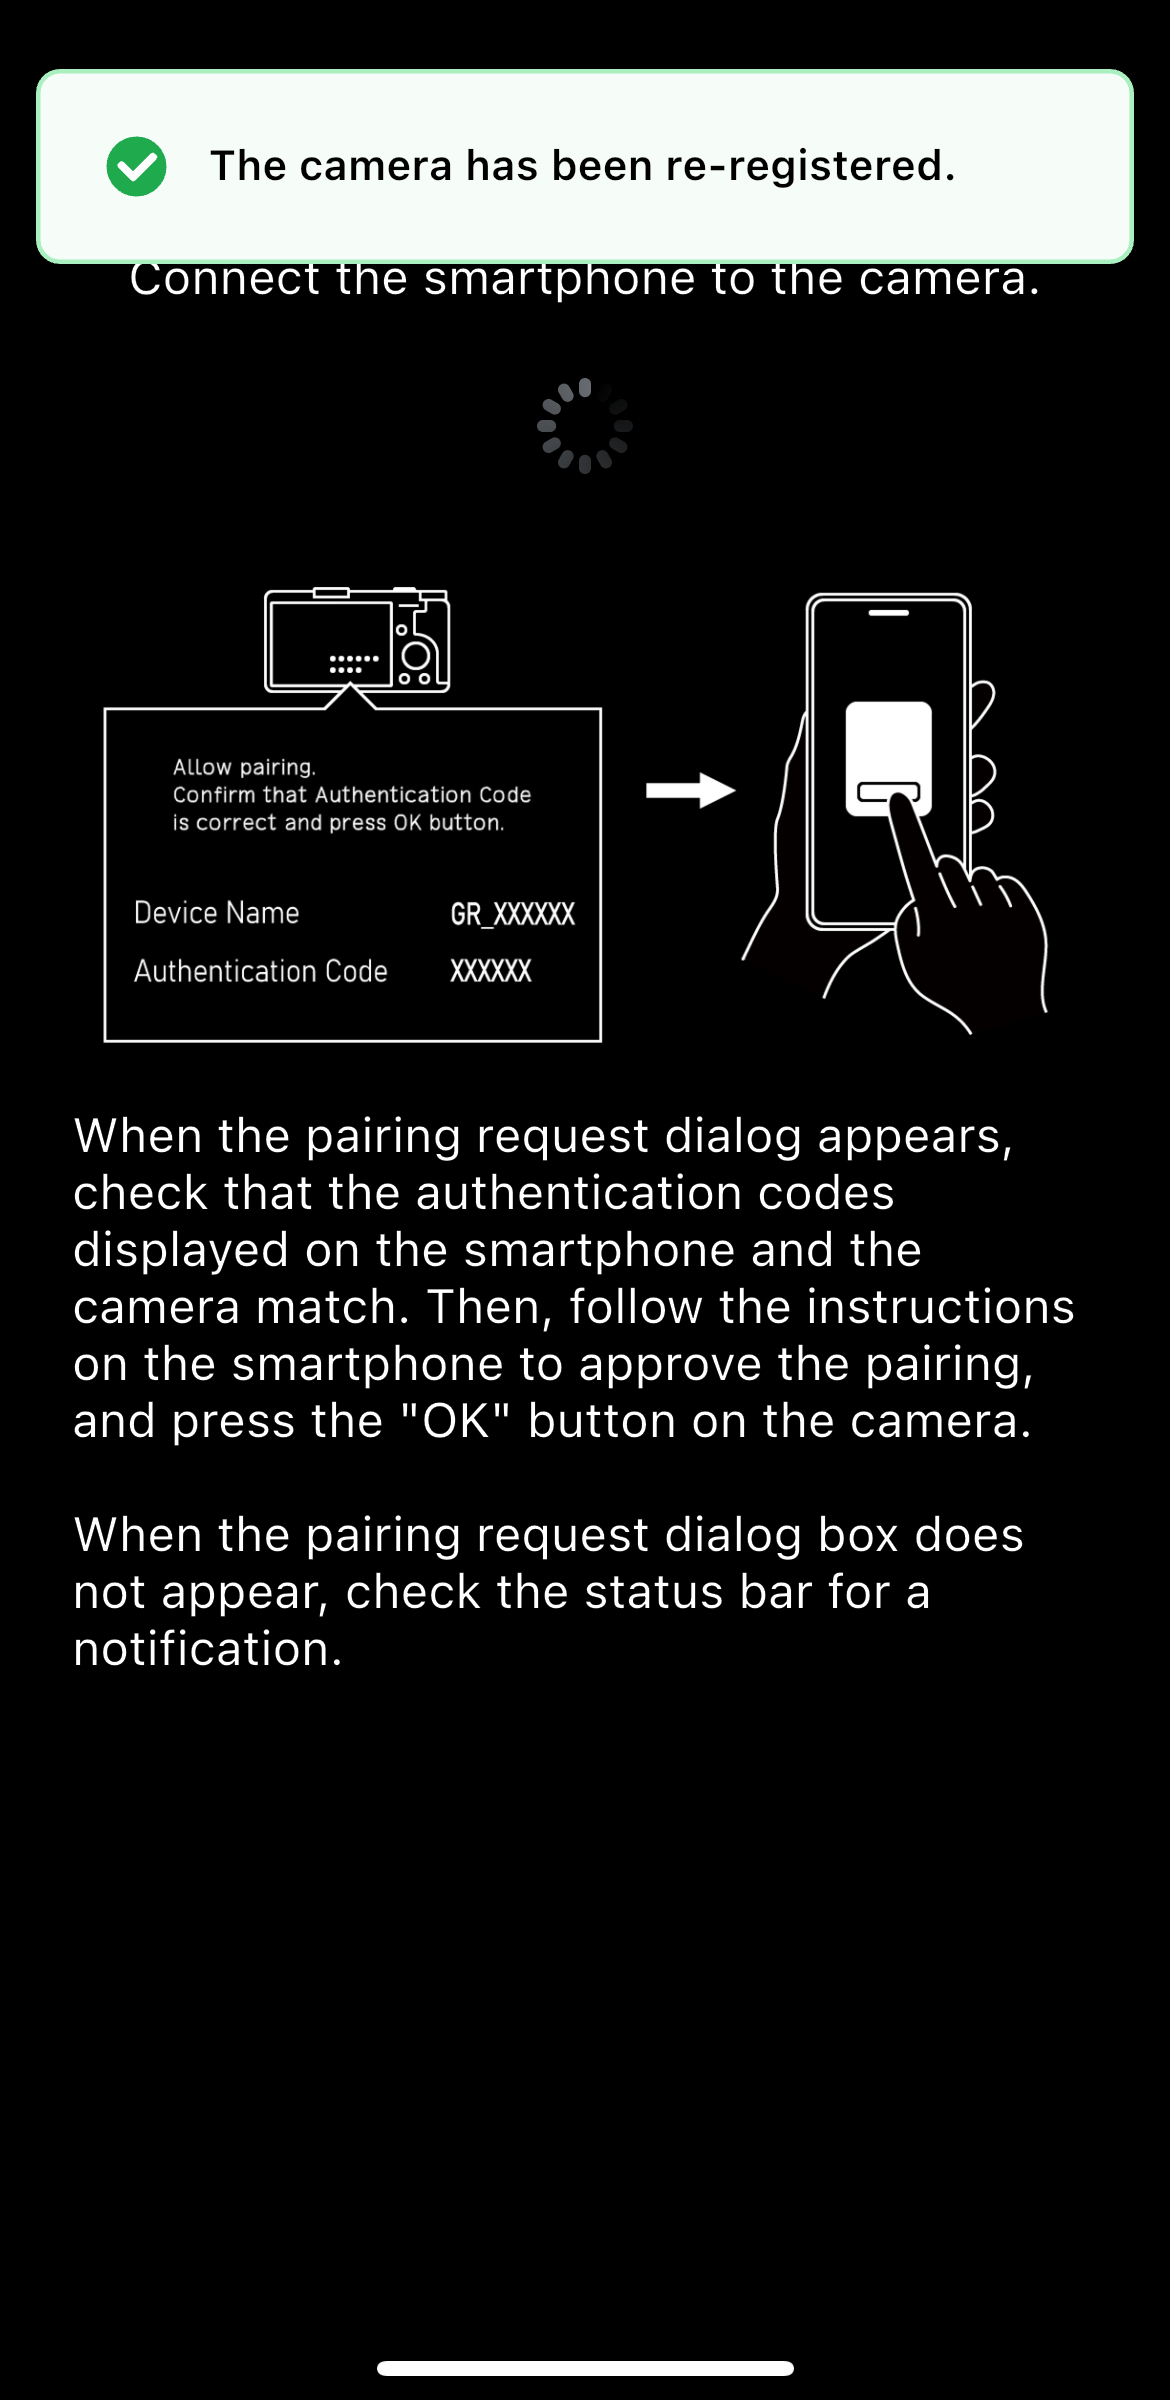
To confirm whether the device displayed is your camera, check the device name displayed on the “Start pairing. Connect to the camera from GR WORLD.” message screen.
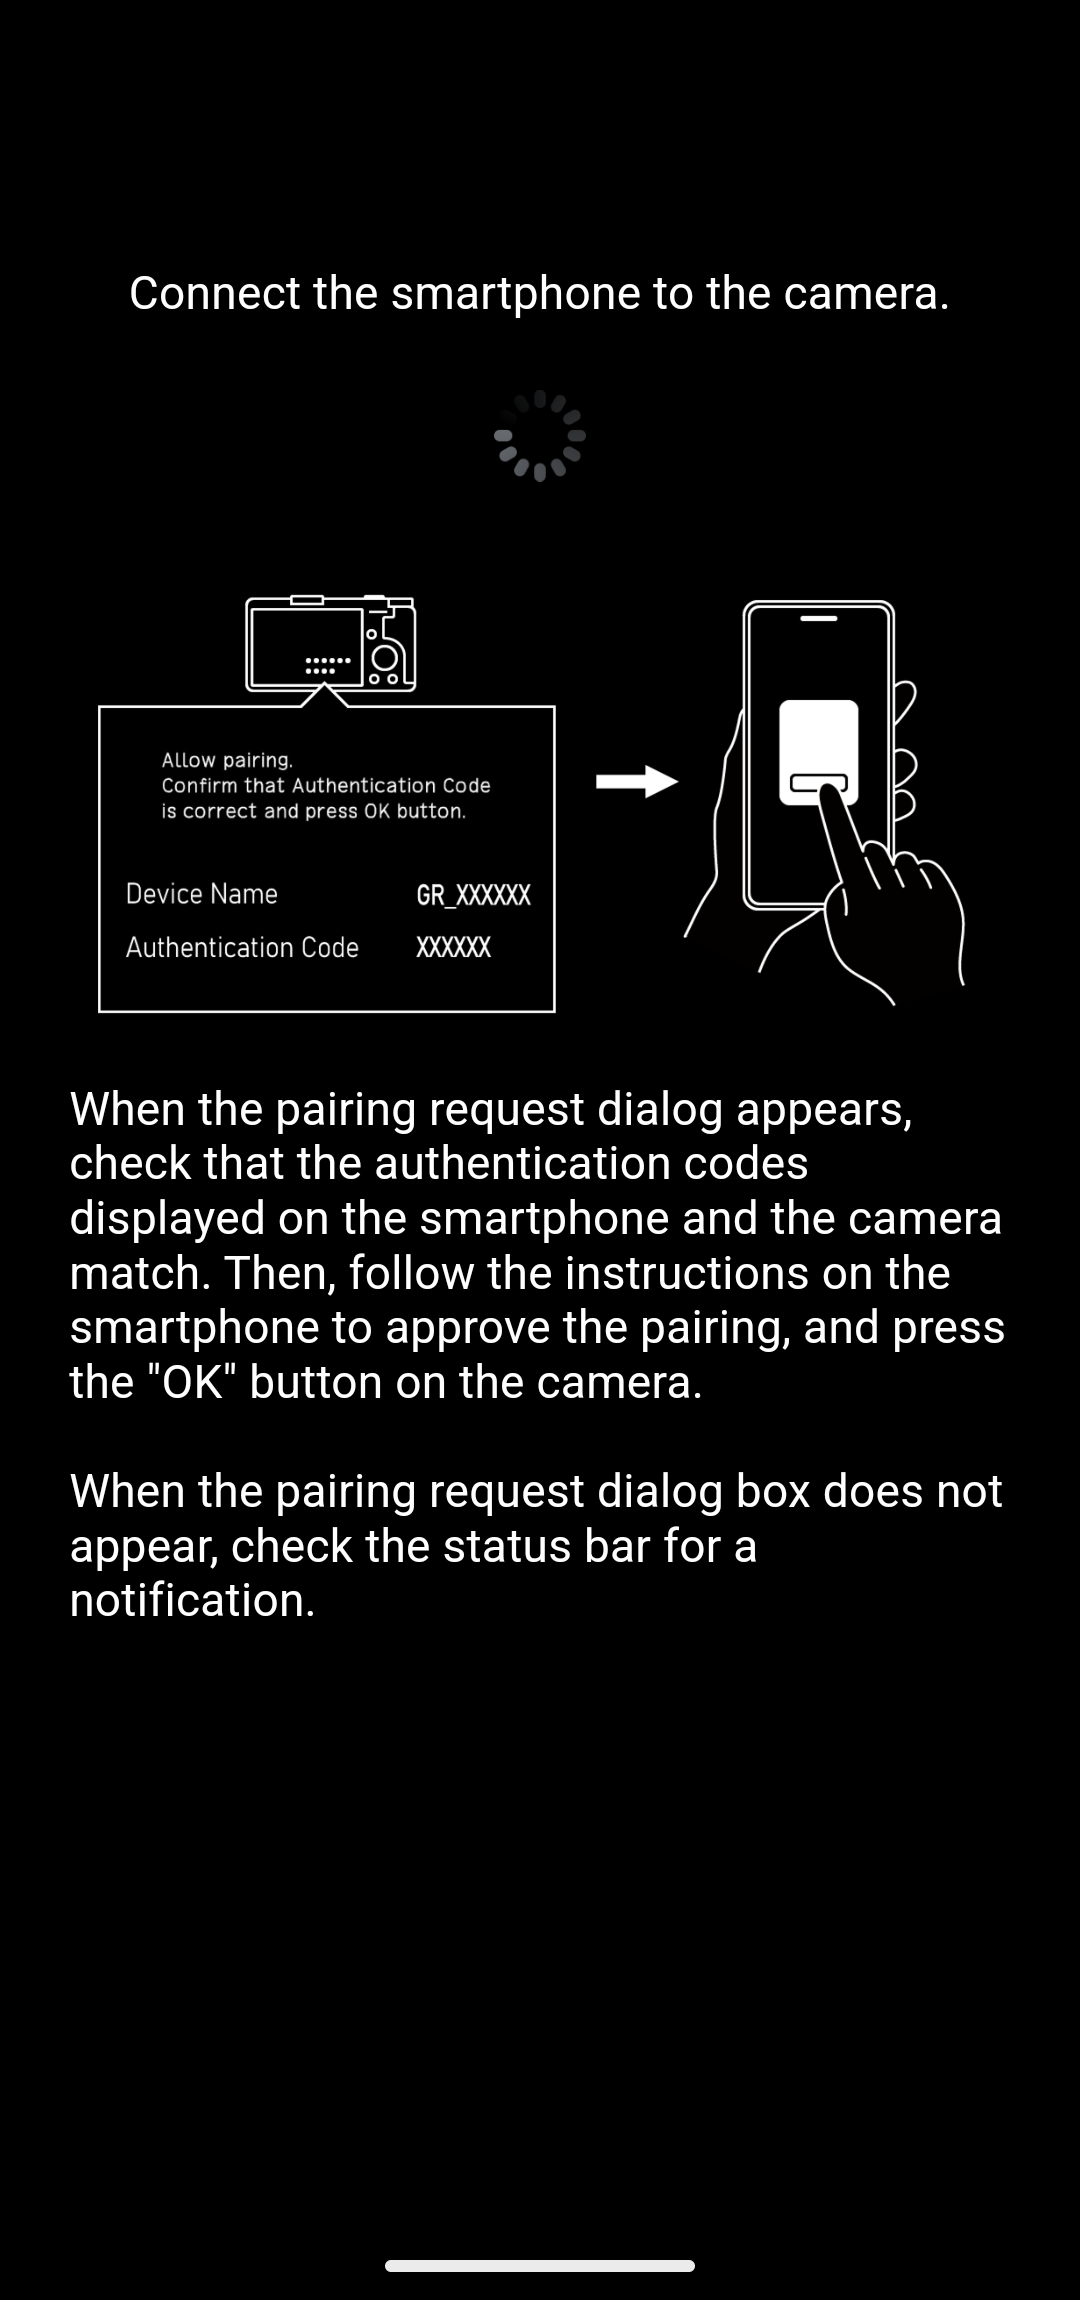
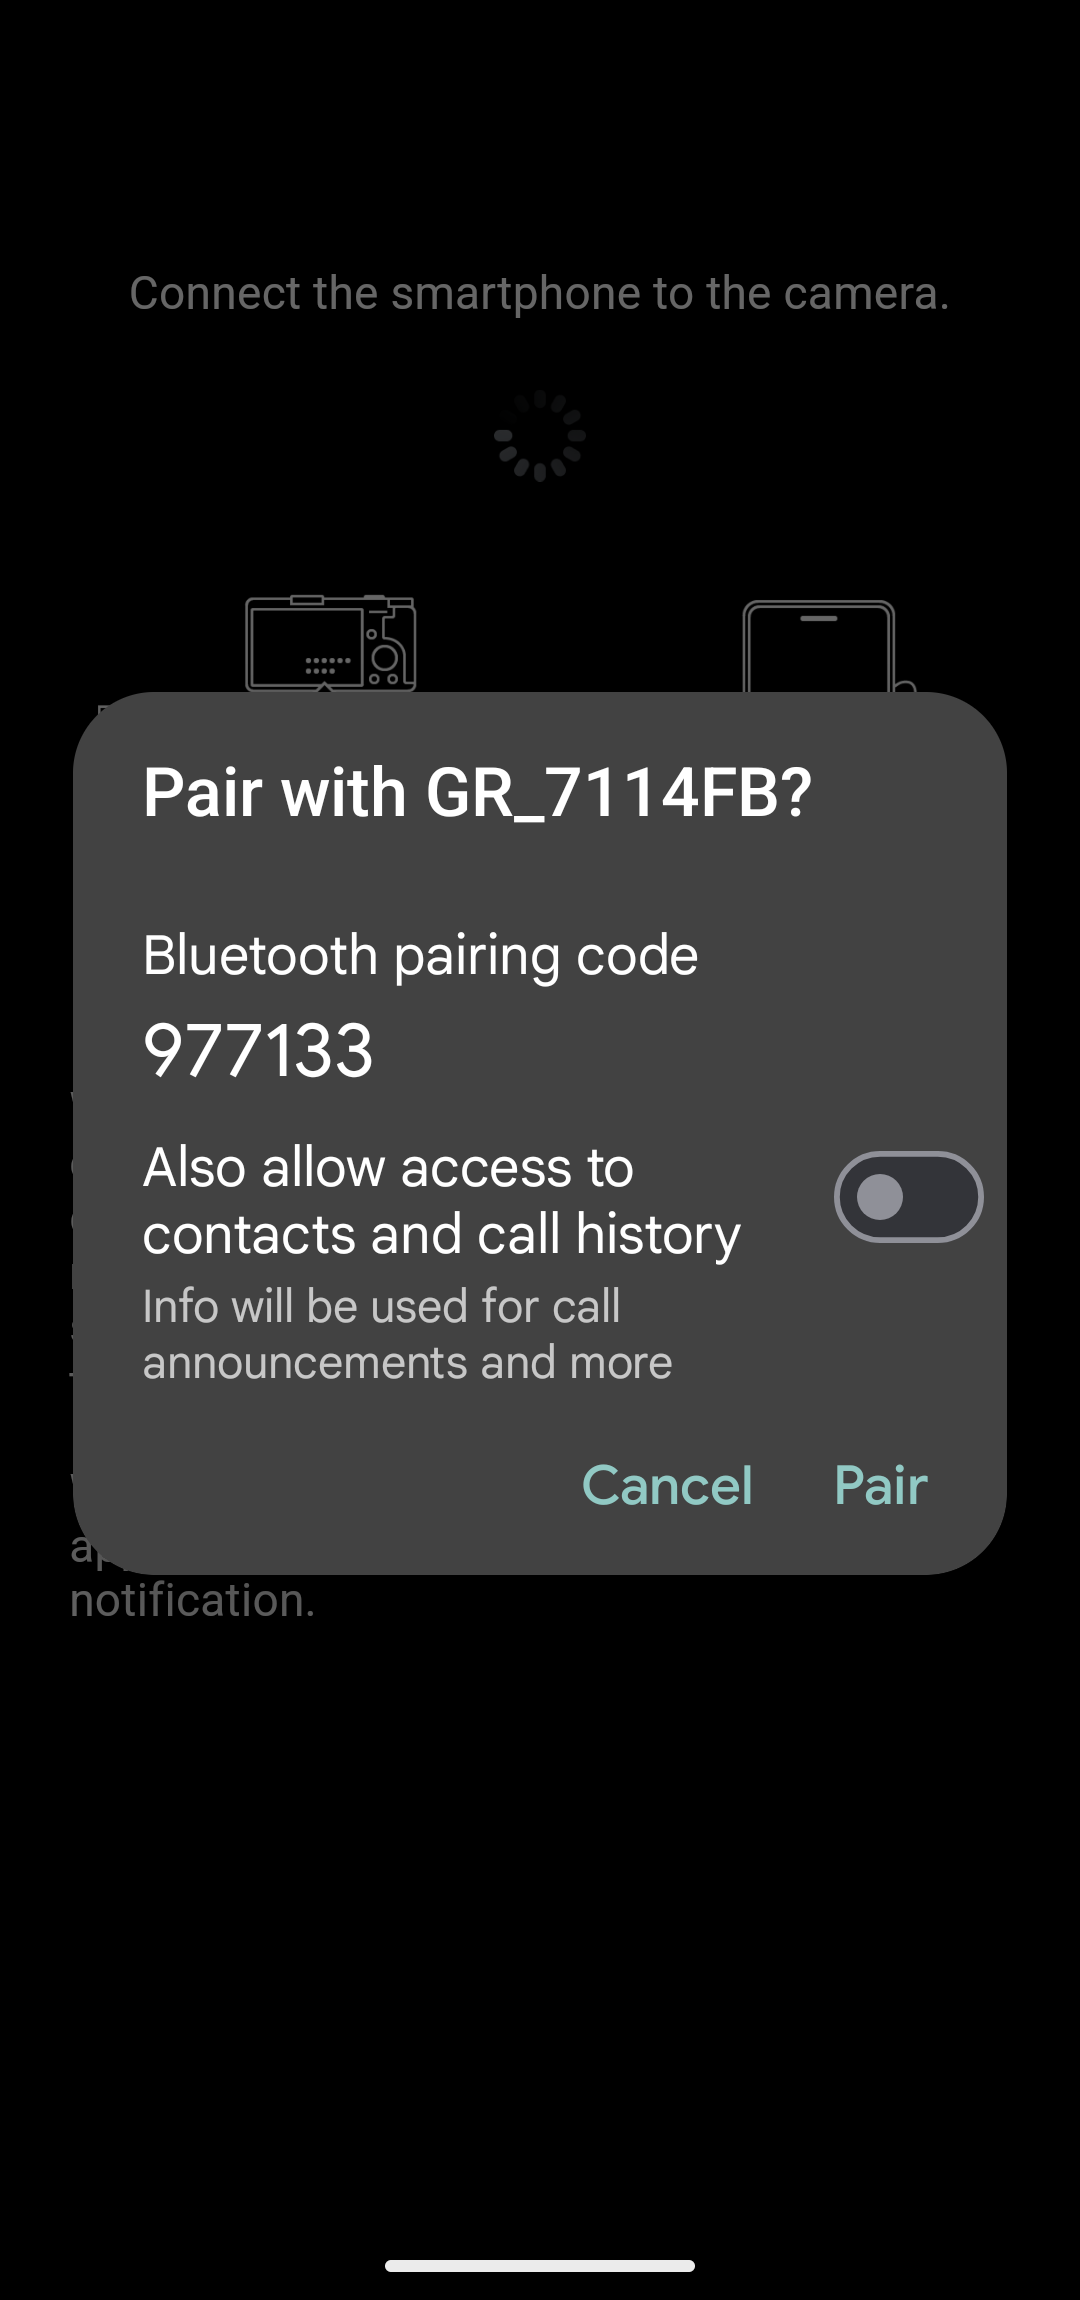
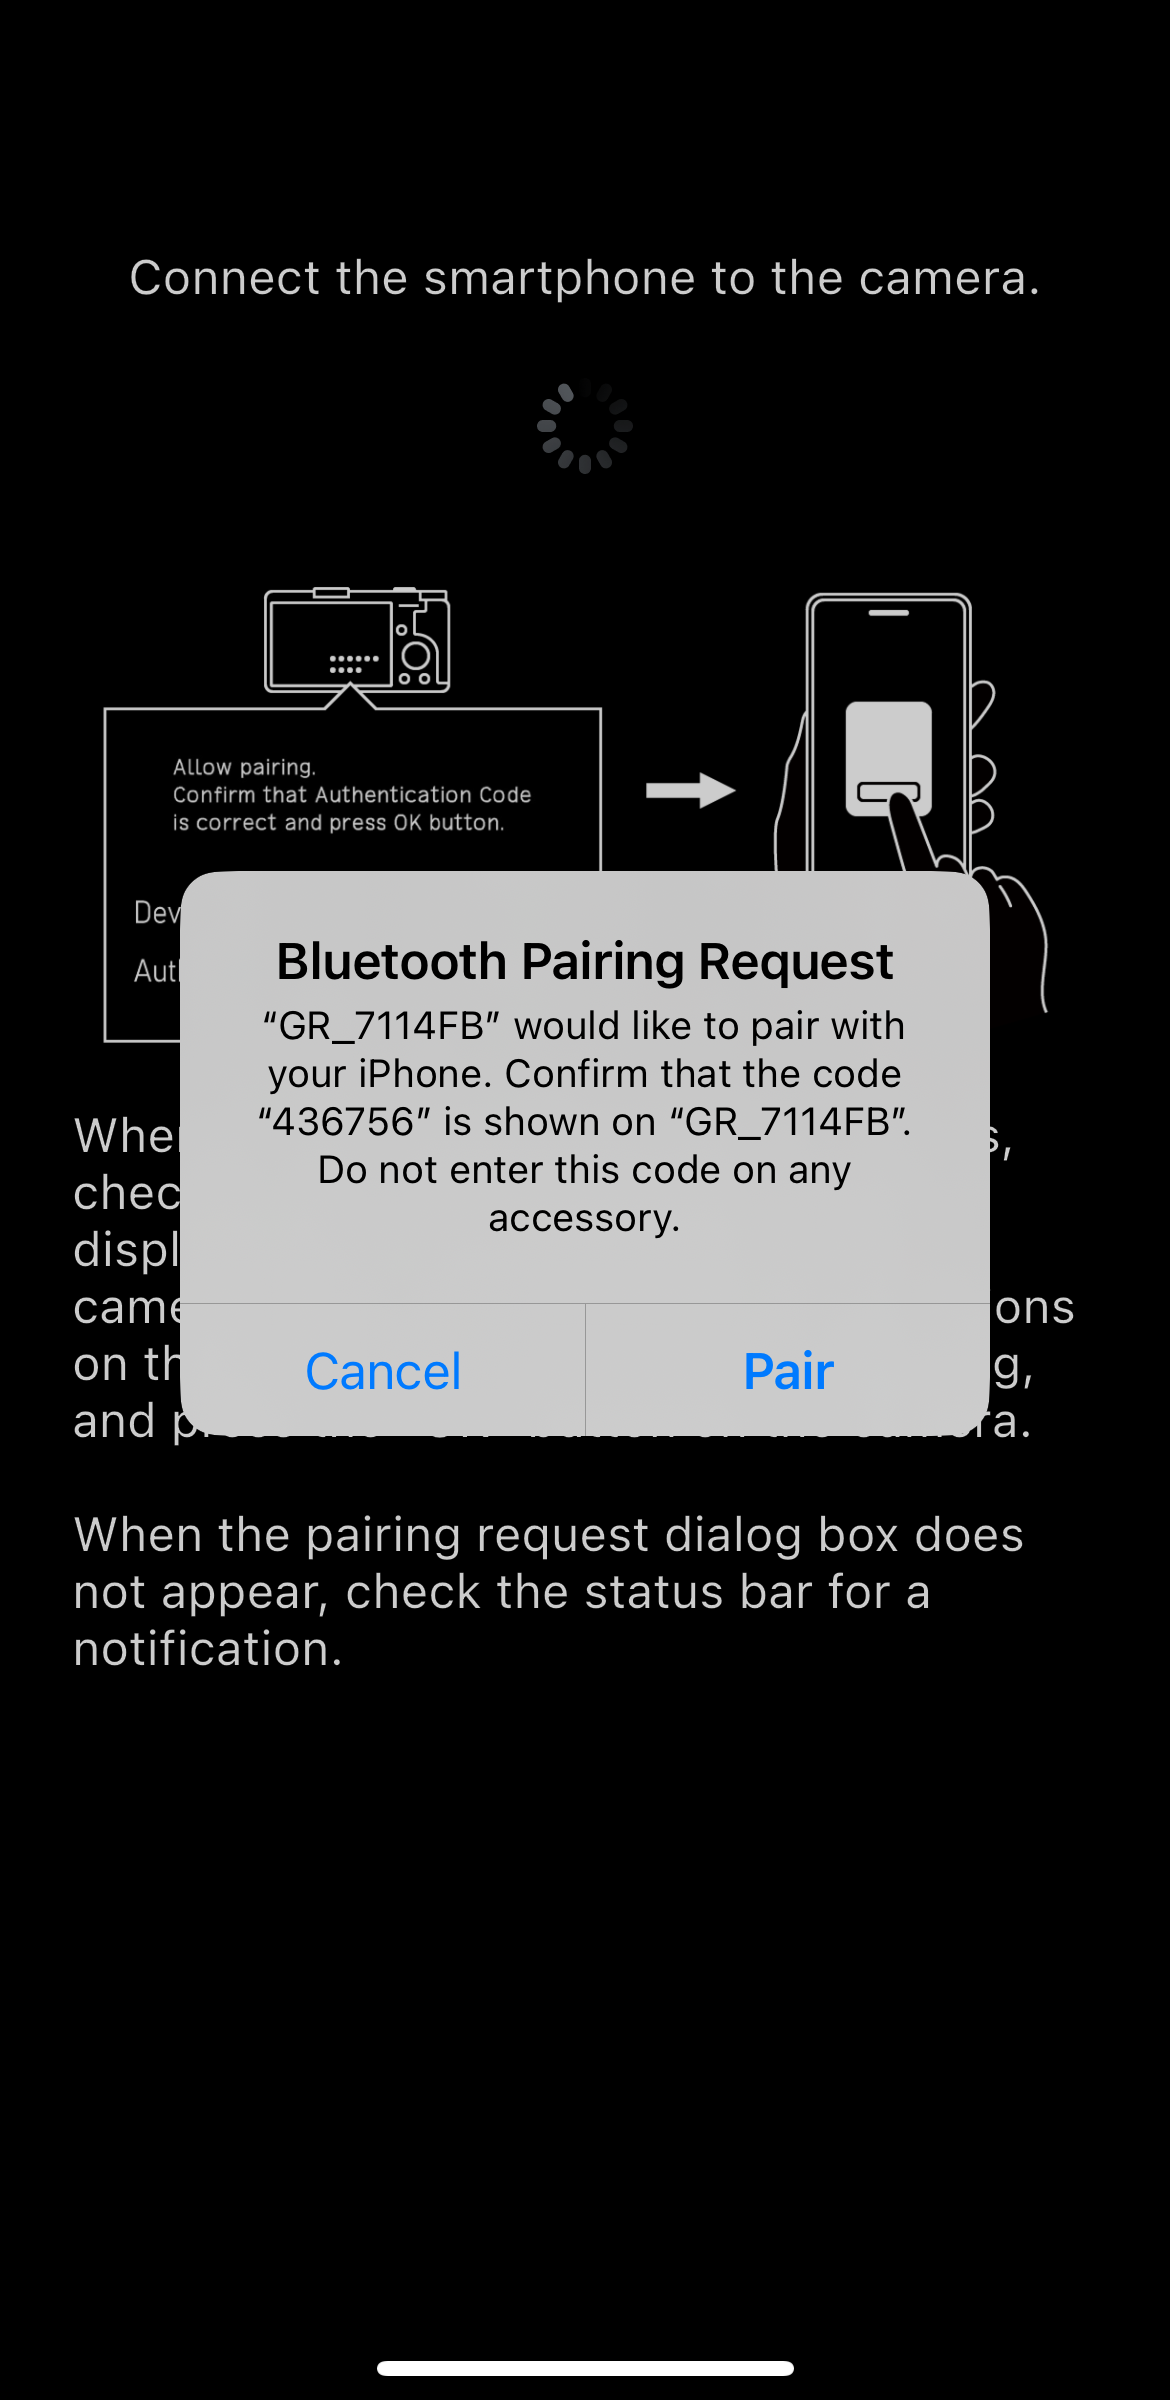
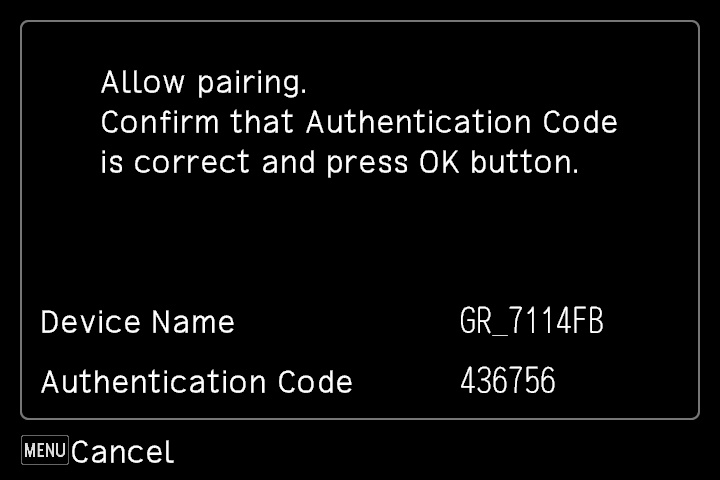
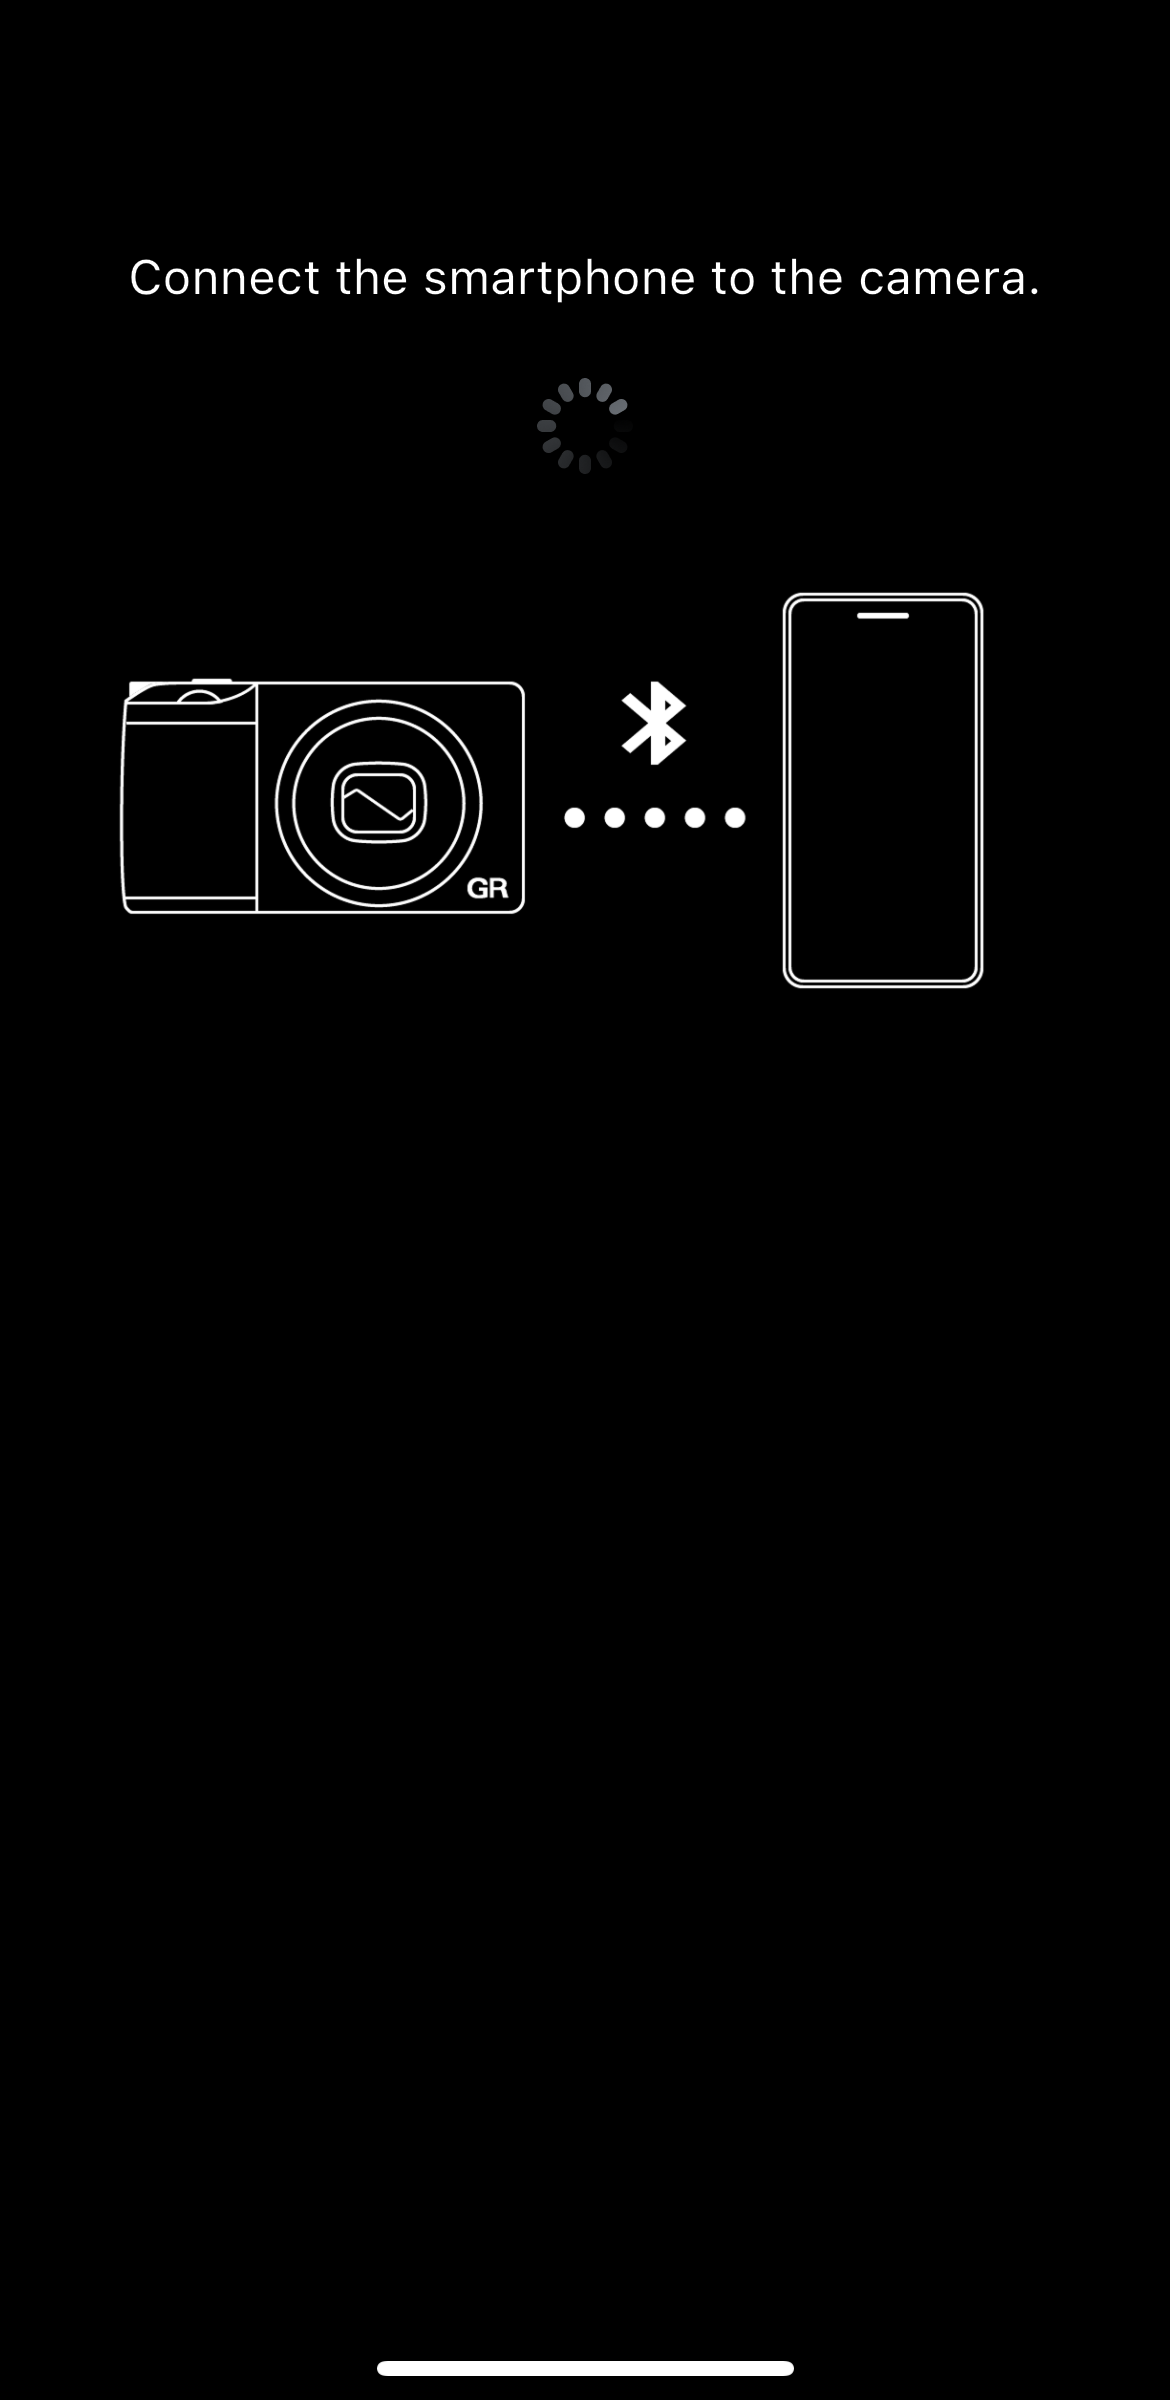
Make sure that the authentication codes displayed on the camera and smartphone match, follow the on-screen instructions on the smartphone to allow pairing, and then press the OK button of the camera.
*No action is required for “Allow access to contacts and call logs”. You can leave the check box unchecked.
* If the authentication code does not appear, it may be shown as a notification in the notification area of the smartphone. Check the notification area.
* The screen design and displayed message may vary slightly depending on the smartphone model and OS version.


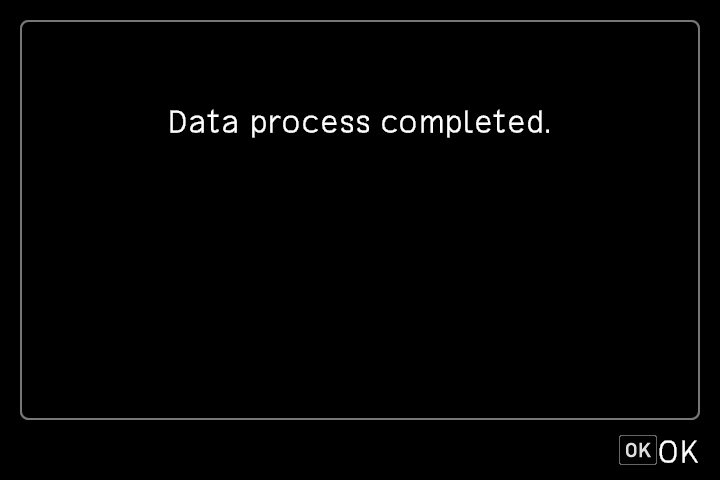
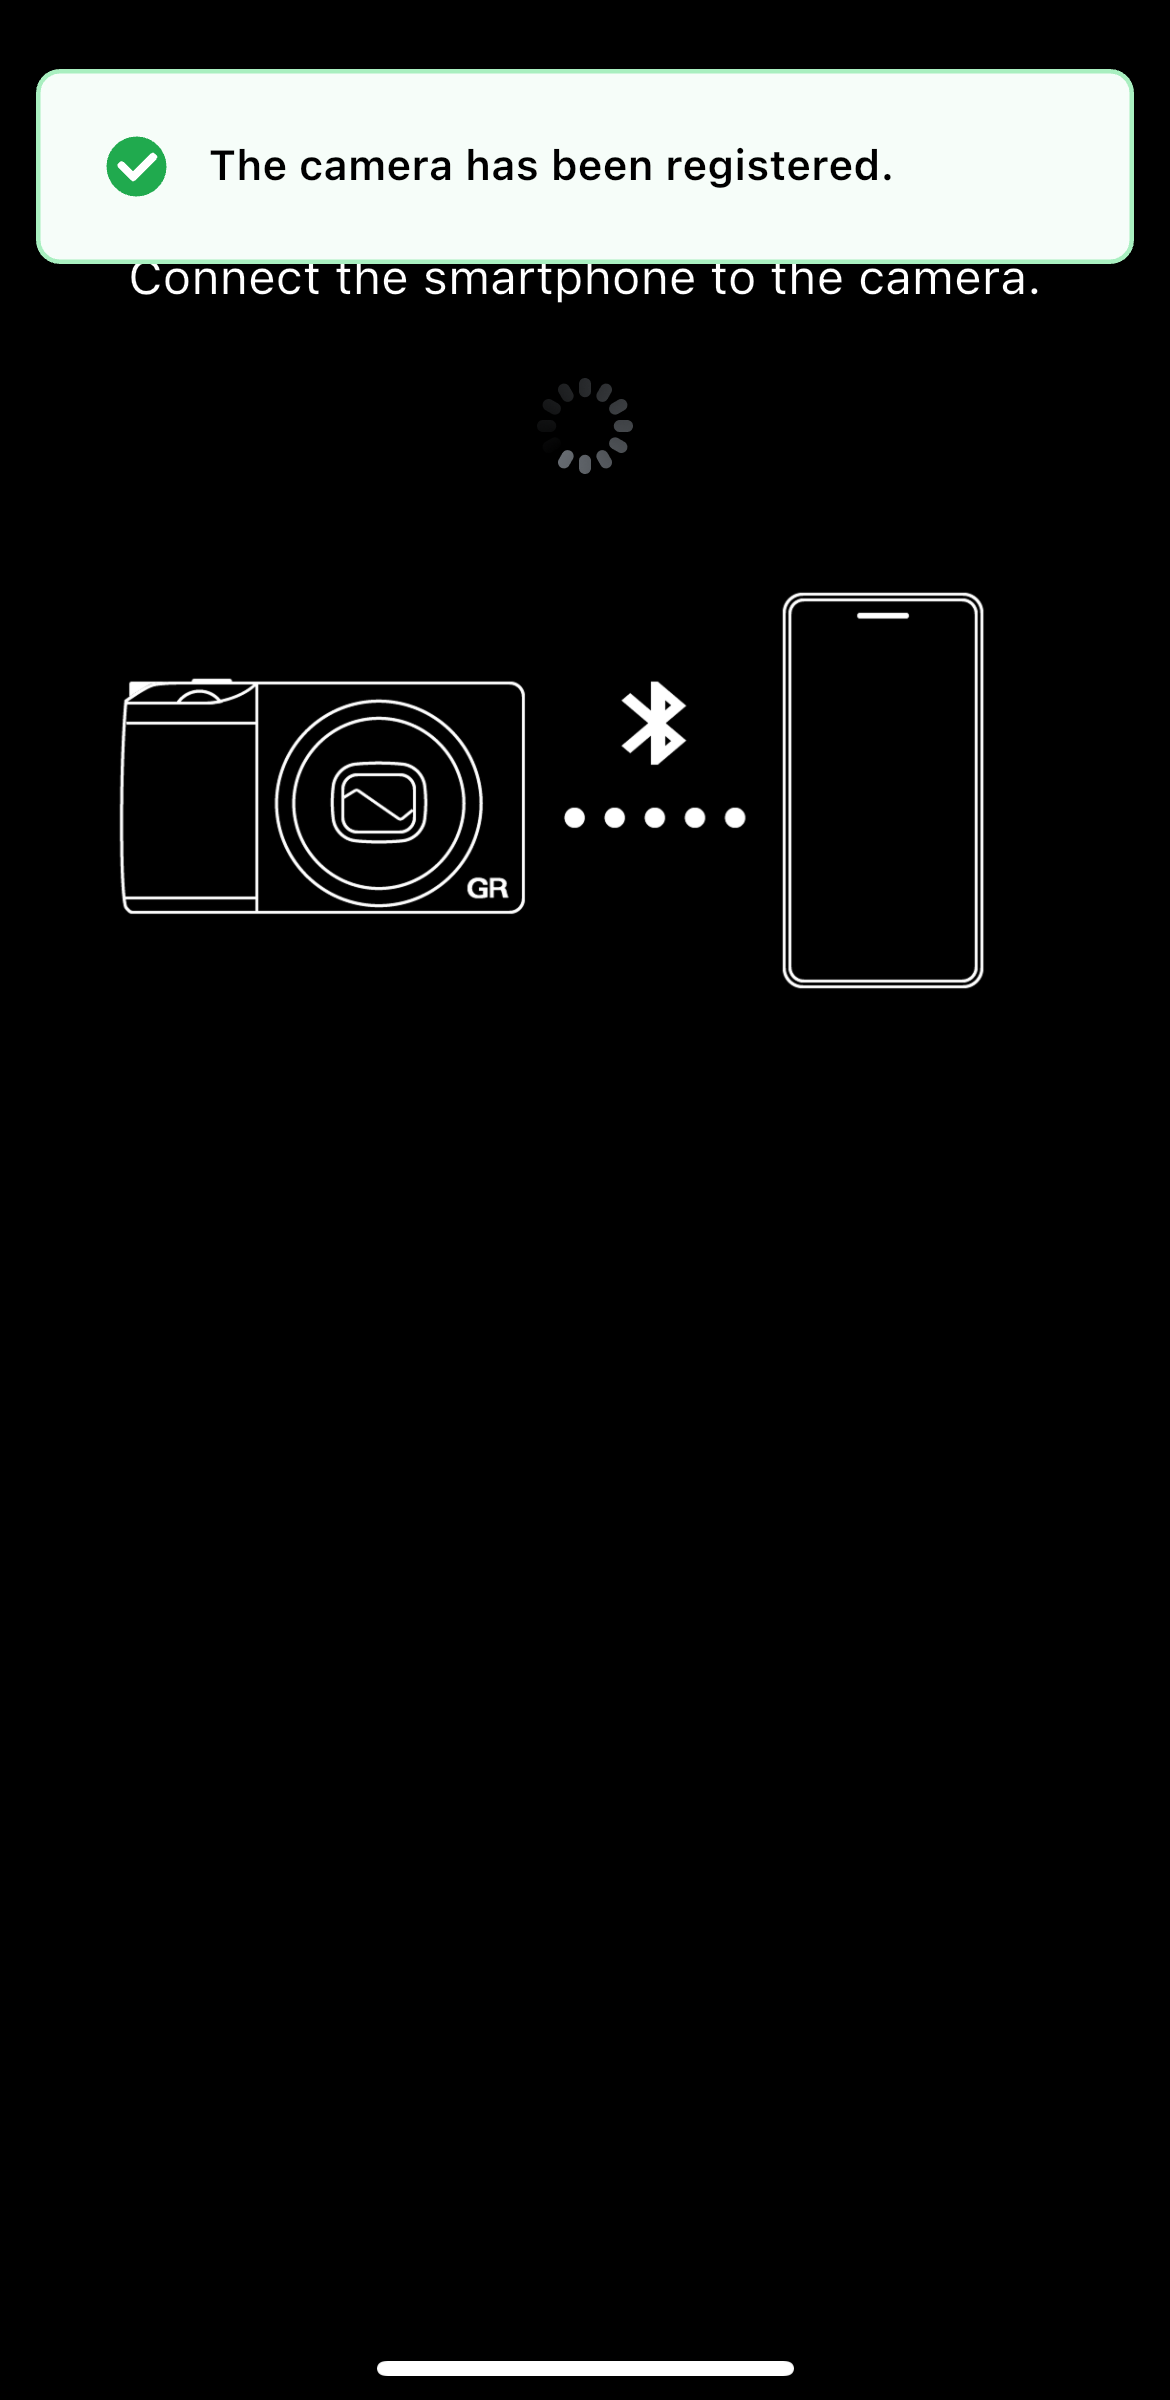
*The paired smartphone is registered on the camera.
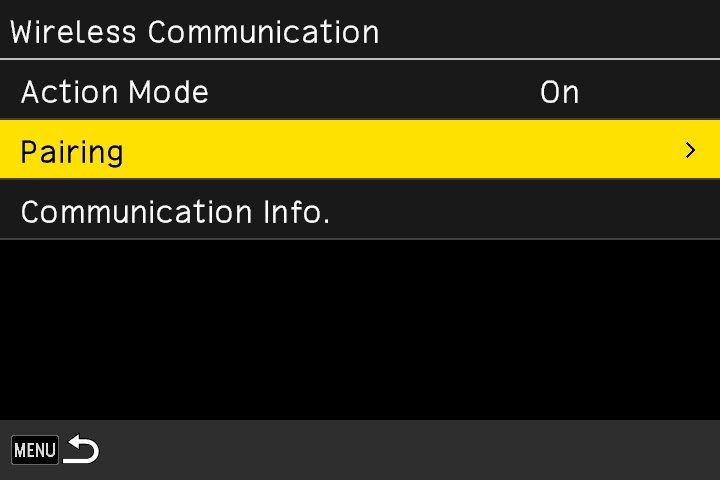
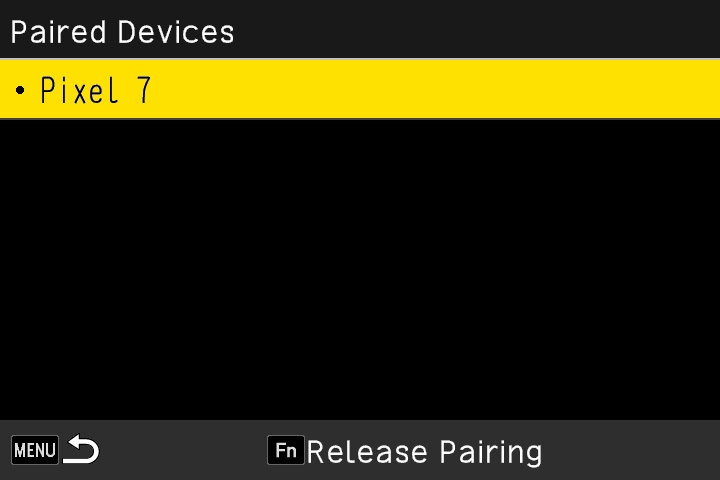
To check registered smartphones, operate the camera to select “Wireless Communication” in the setup menu, and then select “Pairing” → “Paired Devices”.

Tap “Register new camera”.
* Make sure that the Bluetooth function and location information function of the smartphone are turned on.

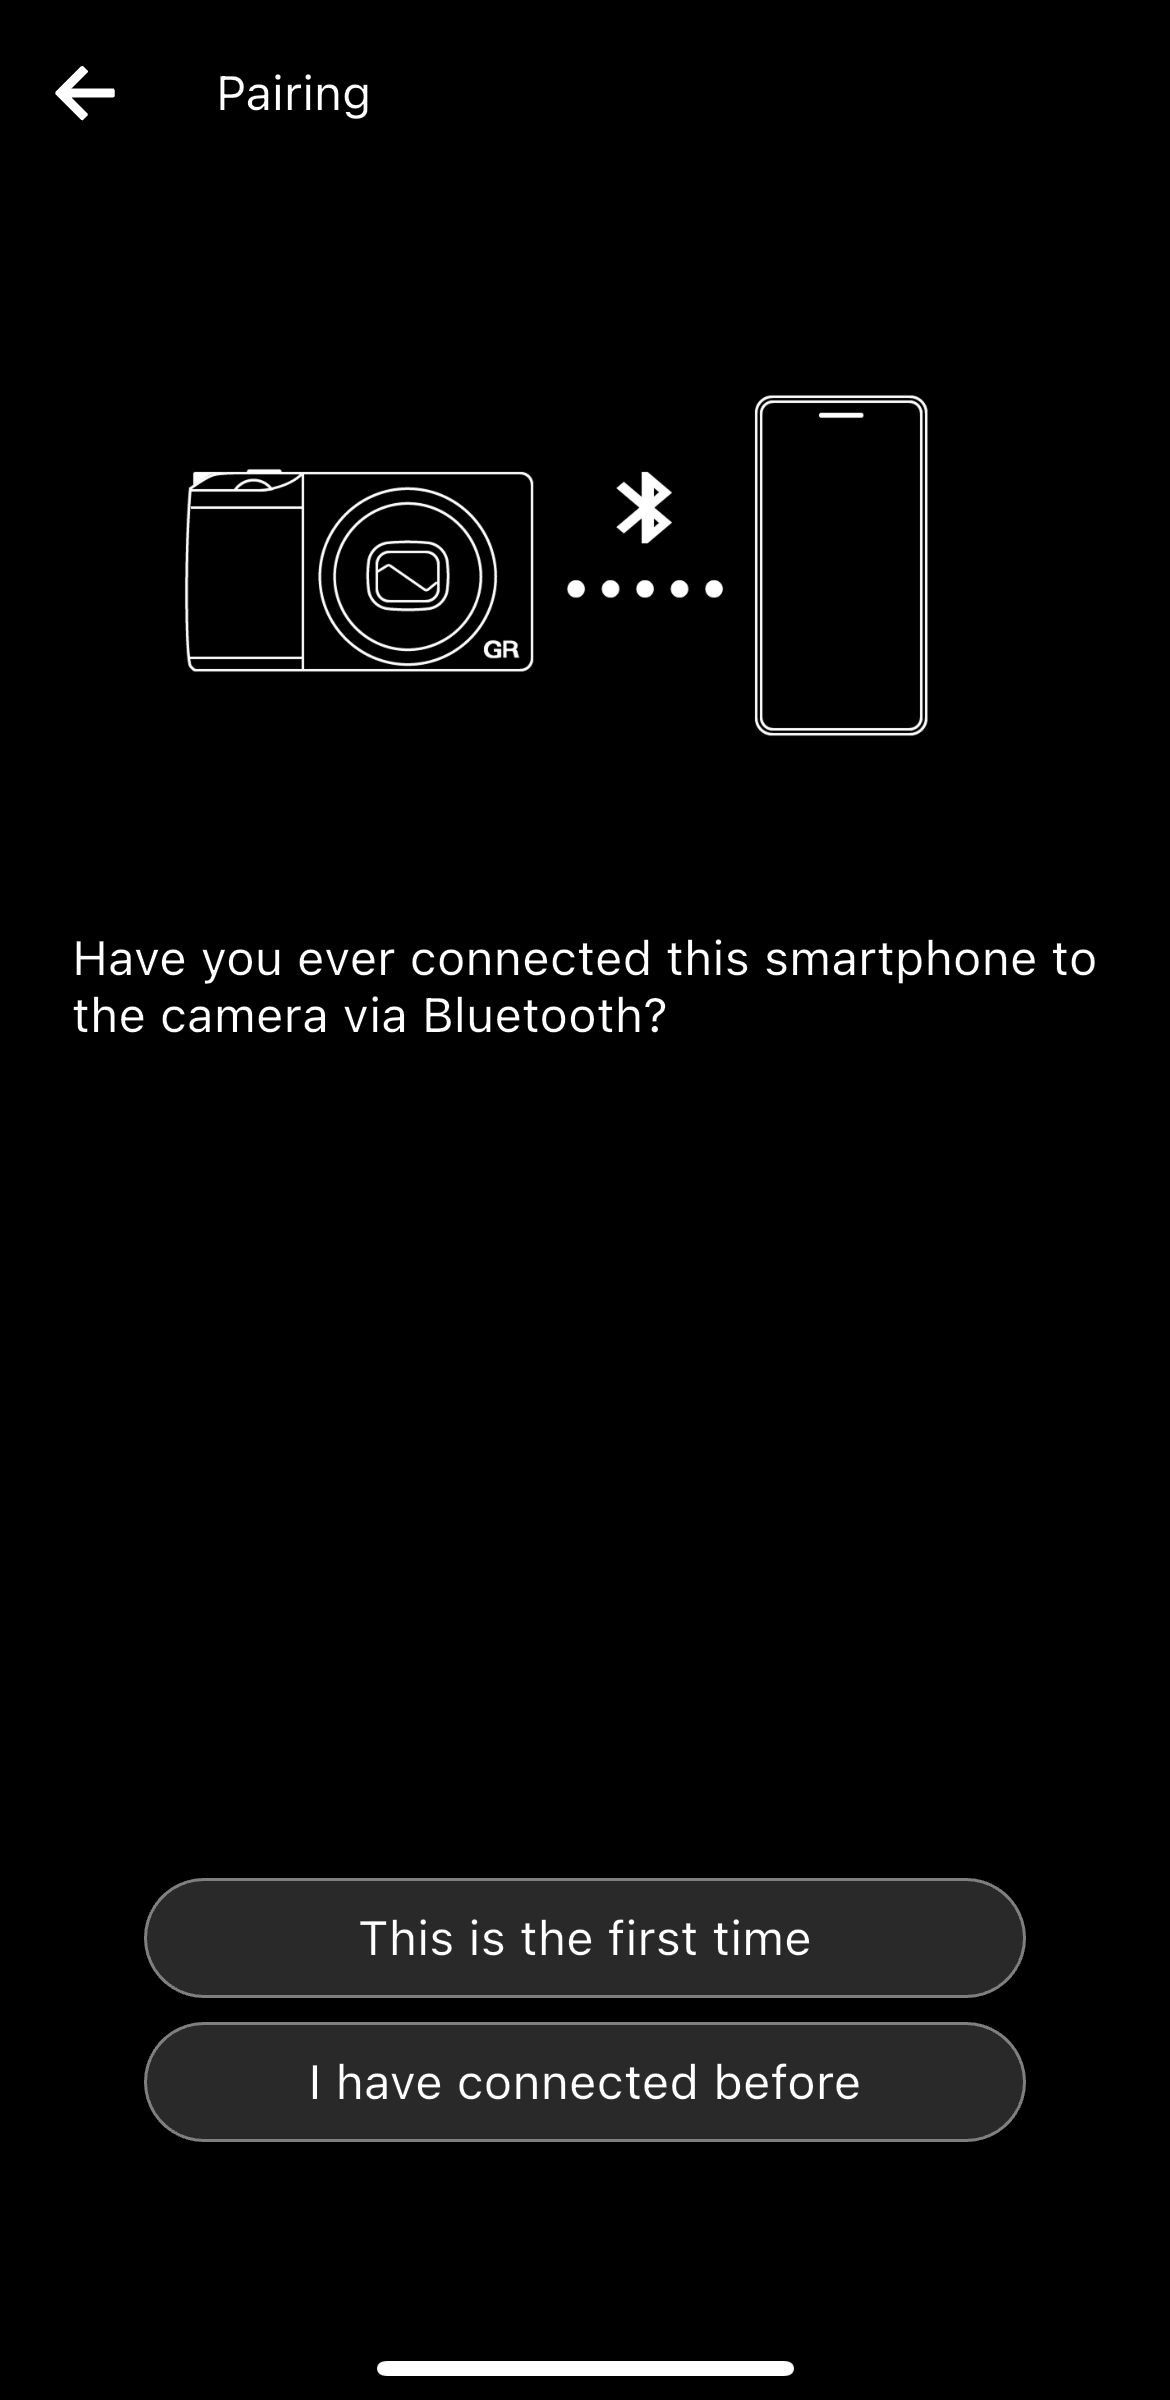
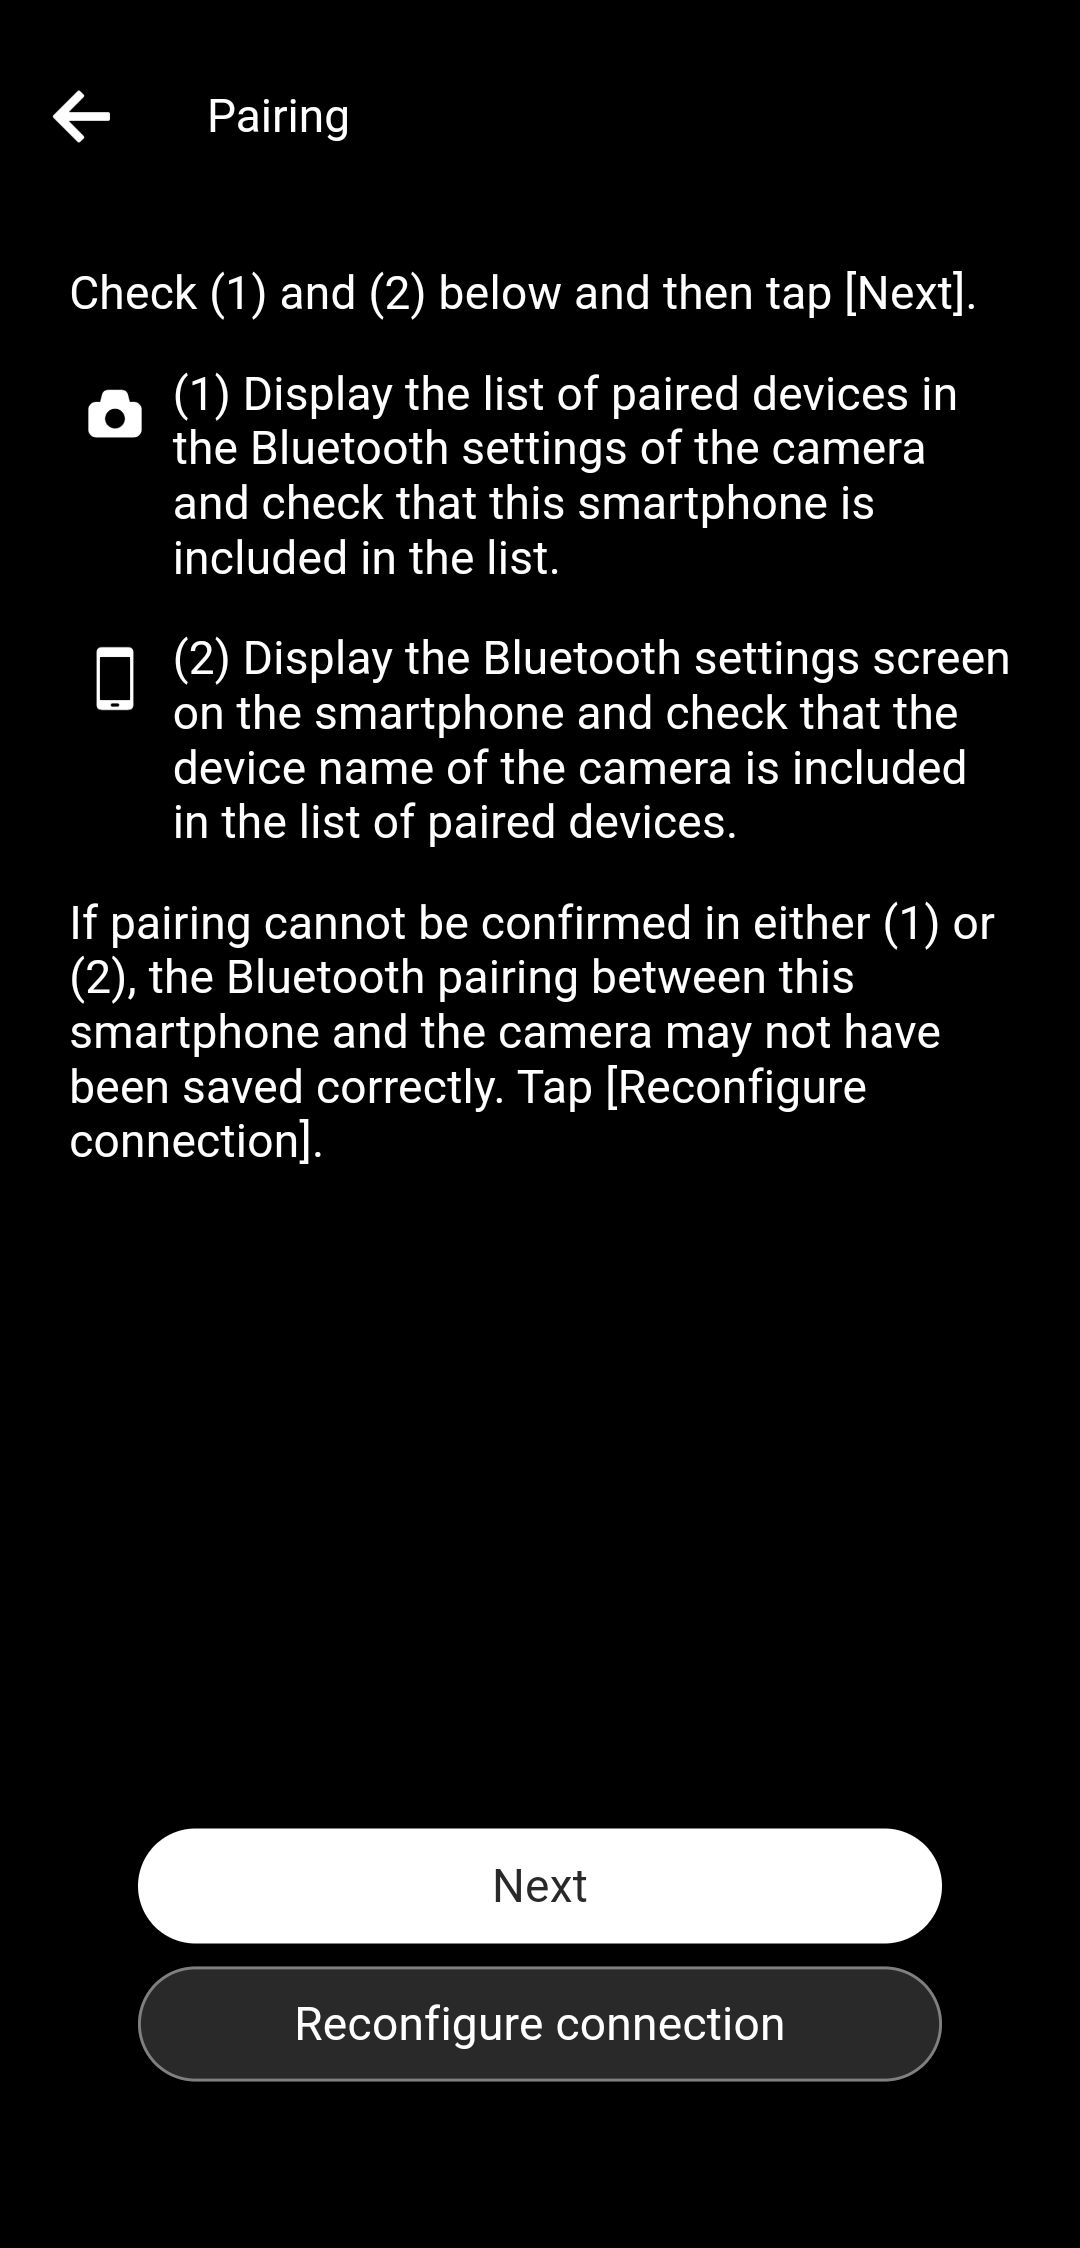
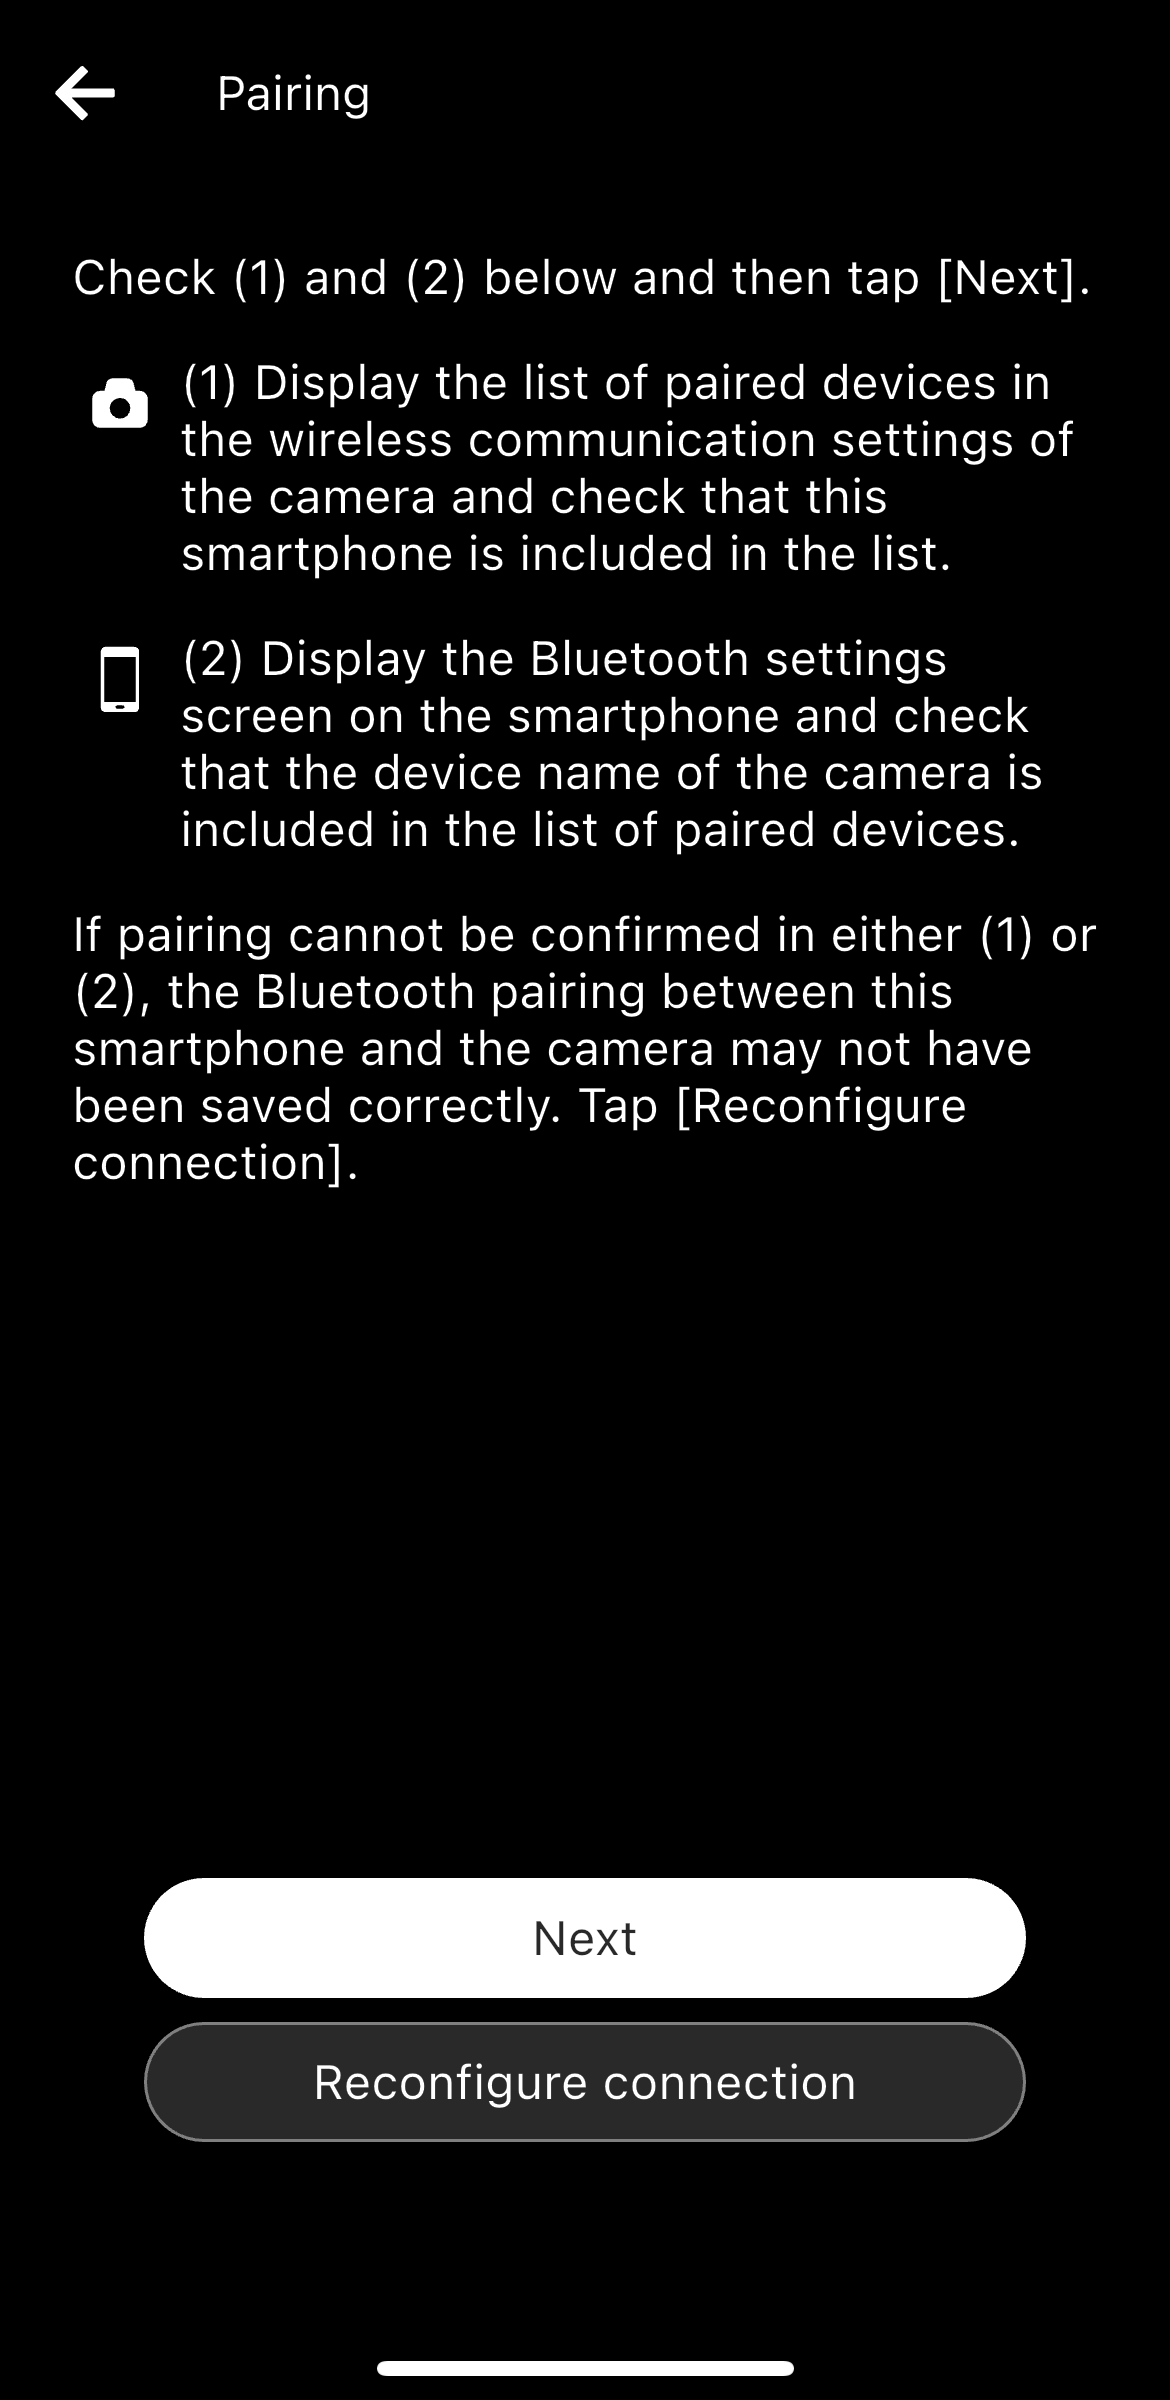
* If you are not sure whether you have connected your smartphone to the camera, check the following two points.
(1) Display the list of paired devices from the wireless communication settings on the camera and confirm that your smartphone is on the list.
(2) Display the list of paired devices on the Bluetooth settings screen on the smartphone and confirm that the device name of the camera is on the list.
When both devices are displayed, tap “Next”.
When both devices are not displayed, return to the previous screen and tap “This is the first time”.
When only one of the devices is displayed, tap “Reconfigure connection”.

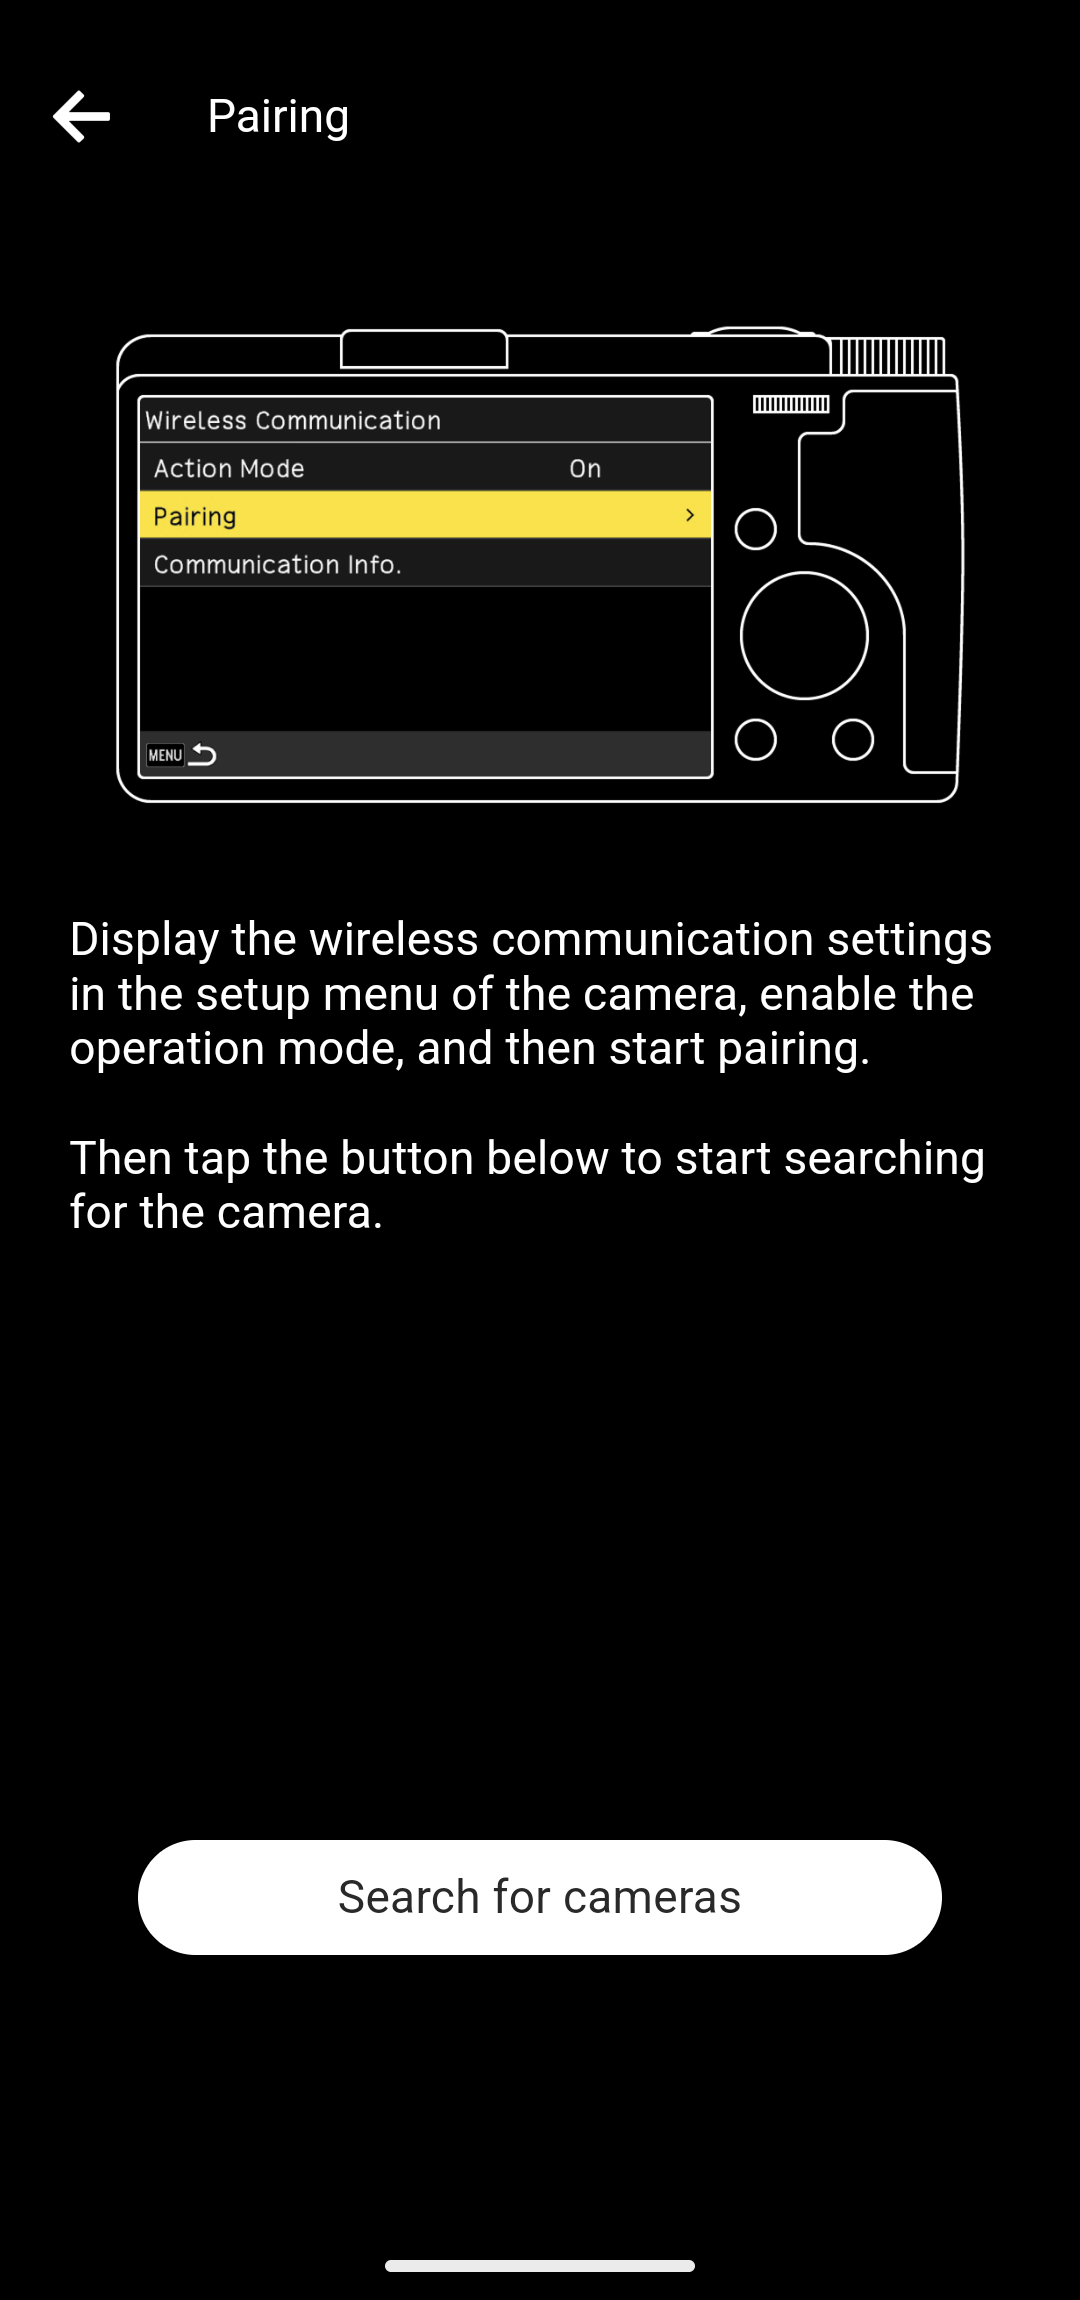
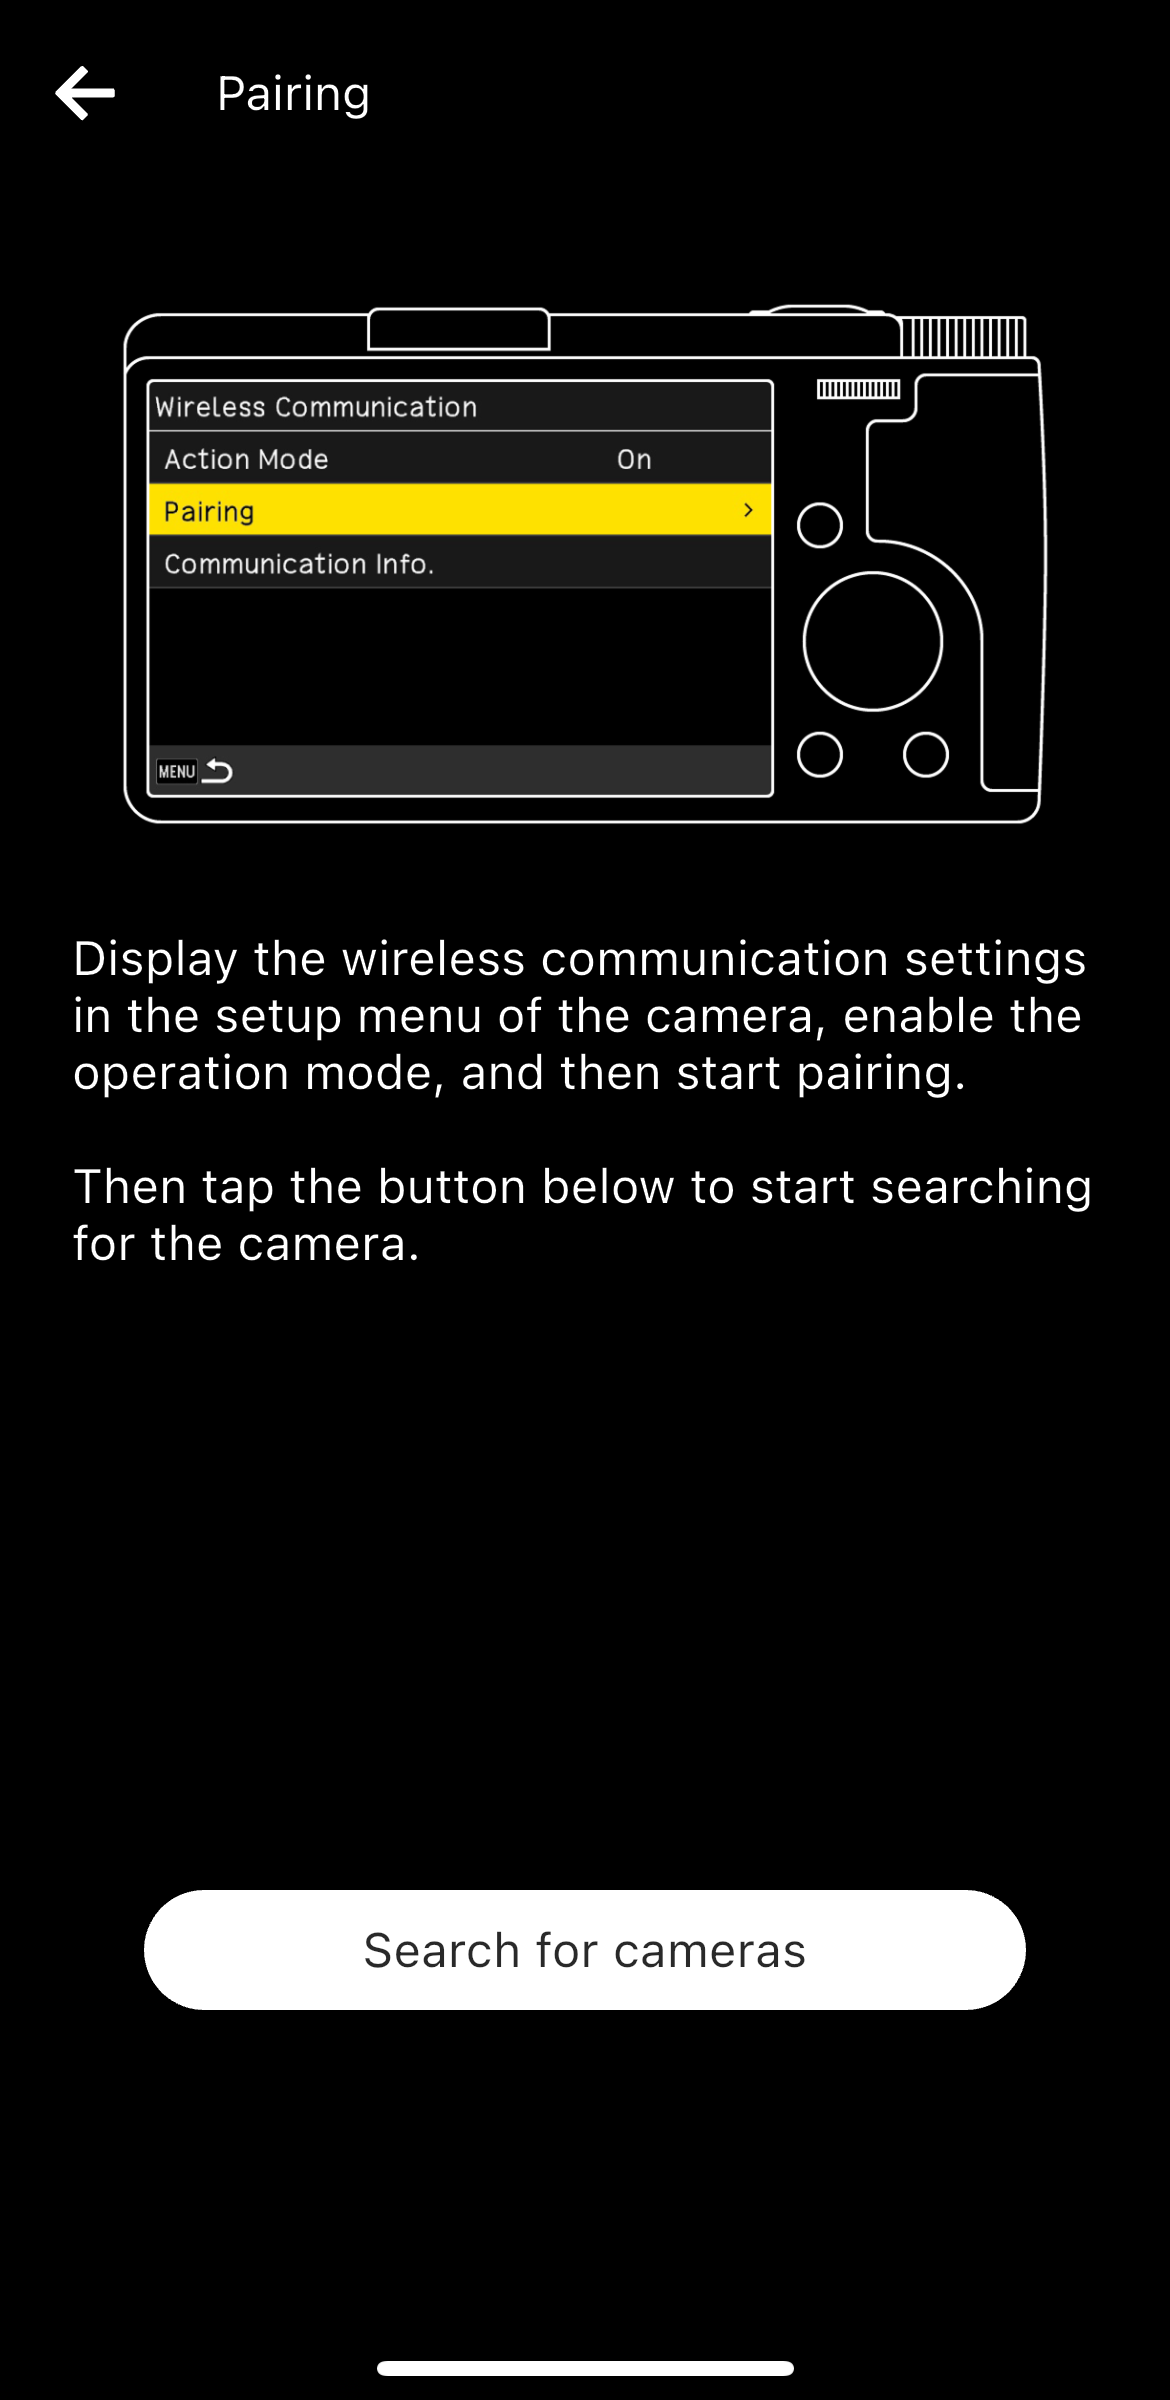
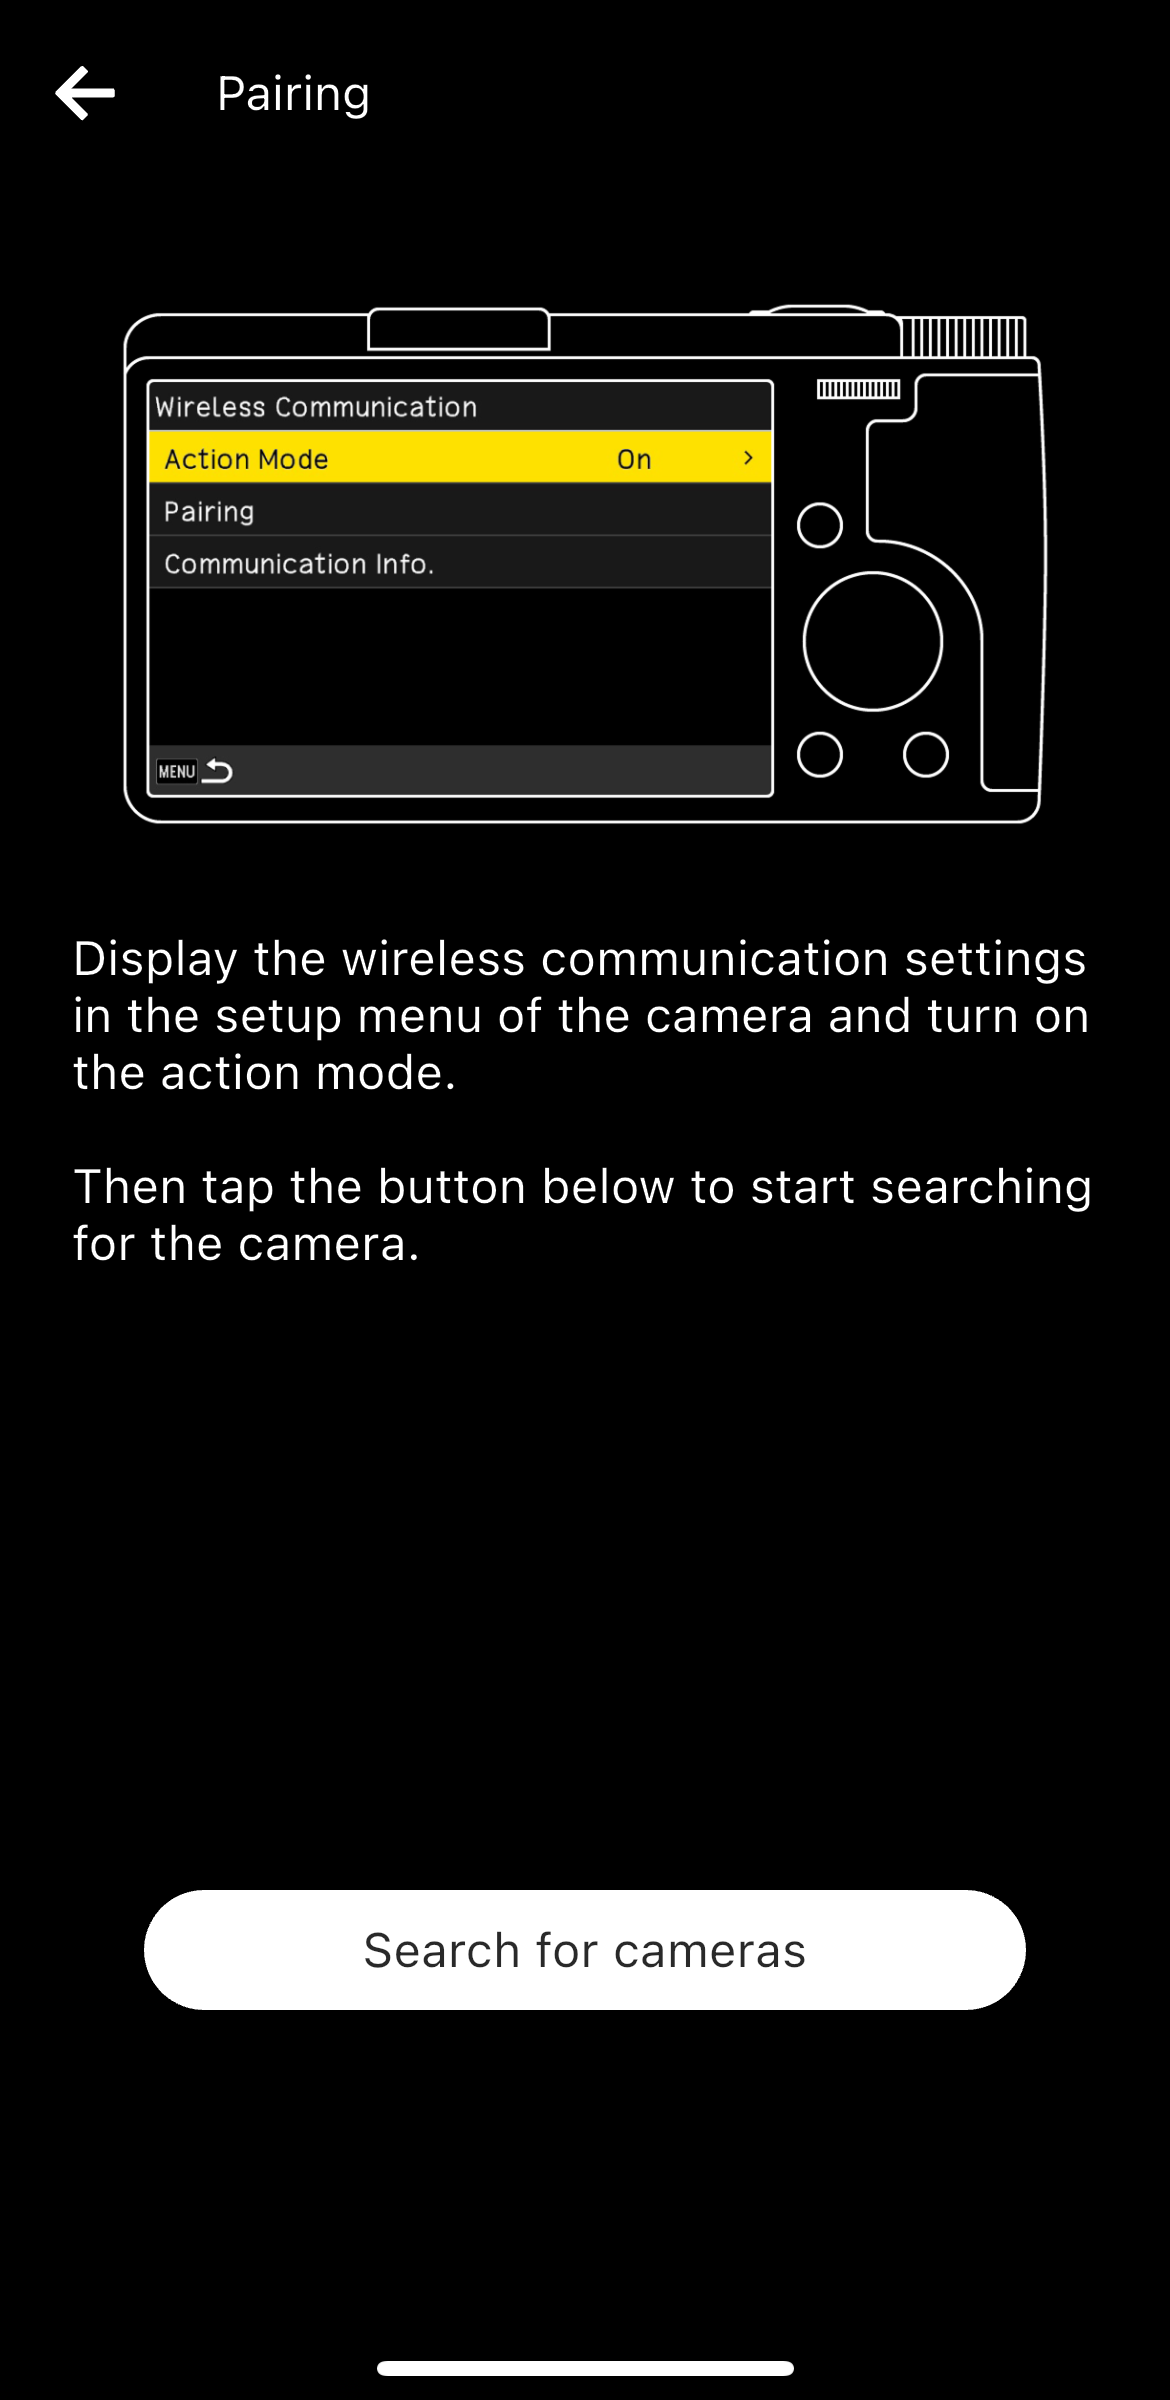
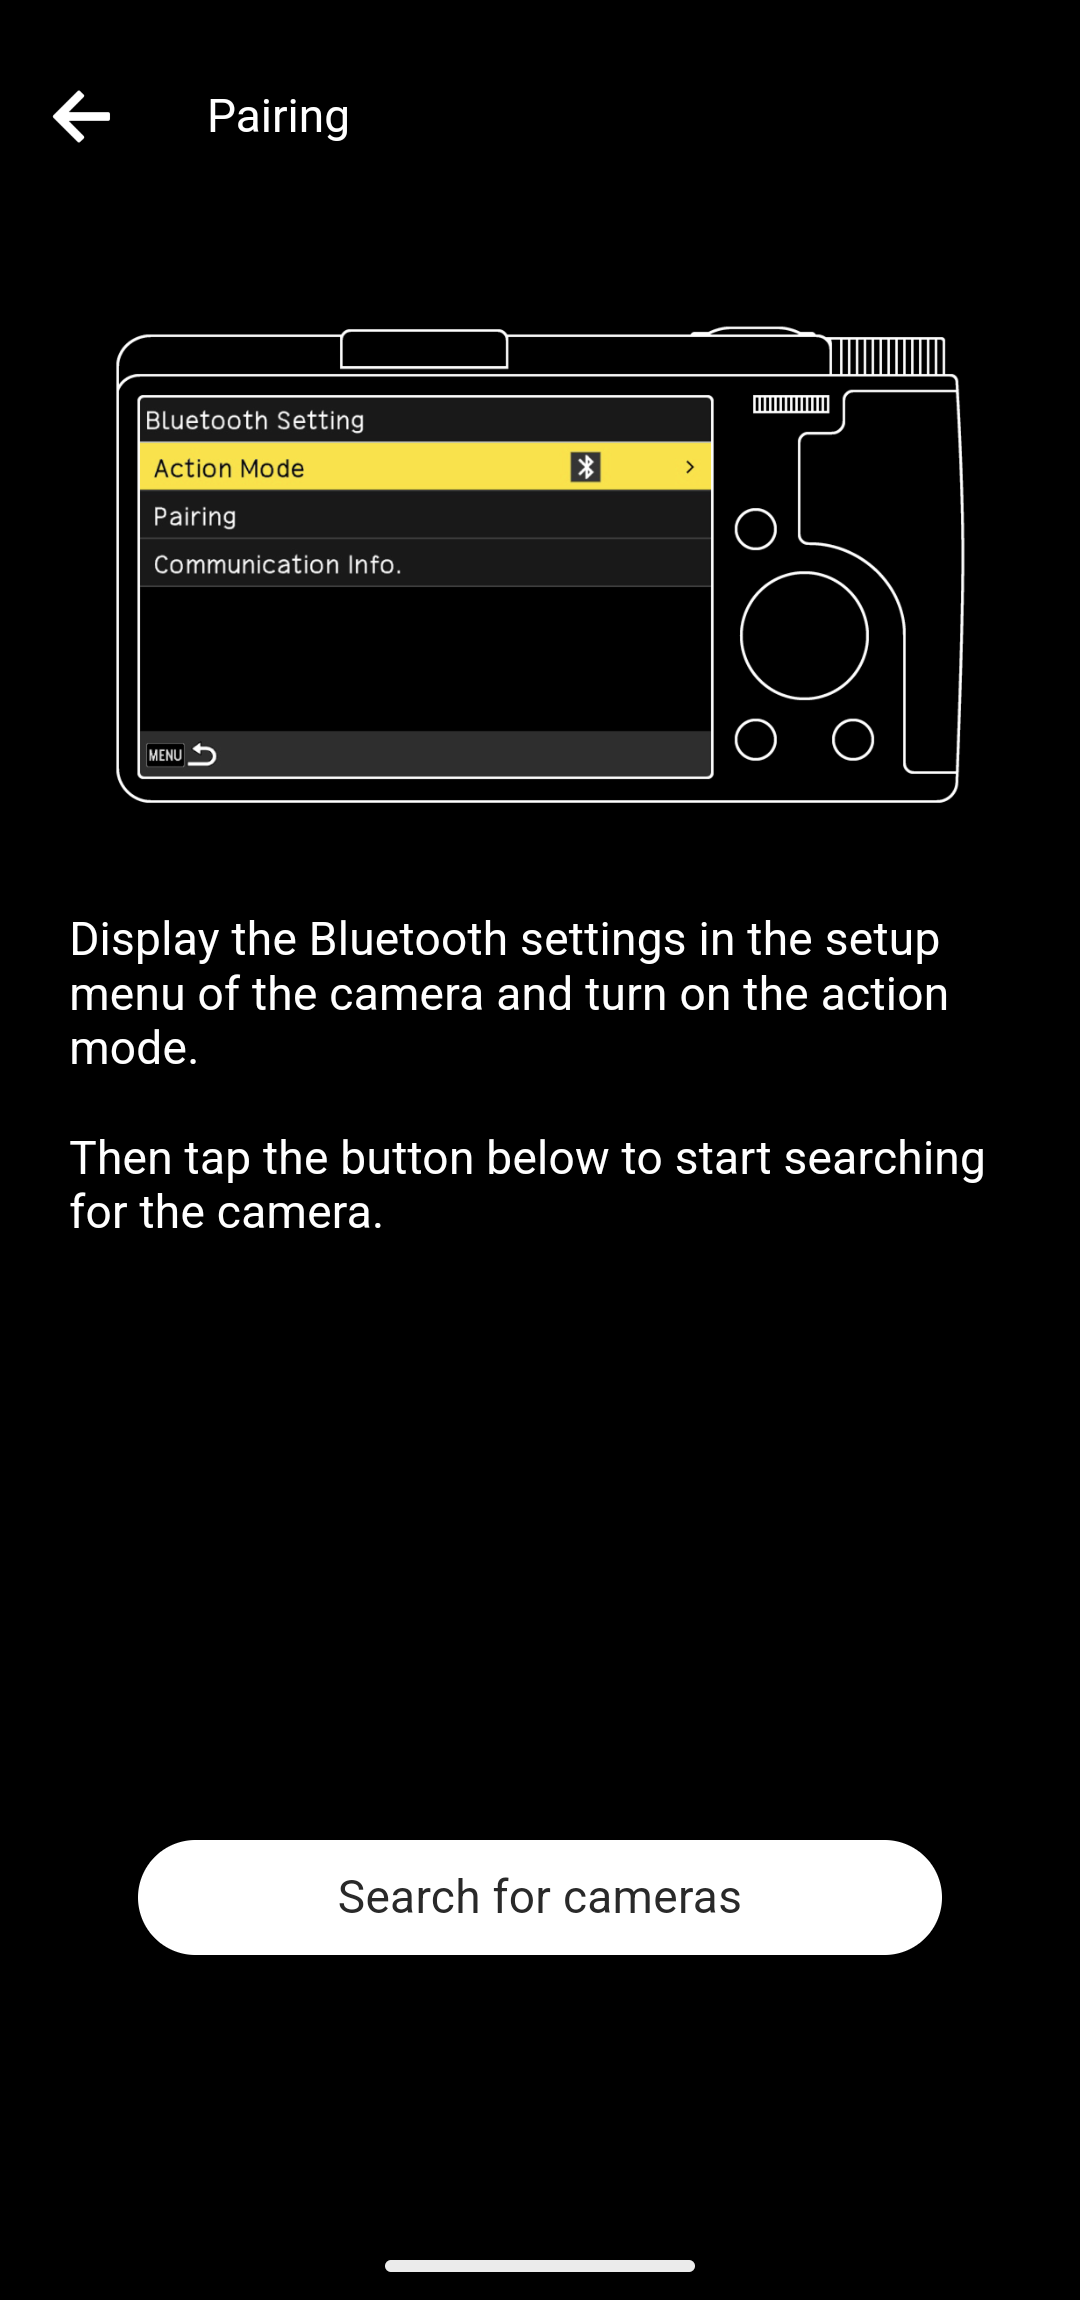
Then, tap “Search for cameras”.


* If you have paired your smartphone with the camera before, the pairing settings remain on both devices, and those settings are used for reconnection. Therefore, authentication code verification is not necessary.

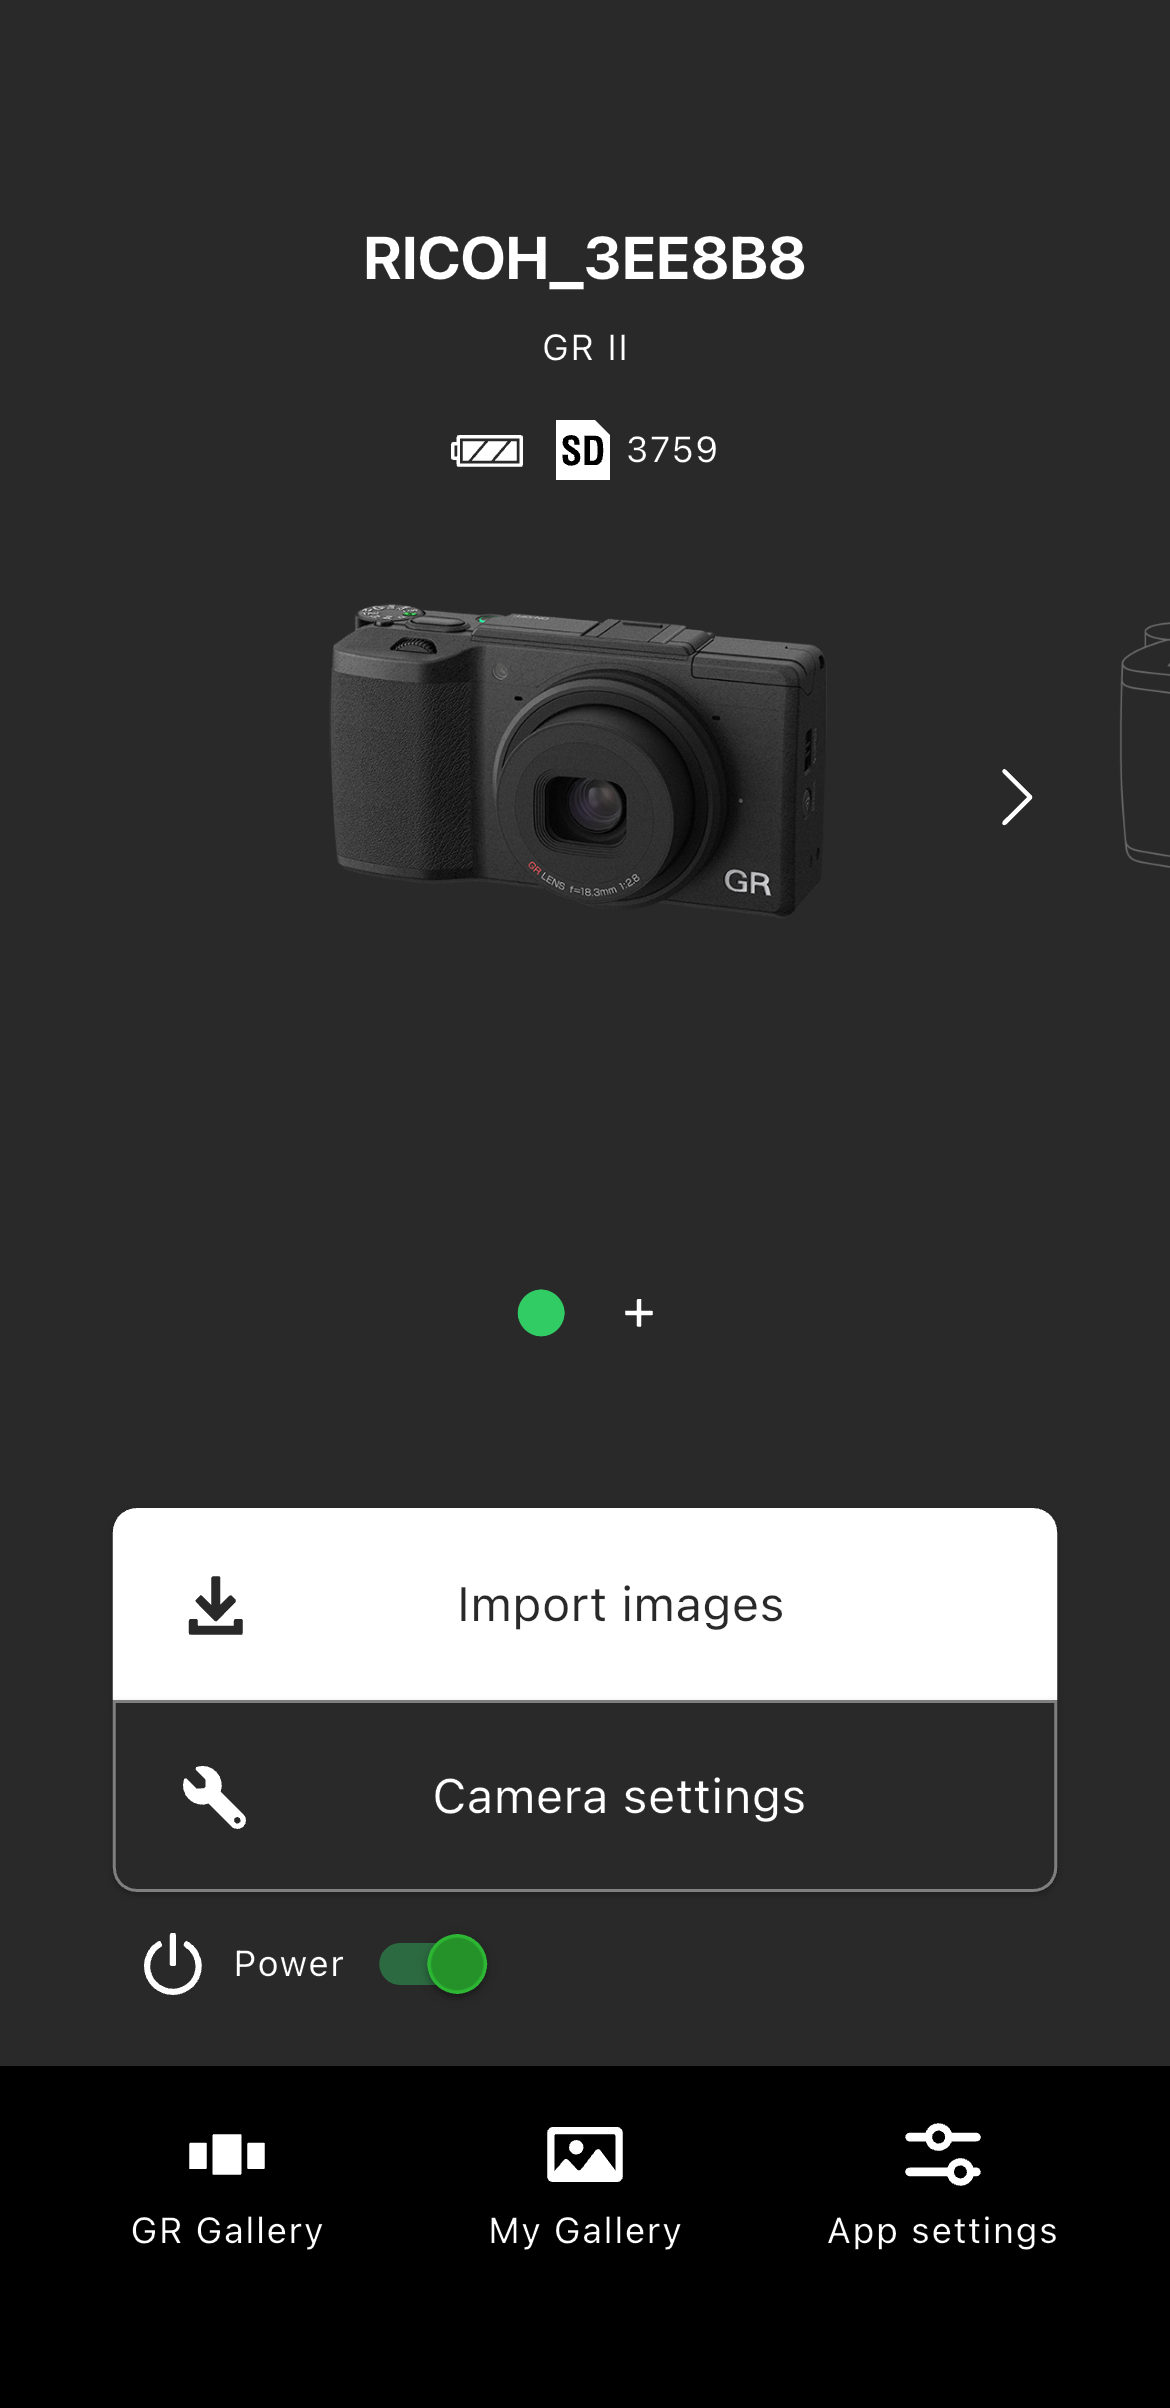
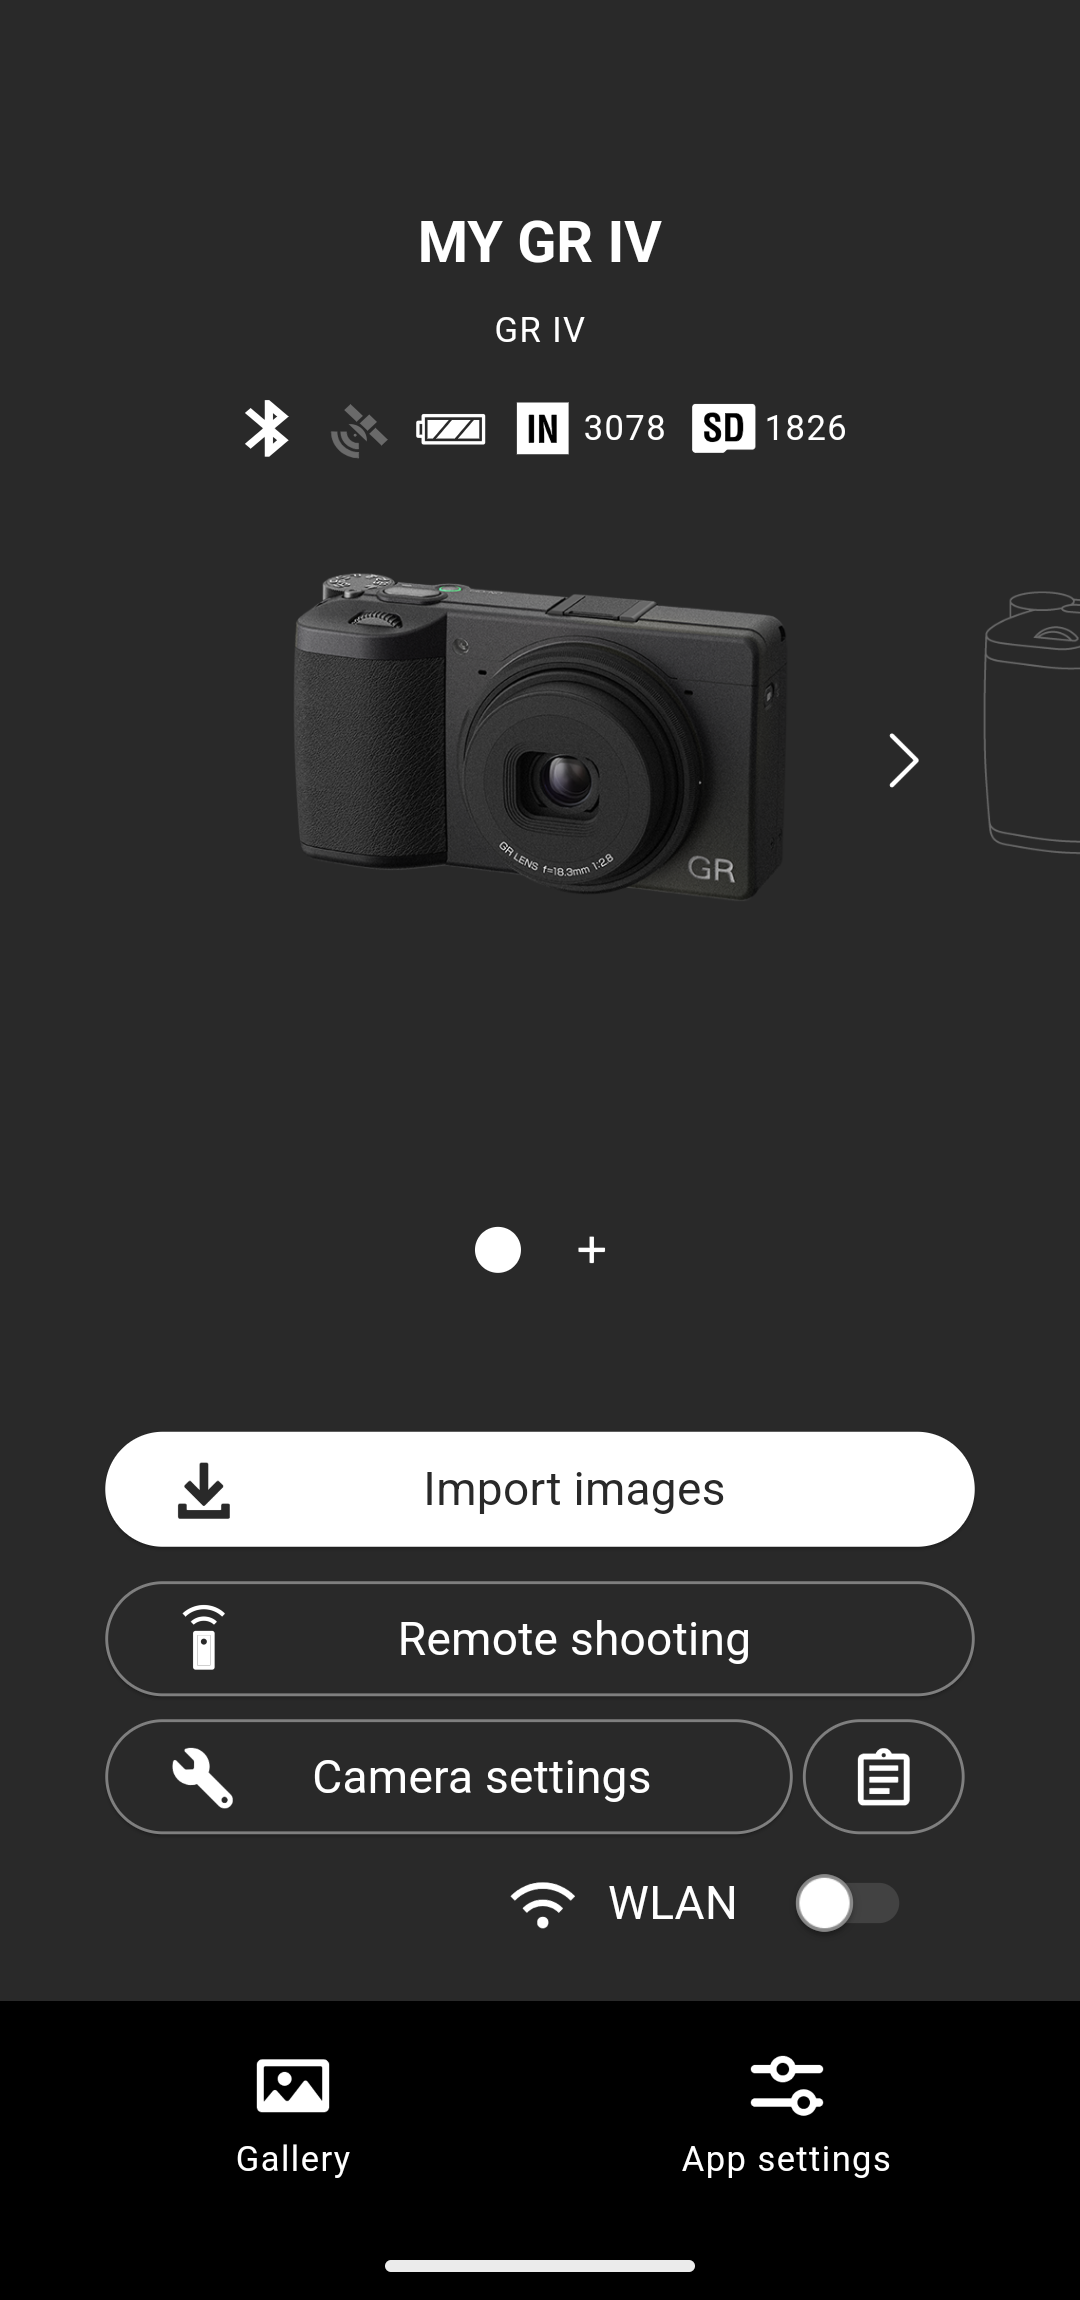
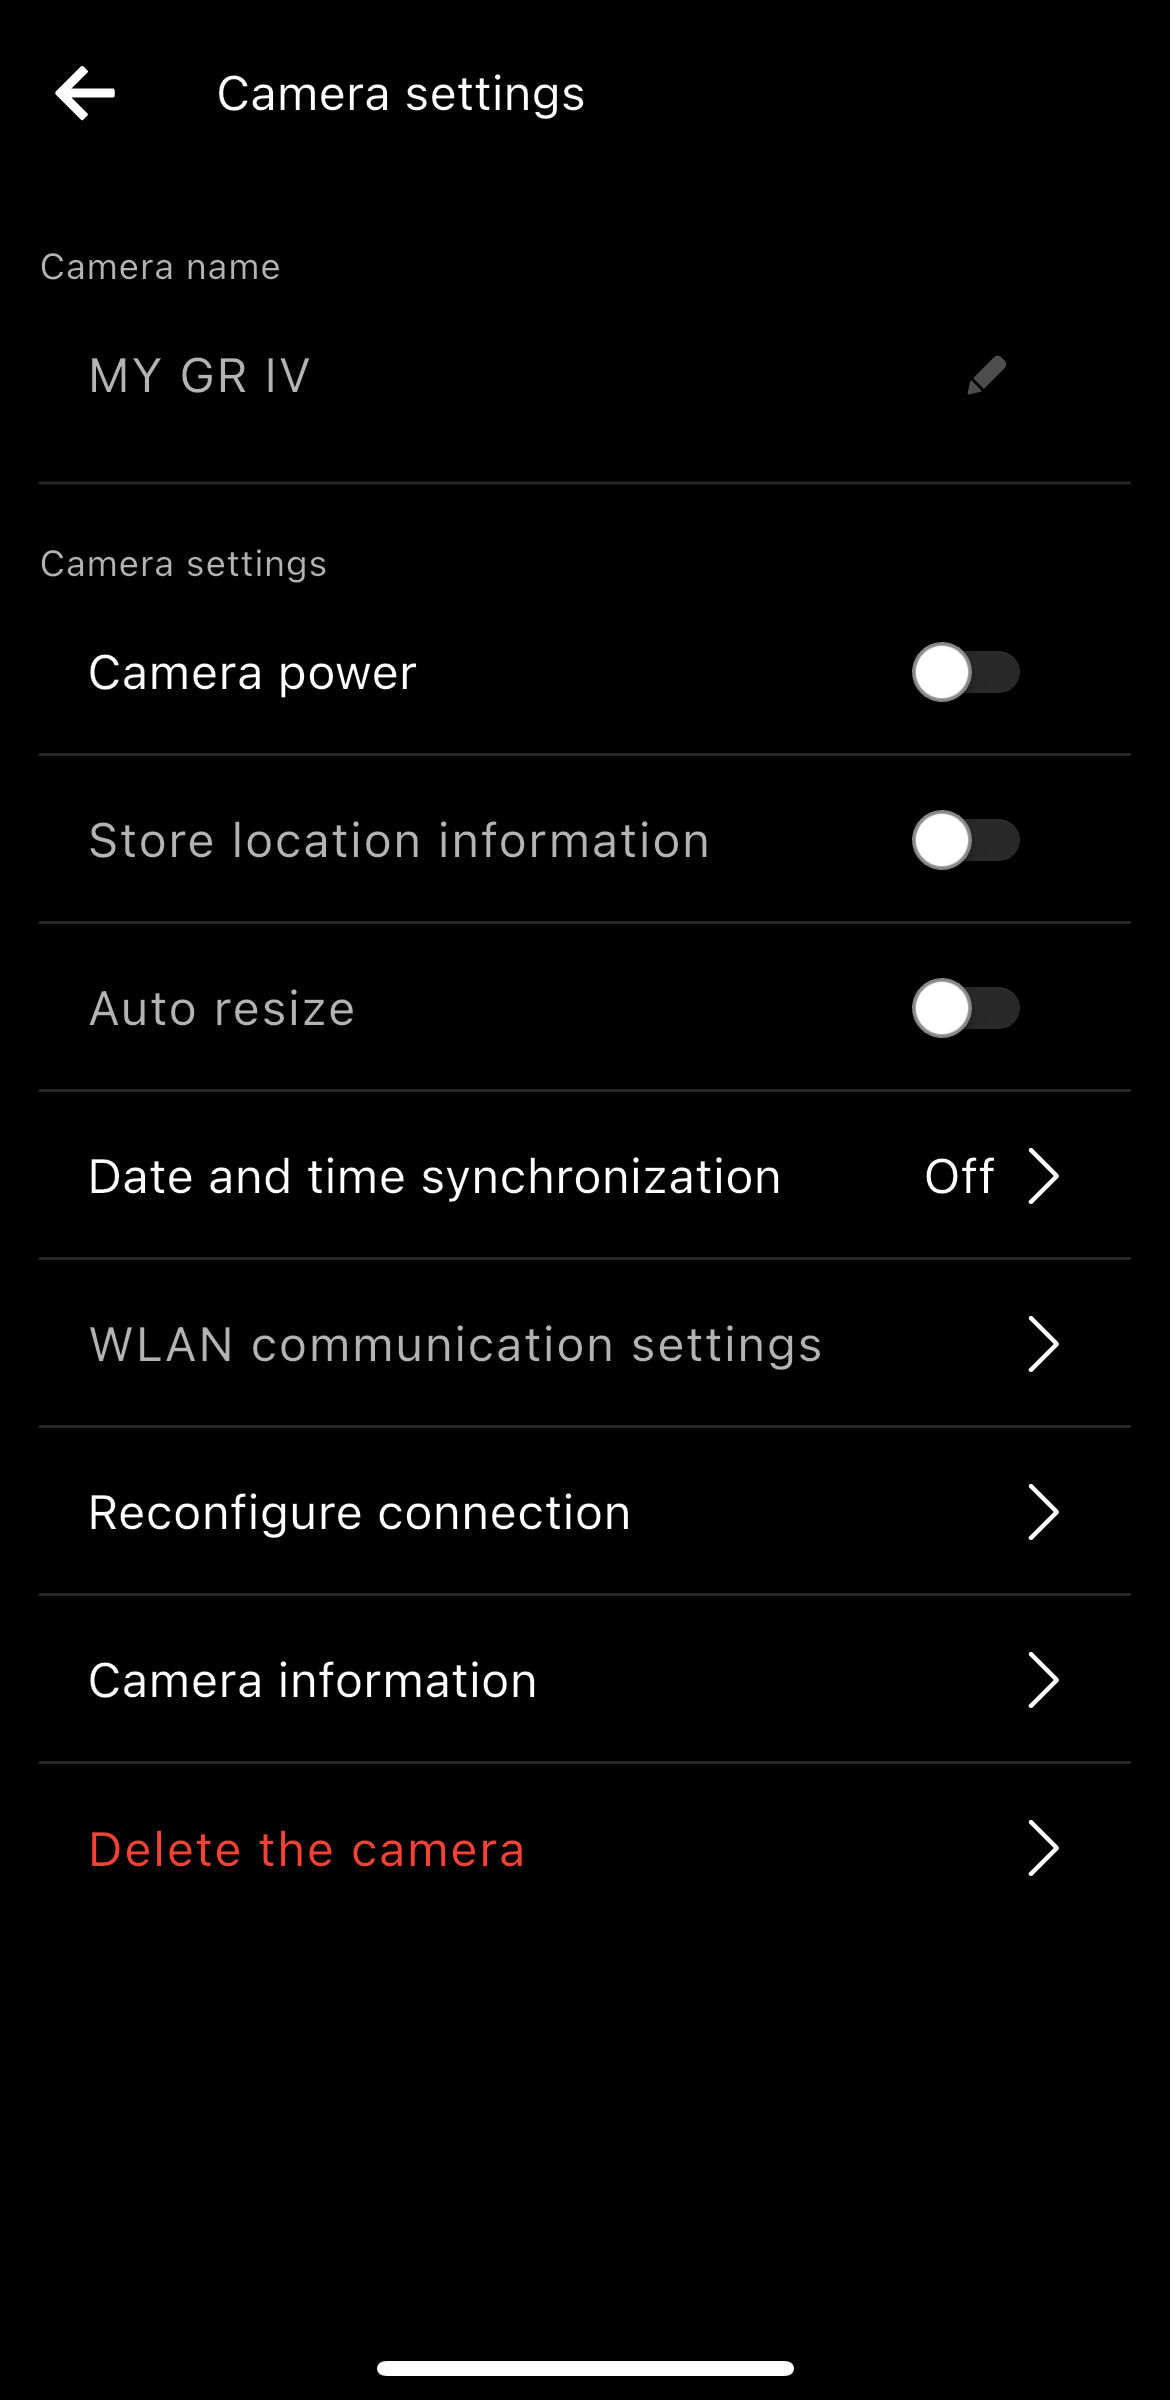
Tap “Camera settings”.
* Make sure that the Bluetooth function and location information function of the smartphone are turned on.


Follow steps (1) and (2) below to cancel the pairing settings.
(1) Display the list of paired devices from the wireless communication settings on the camera and unpair your smartphone if it is on the list.
(2) Display the list of paired devices on the Bluetooth settings screen on the smartphone and unpair the camera if its device name is on the list.
After canceling the pairing settings, tap “Next”.
To confirm whether the device displayed is your camera, check the device name displayed on the “Start pairing. Connect to the camera from GR WORLD.” message screen.
Make sure that the authentication codes displayed on the camera and smartphone match, follow the on-screen instructions on the smartphone to allow pairing, and then press the OK button of the camera.
* If the authentication code does not appear, it may be shown as a notification in the notification area of the smartphone. Check the notification area.
* The screen design and displayed message may vary slightly depending on the smartphone model and OS version.

* Make sure that the Bluetooth function and location information function of the smartphone are turned on.
* By allowing this, the smartphone will be able to find and connect to nearby cameras. If this is not allowed, the smartphone will not be able to connect to the camera, and functions such as image import and remote shooting will not be available.
* The screen design and displayed message may vary slightly depending on the smartphone model and OS version.

To confirm whether the device displayed is your camera, check the device name displayed on the “Start pairing. Connect to the camera from GR WORLD.” message screen.
Make sure that the authentication codes displayed on the camera and smartphone match, follow the on-screen instructions on the smartphone to allow pairing, and then press the OK button of the camera.
* If the authentication code does not appear, it may be shown as a notification in the notification area of the smartphone. Check the notification area.
* The screen design and displayed message may vary slightly depending on the smartphone model and OS version.


* The paired smartphone is registered on the camera.
To check registered smartphones, operate the camera to select “Wireless Communication” in the setup menu, and then select “Pairing” → “Paired Devices”.

Tap “Register new camera”.
* Make sure that the Bluetooth function and location information function of the smartphone are turned on.
* If you are not sure whether you have connected your smartphone to the camera, check the following two points.
(1) Display the list of paired devices from the wireless communication settings on the camera and confirm that your smartphone is on the list.
(2) Display the list of paired devices on the Bluetooth settings screen on the smartphone and confirm that the device name of the camera is on the list.
When both devices are displayed, tap “Next”.
When both devices are not displayed, return to the previous screen and tap “This is the first time”.
When only one of the devices is displayed, tap “Reconfigure connection”.
Then, tap “Search for cameras”.
* If you have paired your smartphone with the camera before, the pairing settings remain on both devices, and those settings are used for reconnection. Therefore, authentication code verification is not necessary.
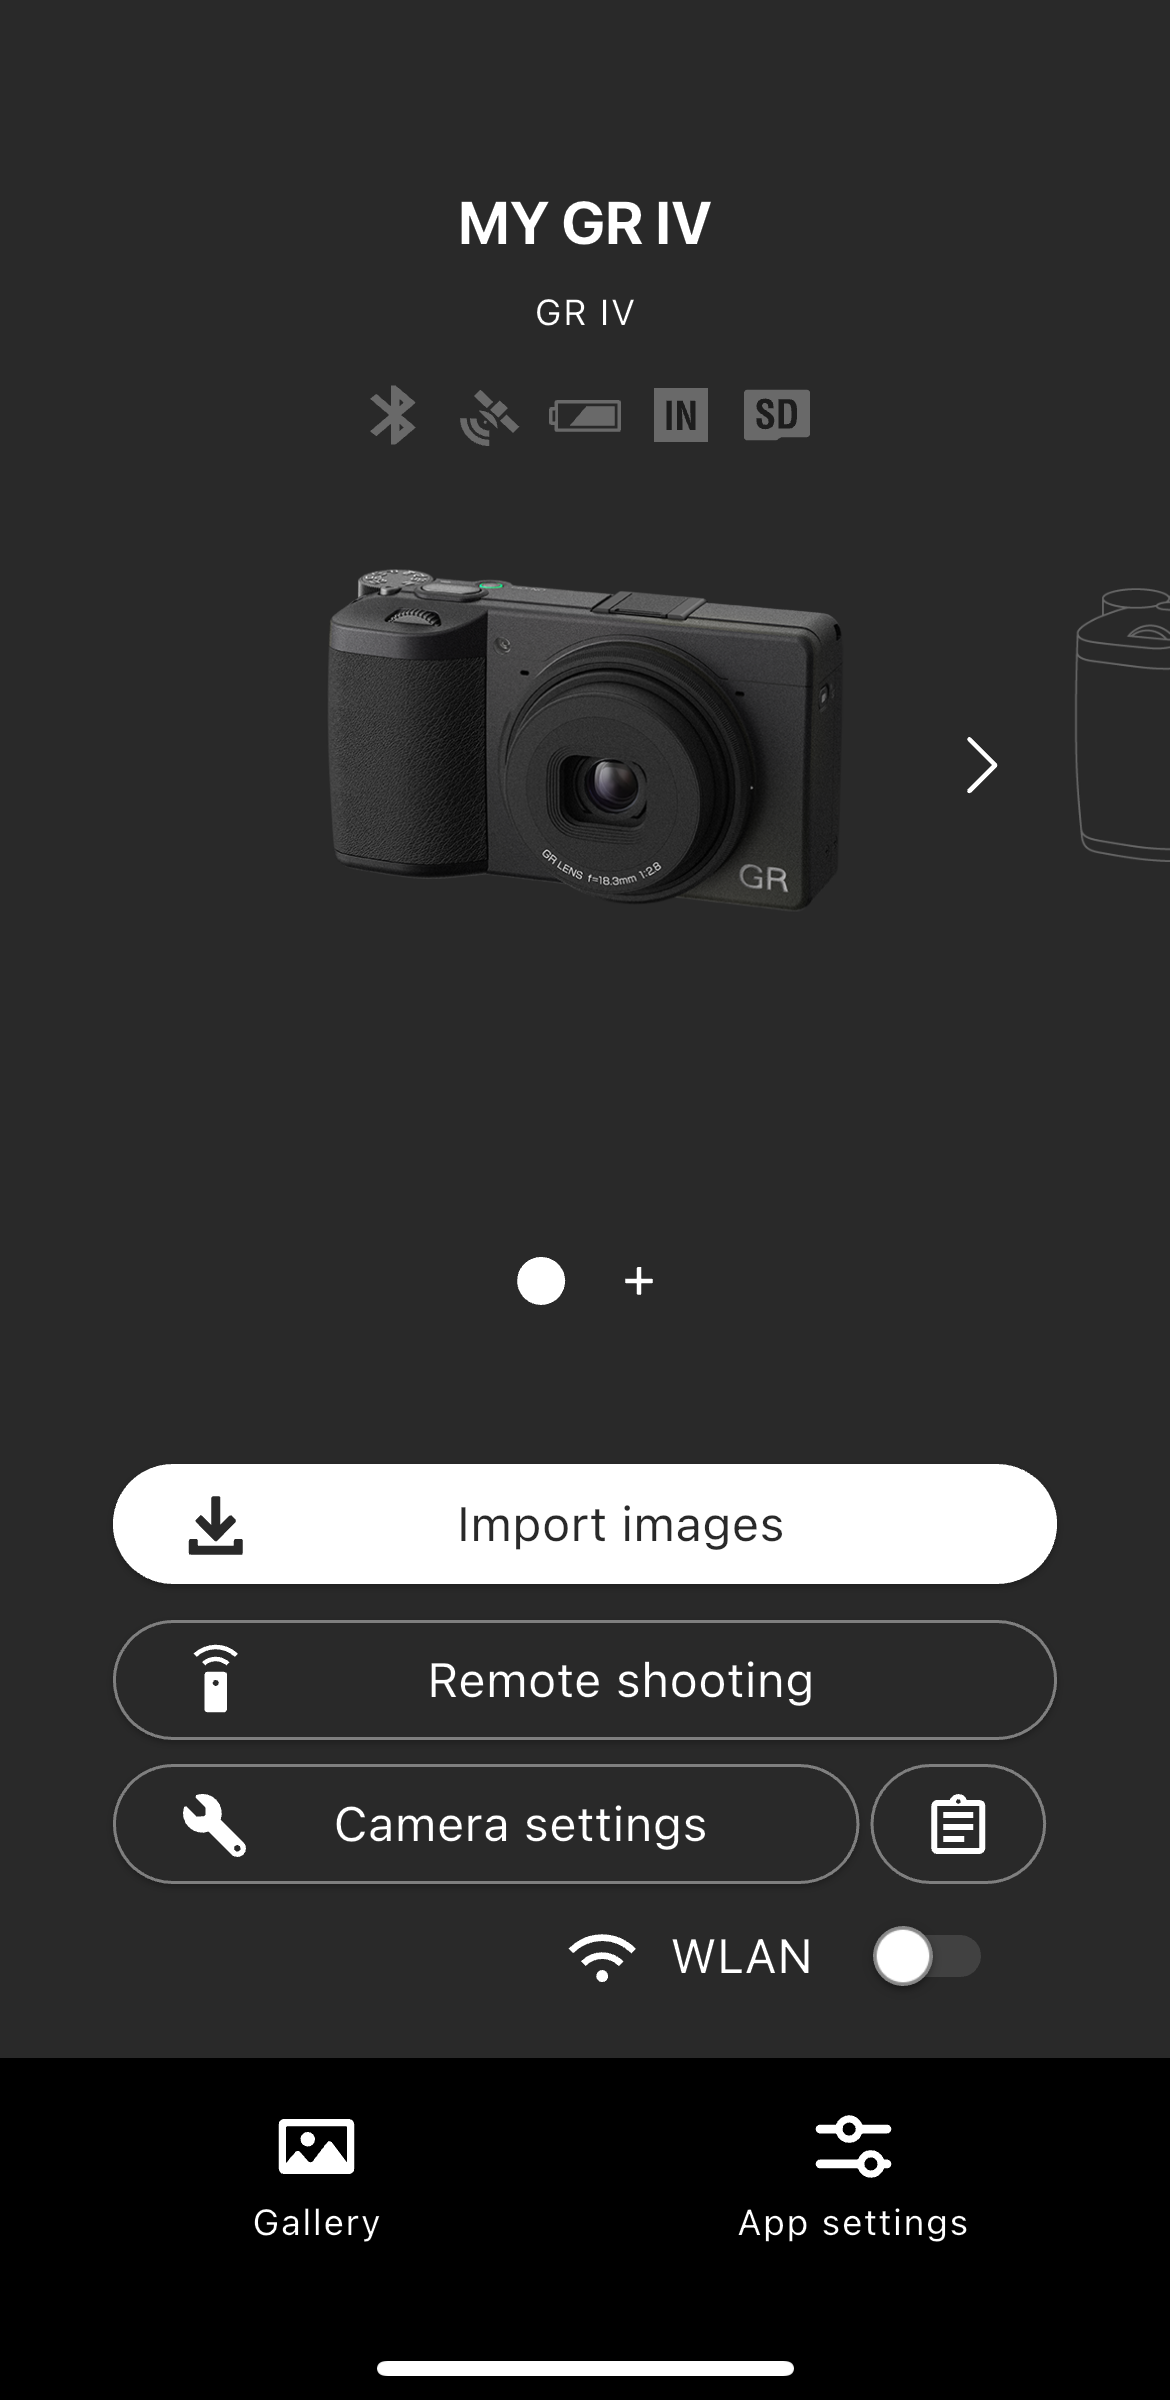
Tap “Camera settings”.
* Make sure that the Bluetooth function and location information function of the smartphone are turned on.
Follow steps (1) and (2) below to cancel the pairing settings.
(1) Display the list of paired devices from the wireless communication settings on the camera and unpair your smartphone if it is on the list.
(2) Display the list of paired devices on the Bluetooth settings screen on the smartphone and unpair the camera if its device name is on the list.
After canceling the pairing settings, tap “Next”.
To confirm whether the device displayed is your camera, check the device name displayed on the “Start pairing. Connect to the camera from GR WORLD.” message screen.
Make sure that the authentication codes displayed on the camera and smartphone match, follow the on-screen instructions on the smartphone to allow pairing, and then press the OK button of the camera.
* If the authentication code does not appear, it may be shown as a notification in the notification area of the smartphone. Check the notification area.
* The screen design and displayed message may vary slightly depending on the smartphone model and OS version.
GR III / GR IIIx
* Please make sure that your smartphone's Bluetooth and location information are turned on.

If you are using GR III Street Edition / GR IIIx Urban Edition / GR III Diary Edition / GR III HDF / GR IIIx HDF, please choose this option.
* By allowing this permission, your smartphone will be able to find and connect to nearby cameras. If you do not allow it, you will not be able to connect to the camera, and you will not be able to use functions such as image import and remote shooting.
* Depending on the smartphone model and OS version, the screen design and displayed messages may differ slightly.
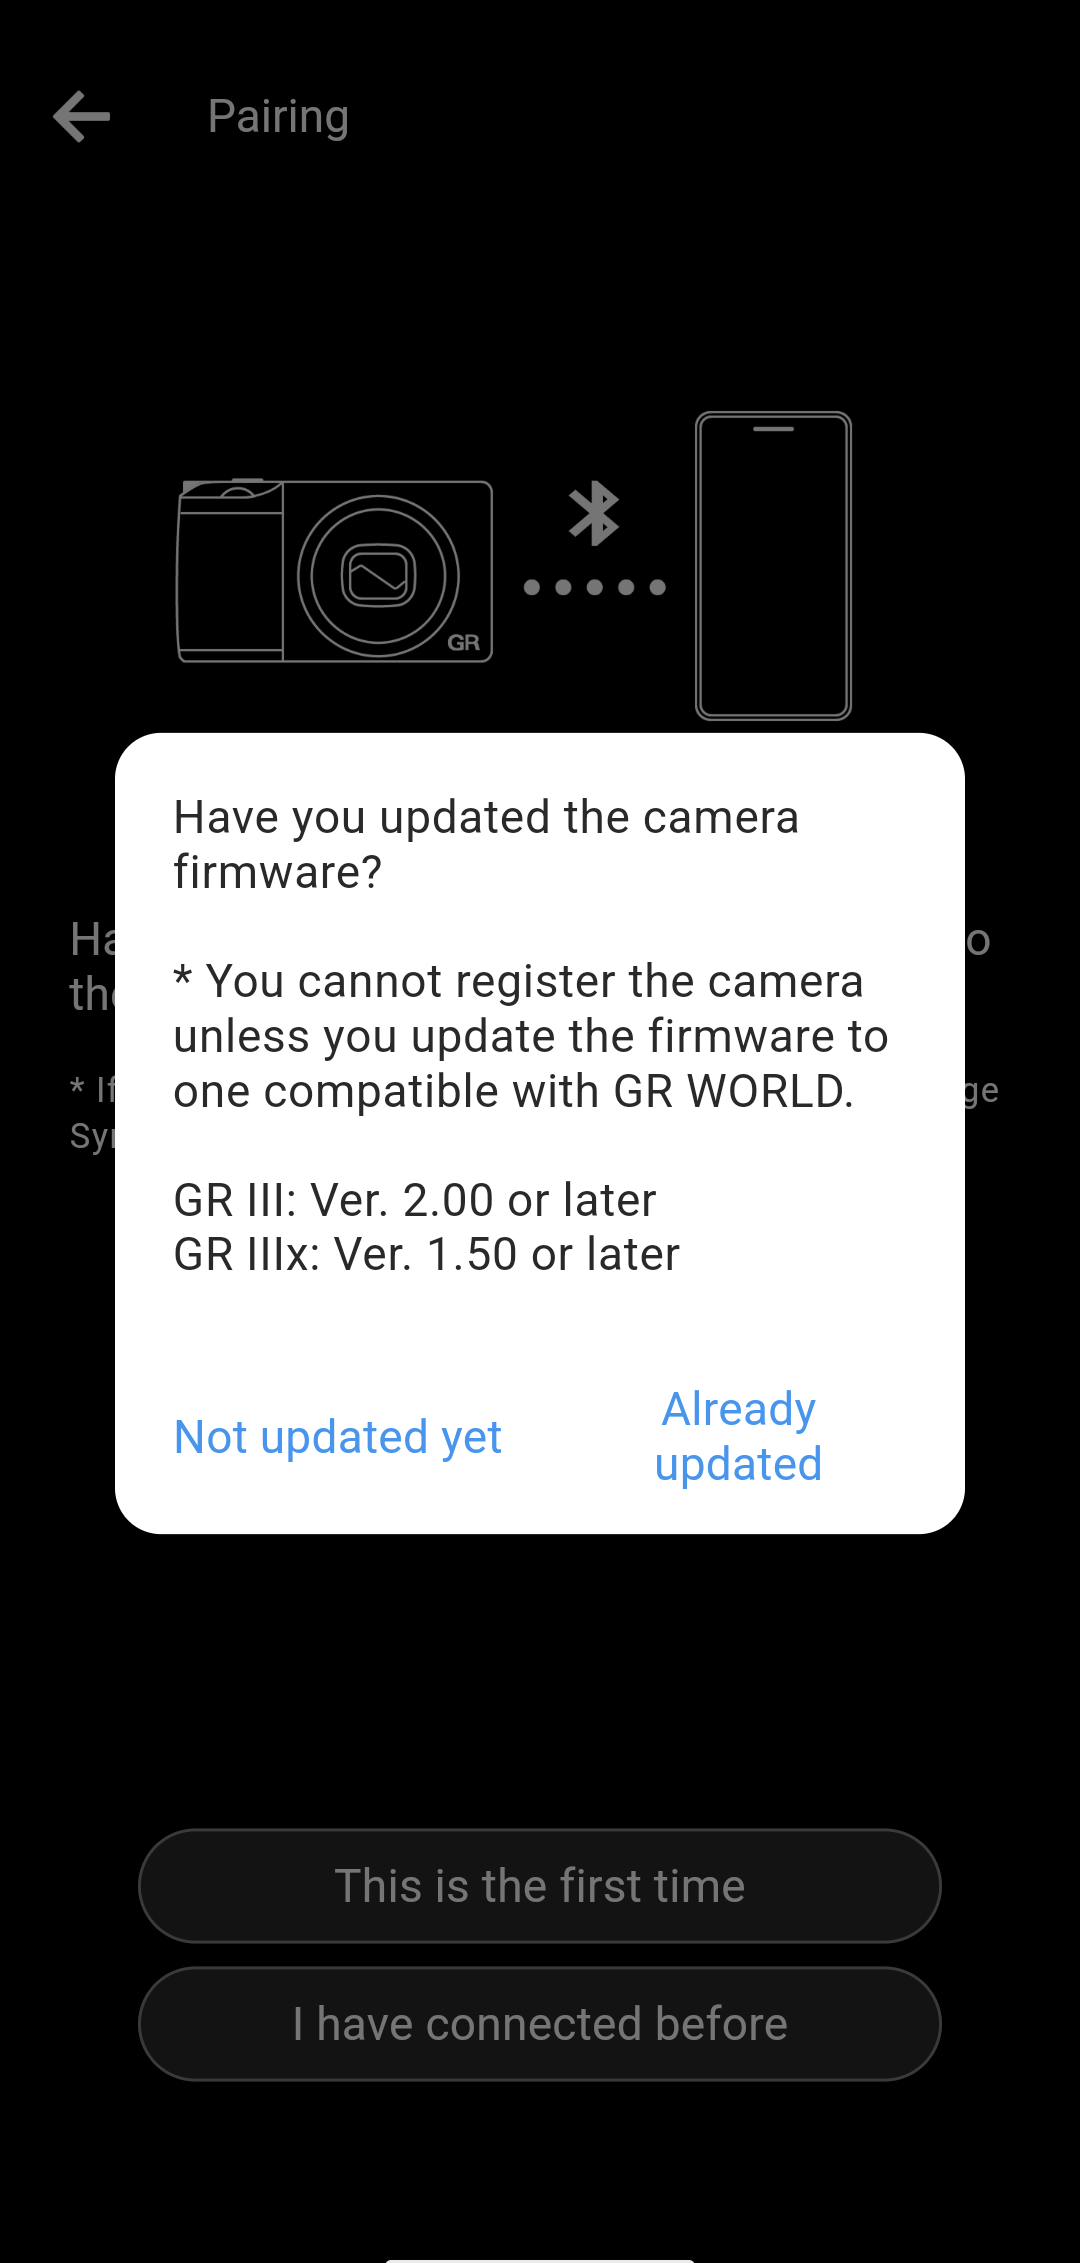
The firmware versions that can be used with this application are as follows.
・GR III / GR III HDF: V2.00 or later
・GR IIIx / GR IIIx HDF: V1.50 or later
Please note that you will not be able to connect to a camera with an older firmware version, which will result in an error.
For details on how to update the camera's firmware, please click here.
・GR III / GR III HDF
https://www.ricoh-imaging.co.jp/english/support/digital/gr3_s.html
・GR IIIx/ GR IIIxHDF
https://www.ricoh-imaging.co.jp/english/support/digital/gr3x_s.html
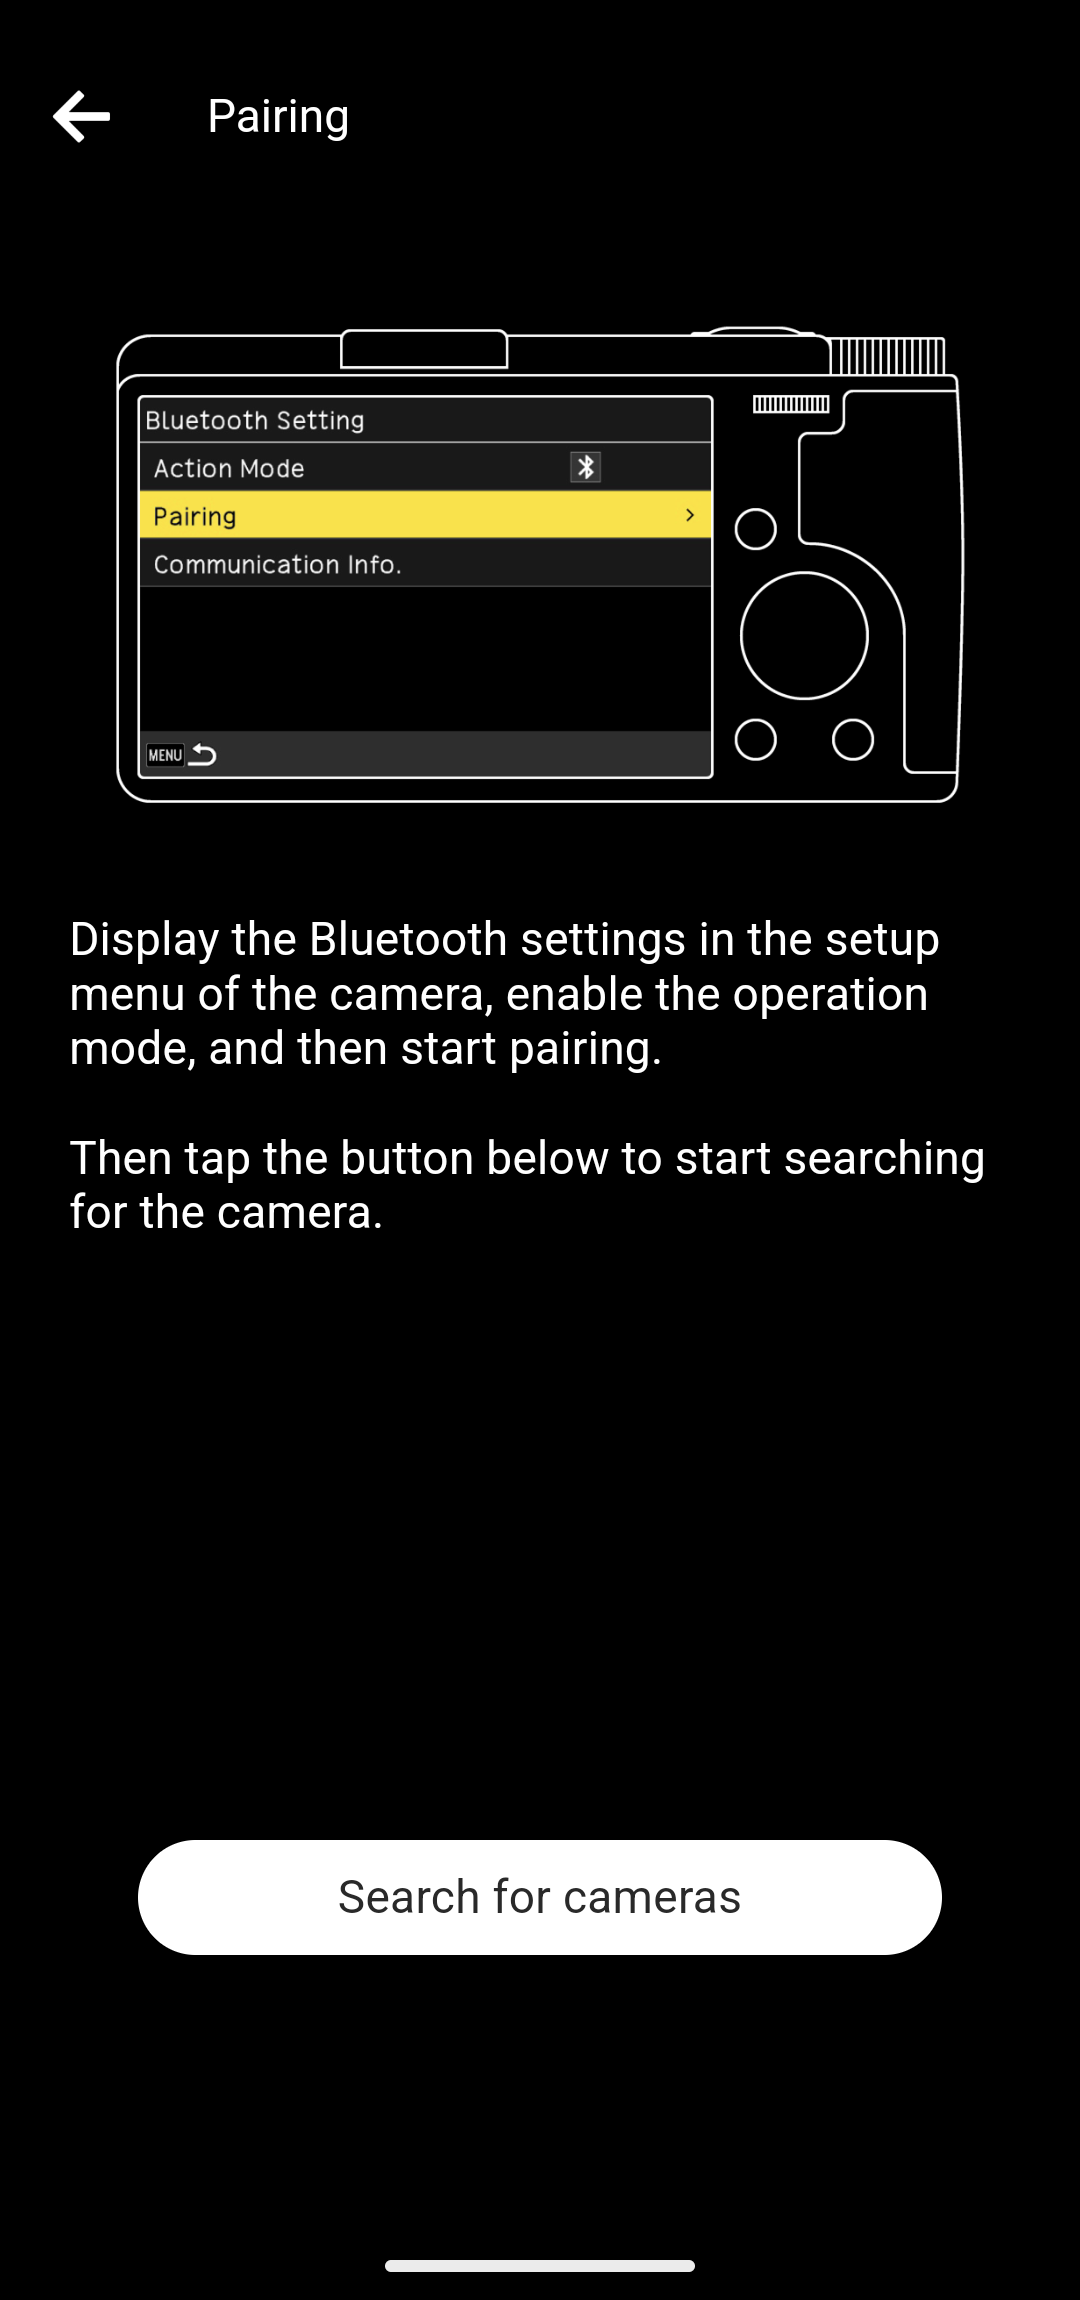
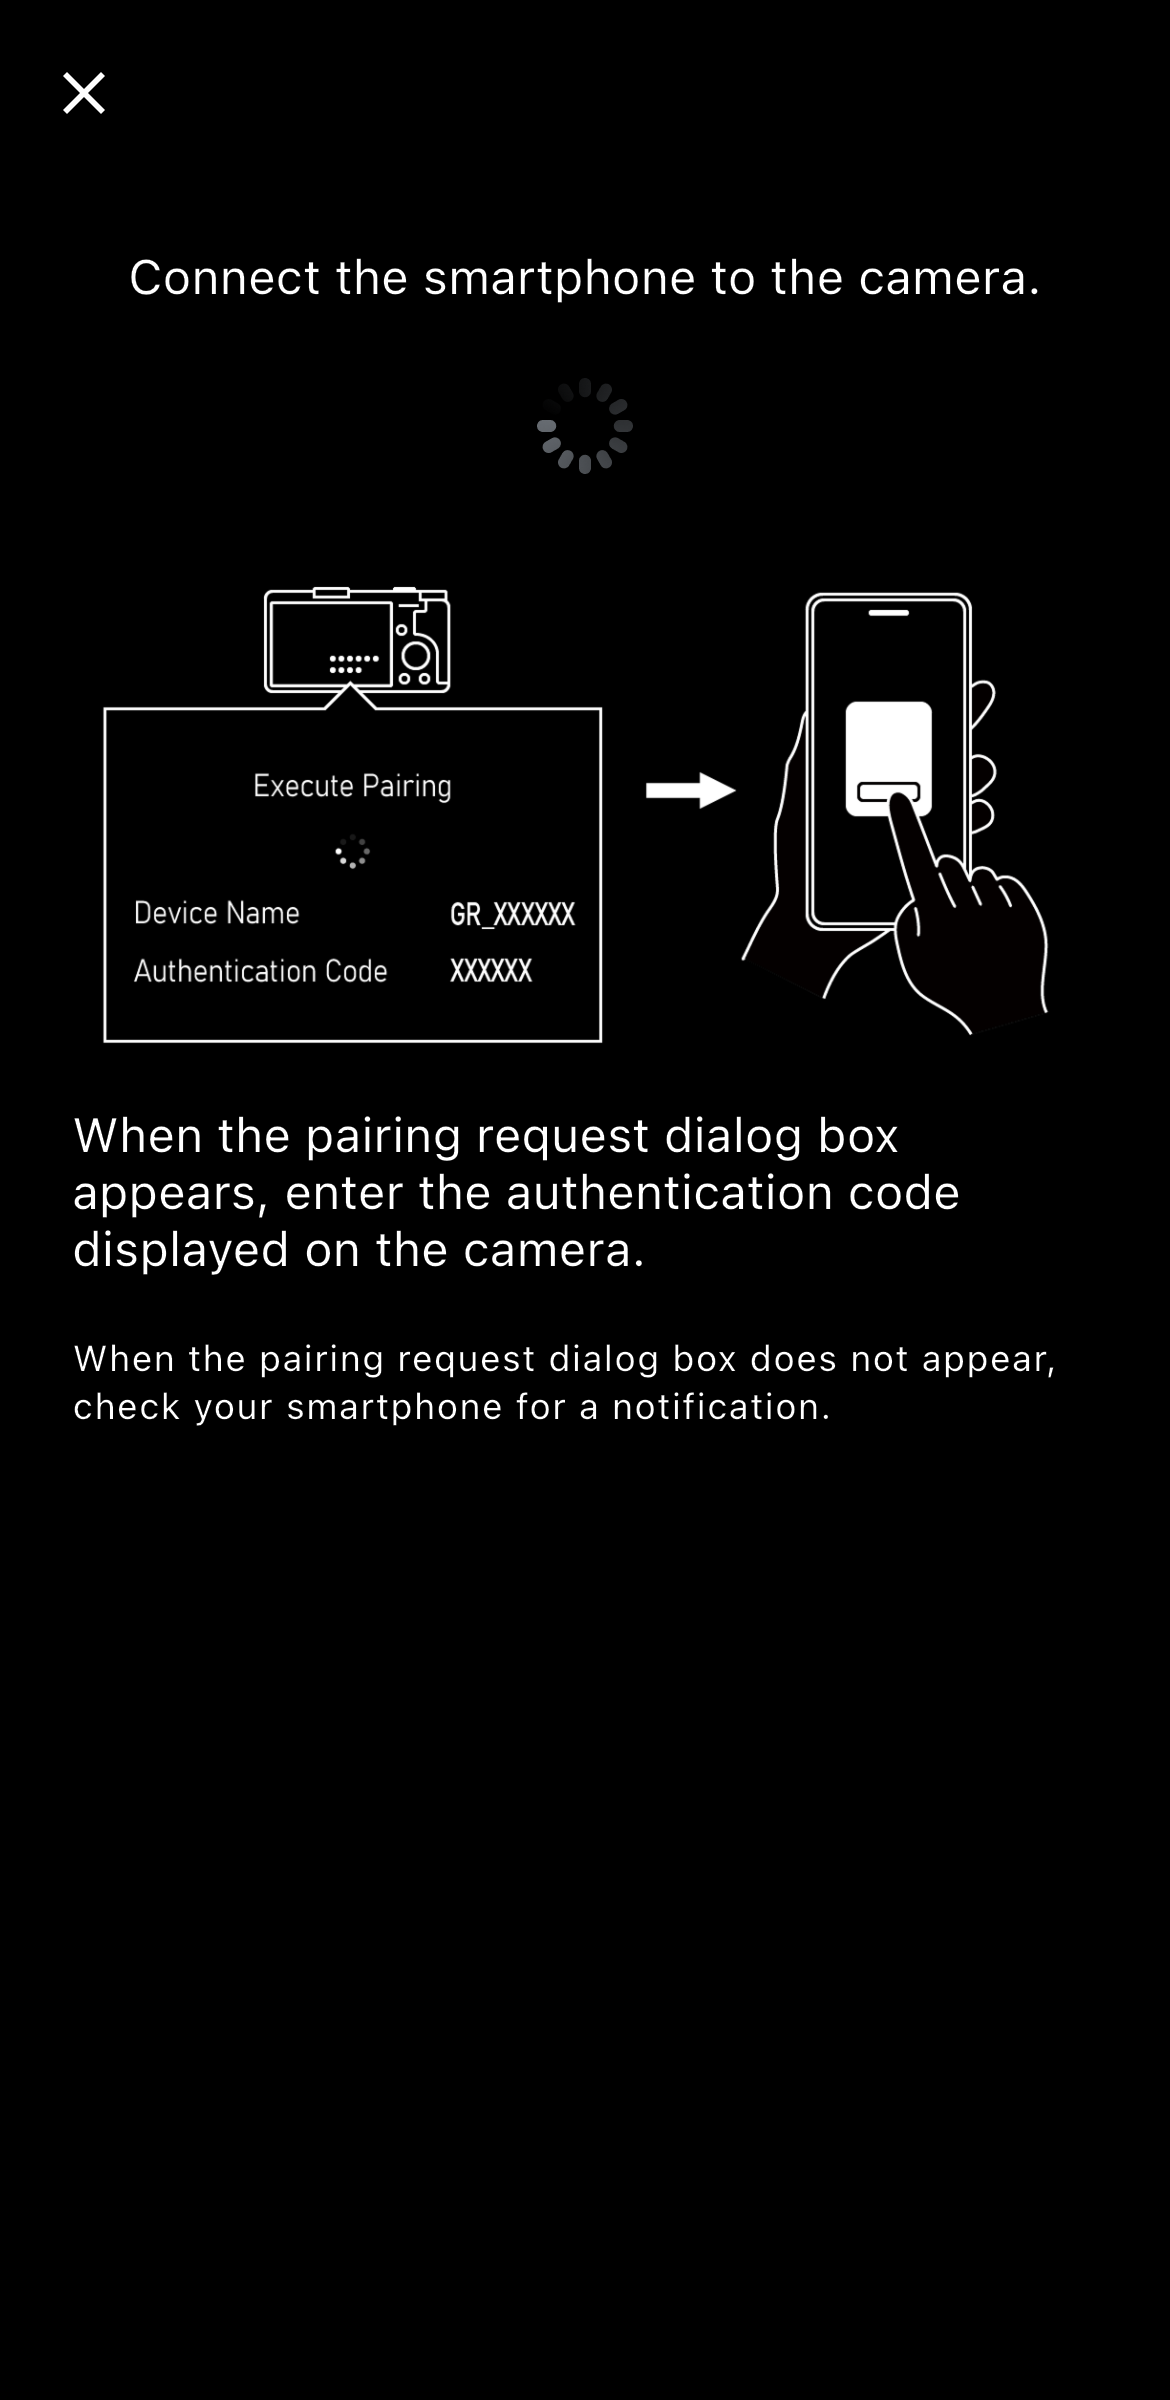
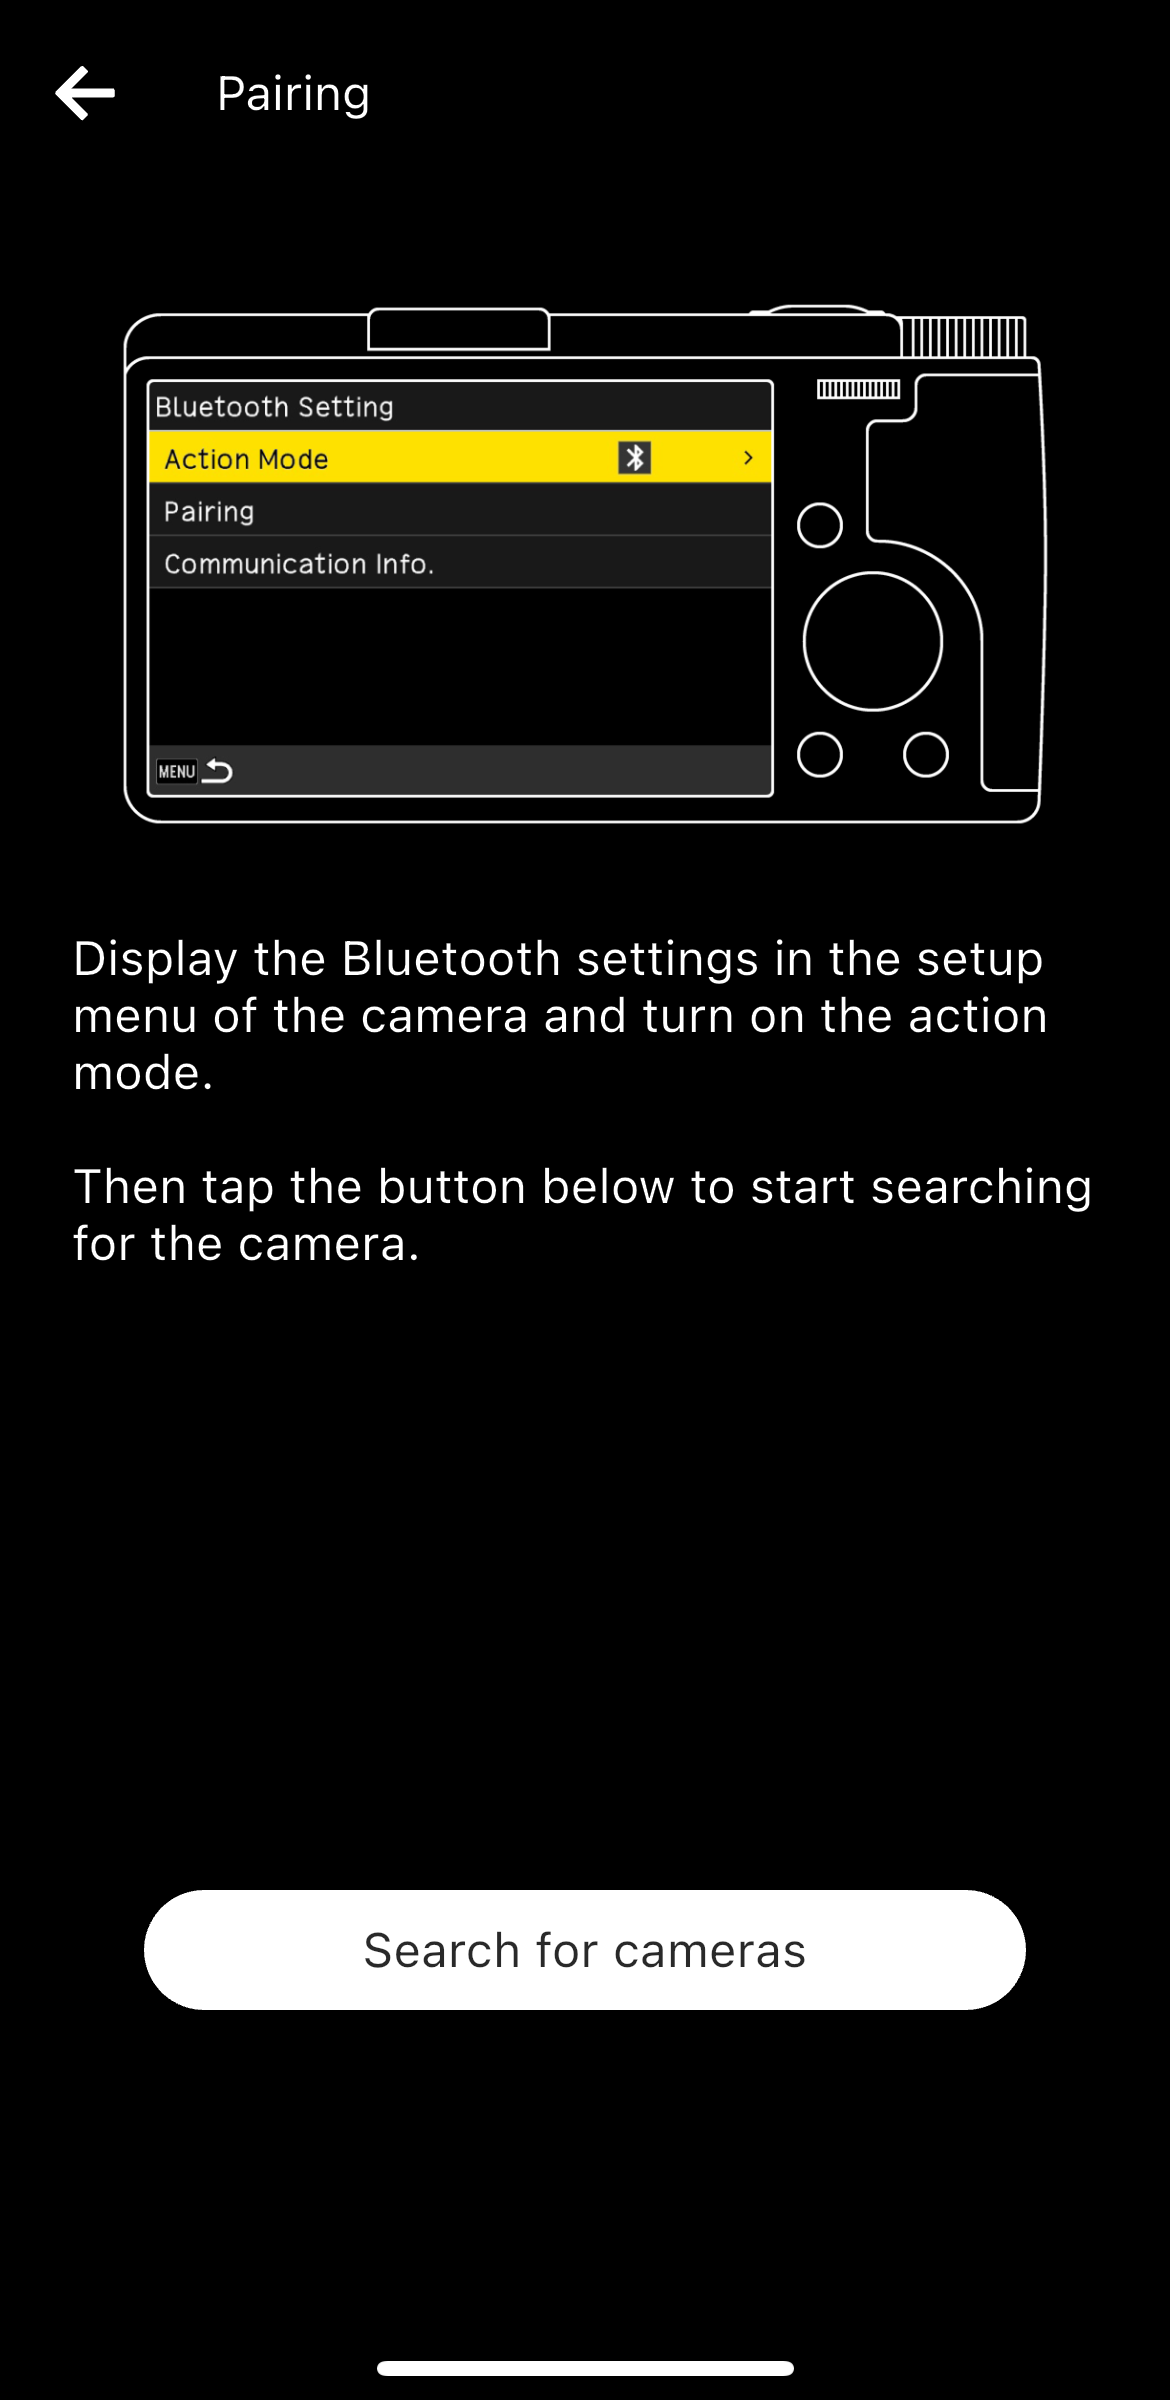
When the "Execute Pairing" message appears on the camera, tap "Search for cameras" in the app.
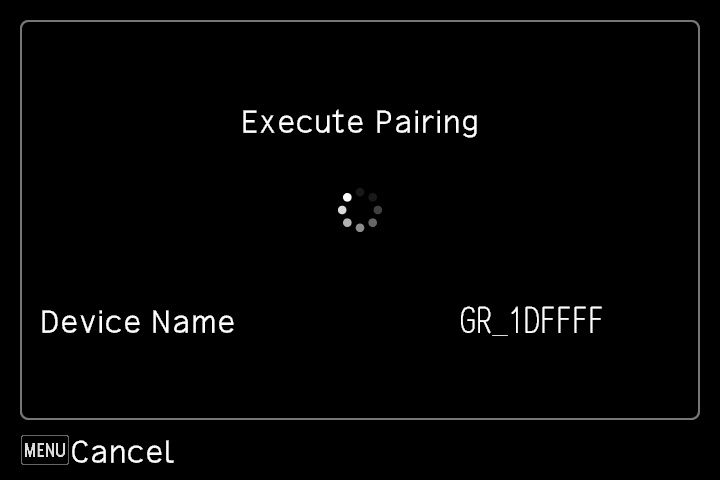
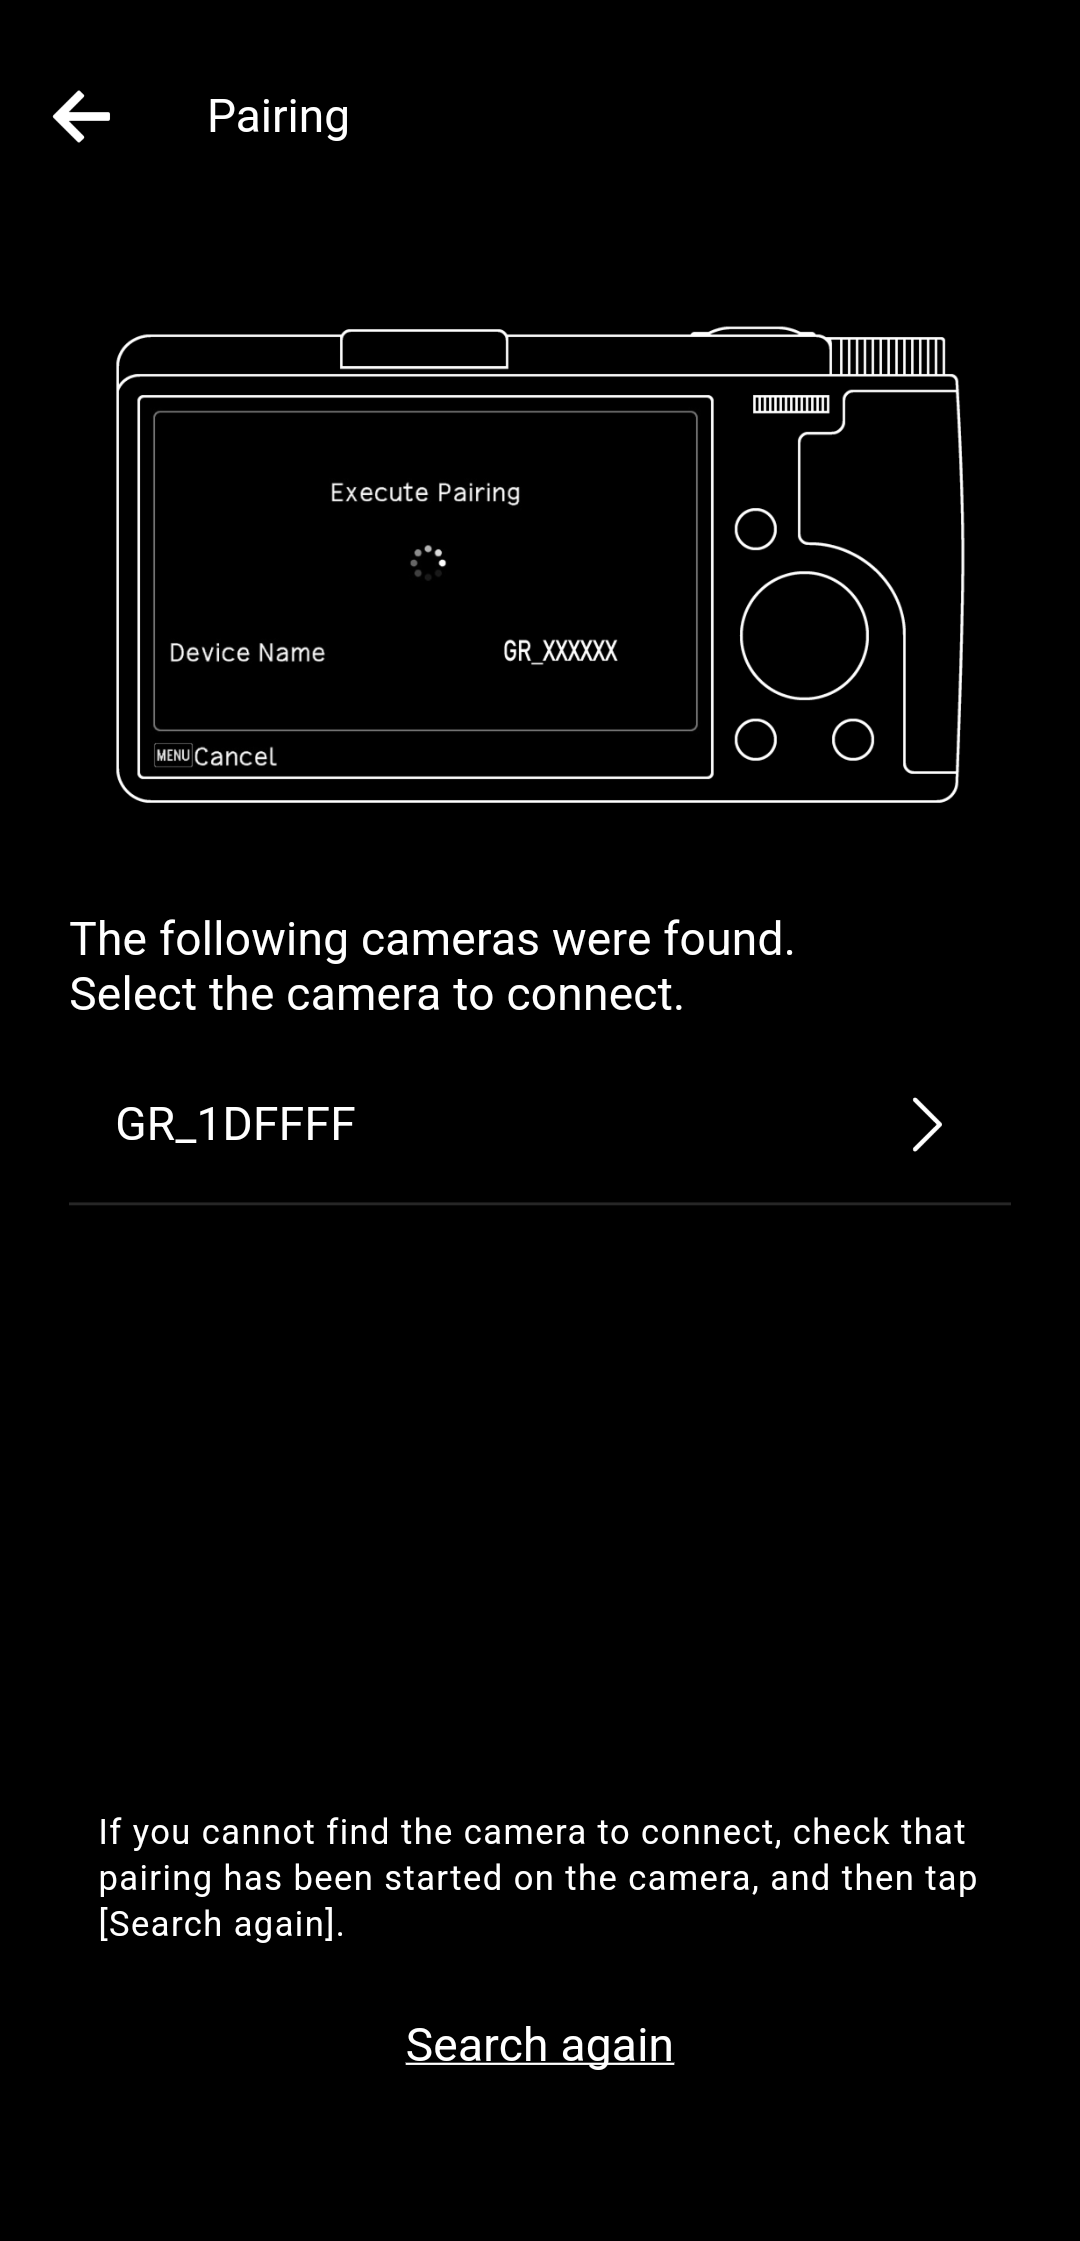
To check whether the displayed camera is your camera, check the device name displayed on the camera's "Execute Pairing" screen.

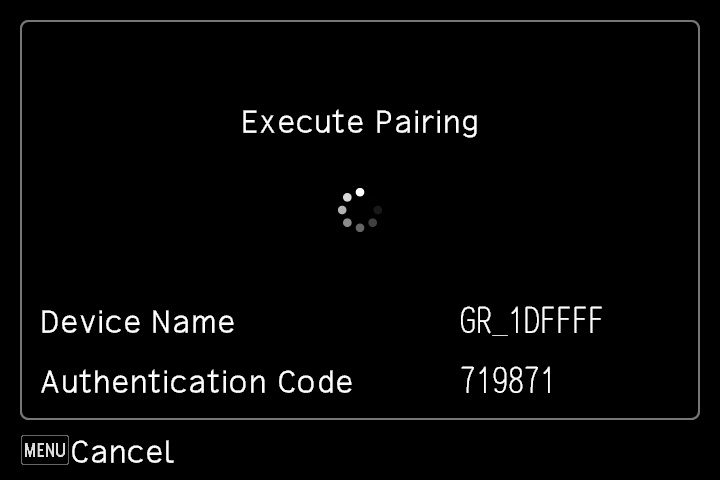
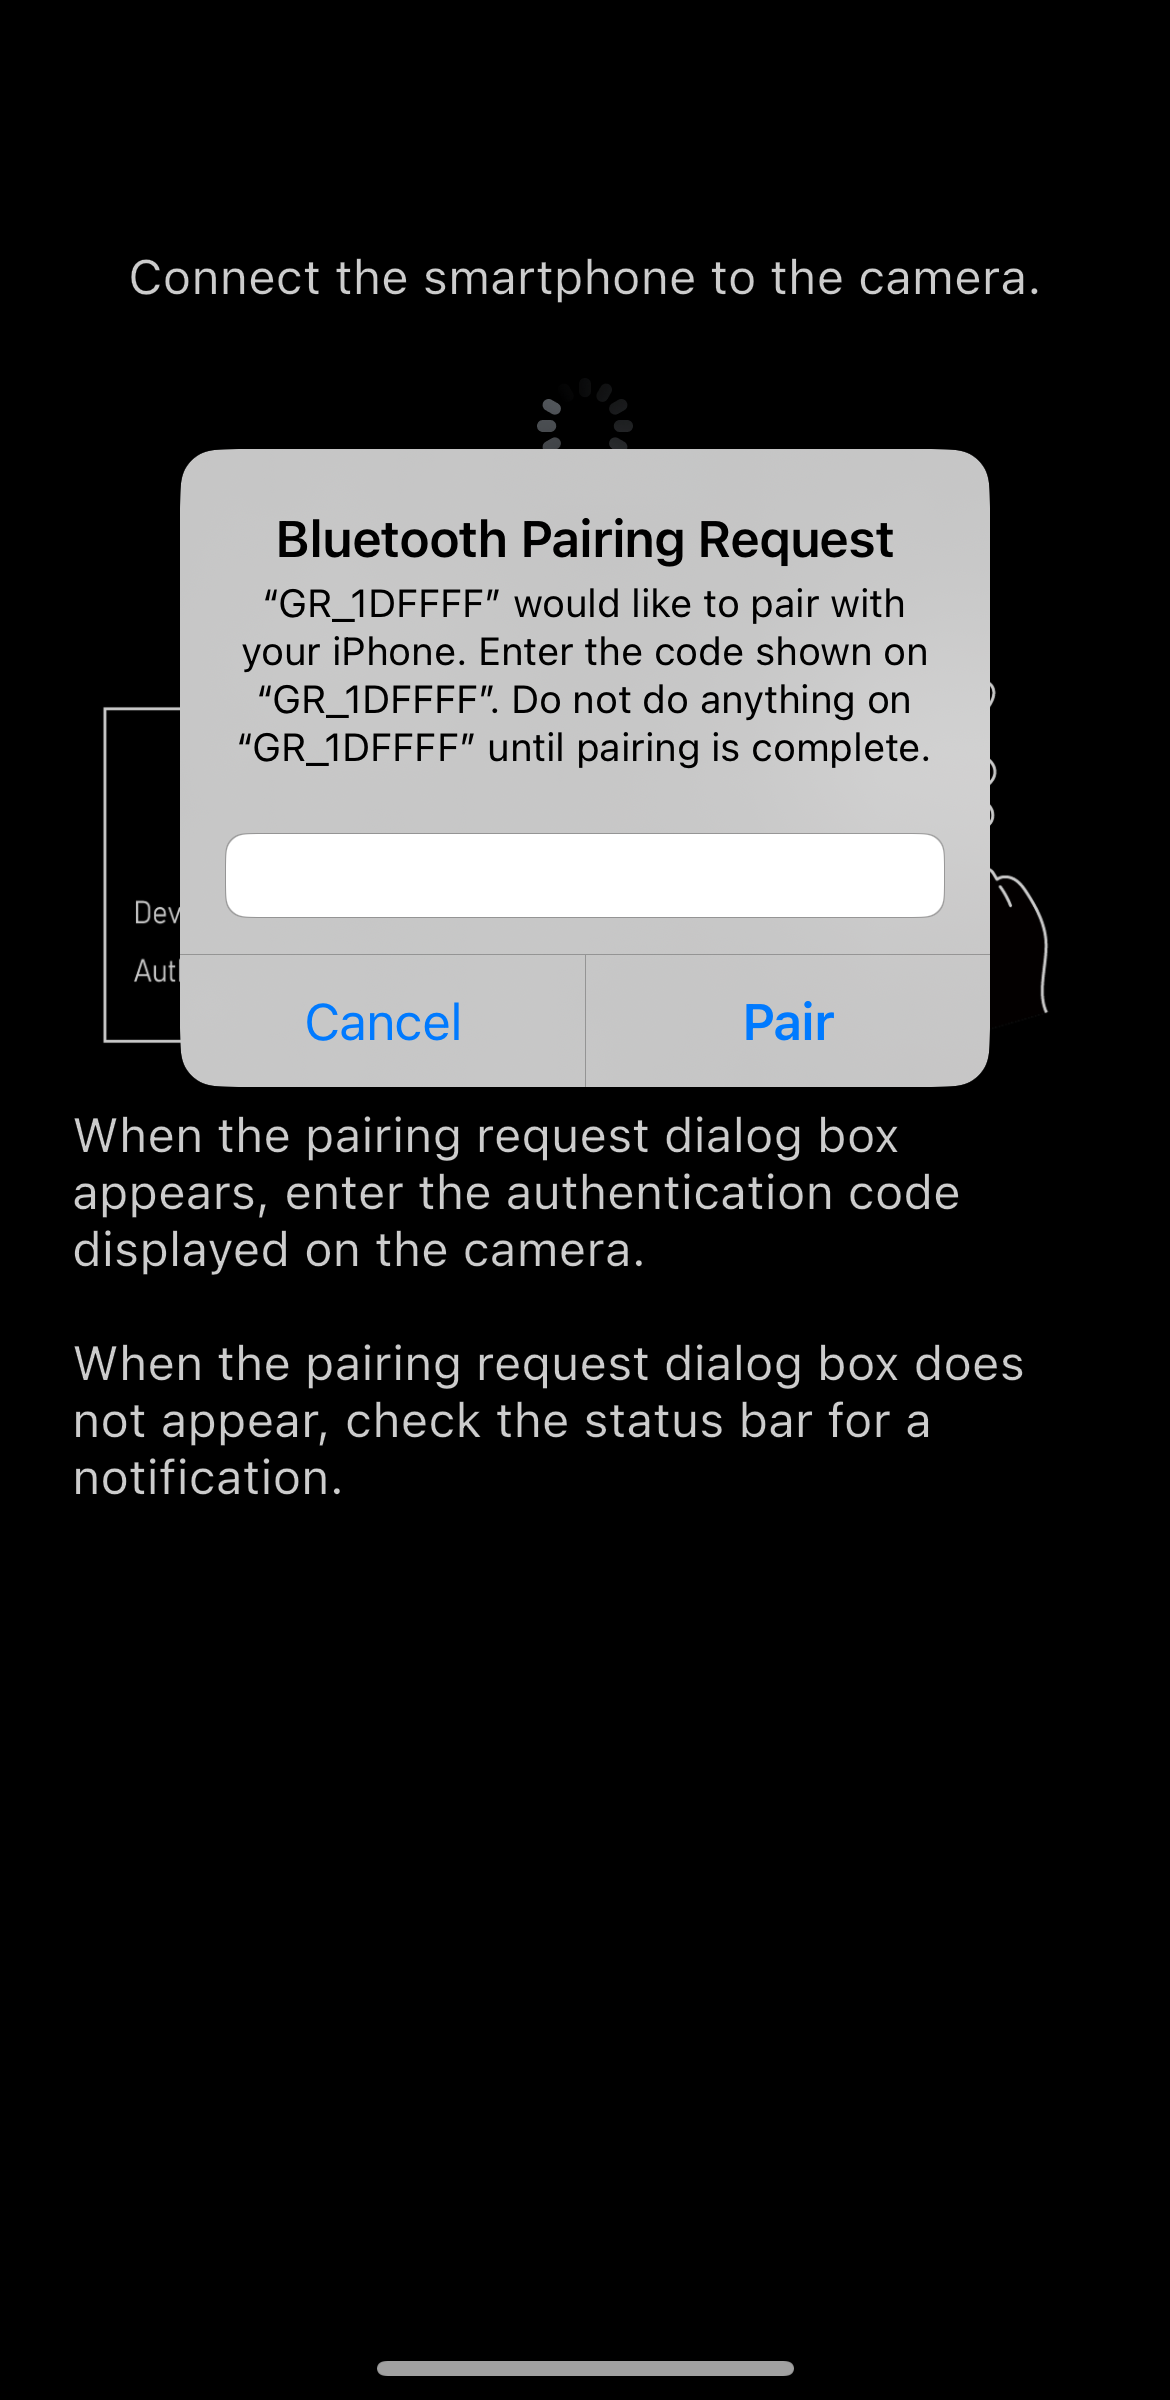
* If the authentication code entry screen is not displayed, there may be a notification in the notification area of your smartphone asking you to enter the authentication code. Check the notification area.
* Depending on the smartphone model and OS version, the screen design and displayed messages may differ slightly.

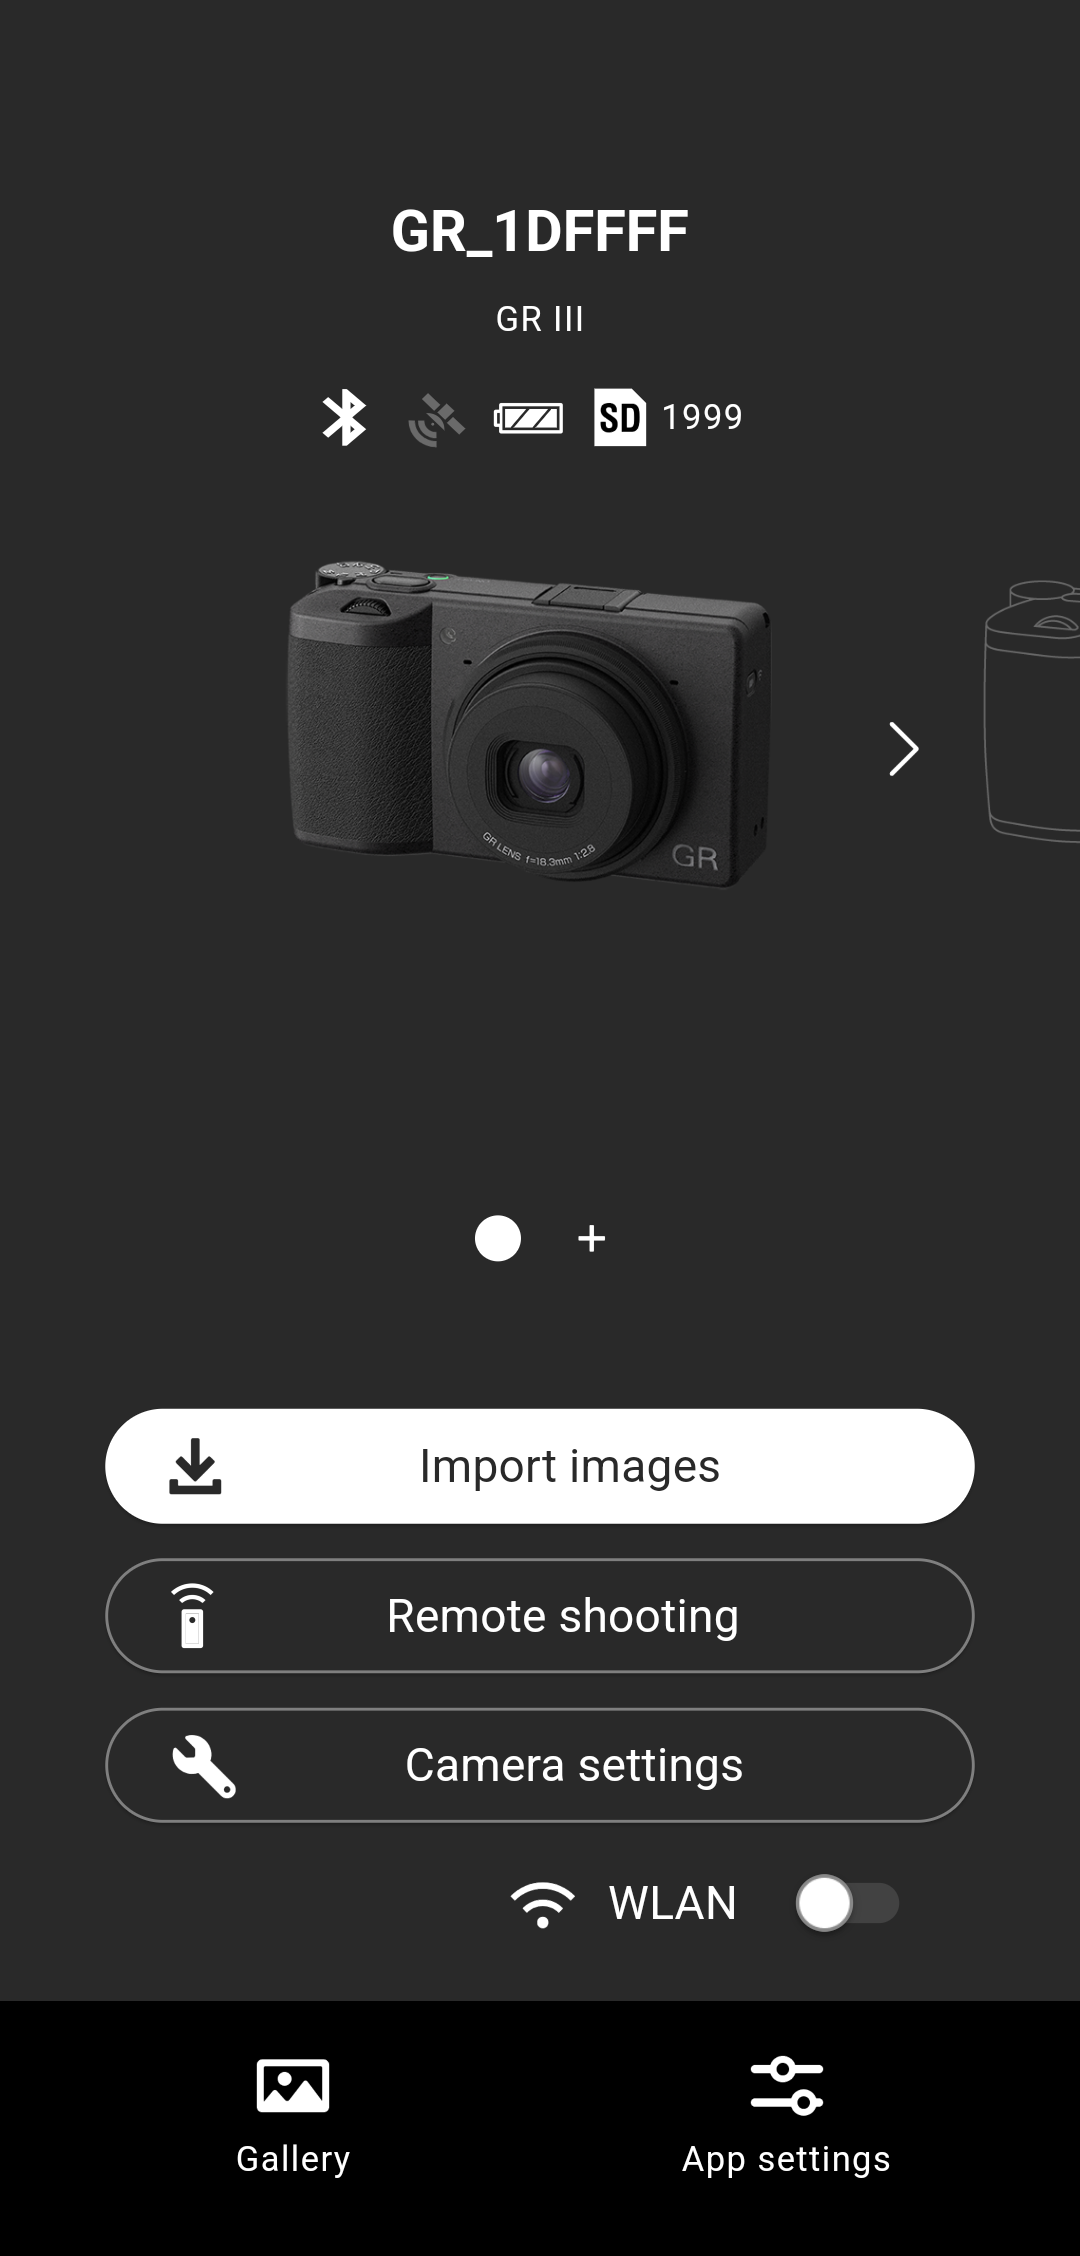
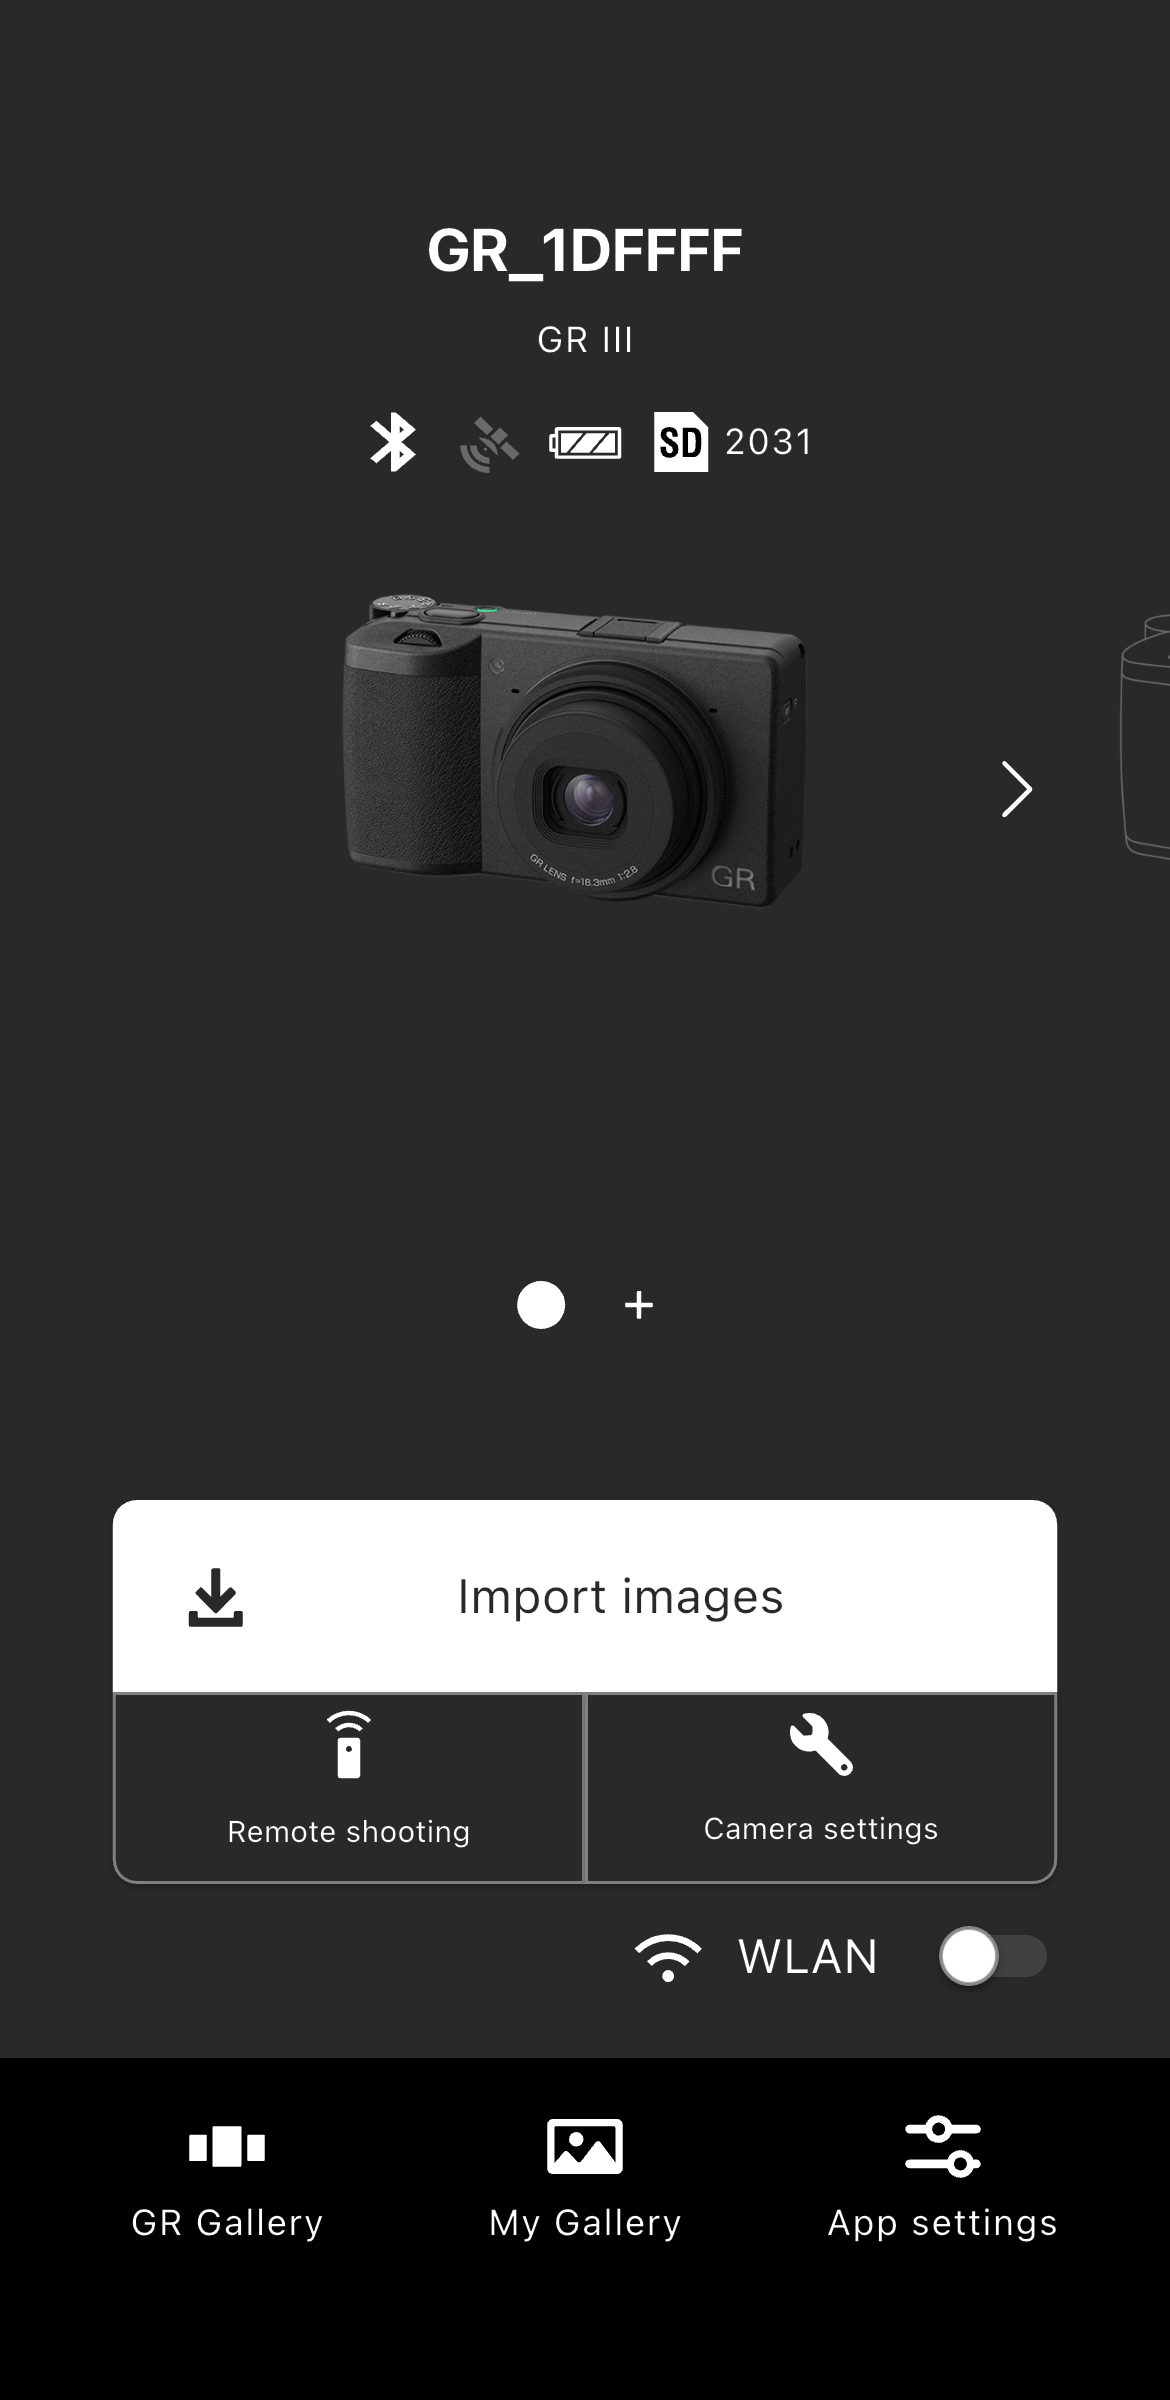
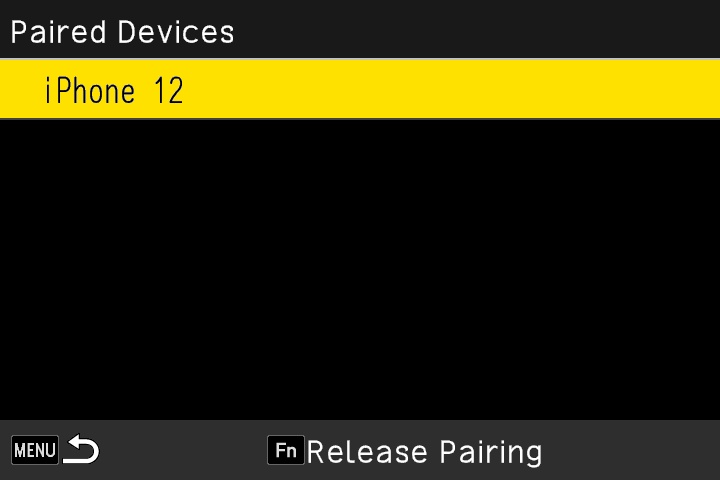
* Paired smartphones are registered to the camera.
Open "Bluetooth Settings" in the camera's setup menu, go to "Pairing" → "Paired Devices", and the registered smartphone will be displayed.
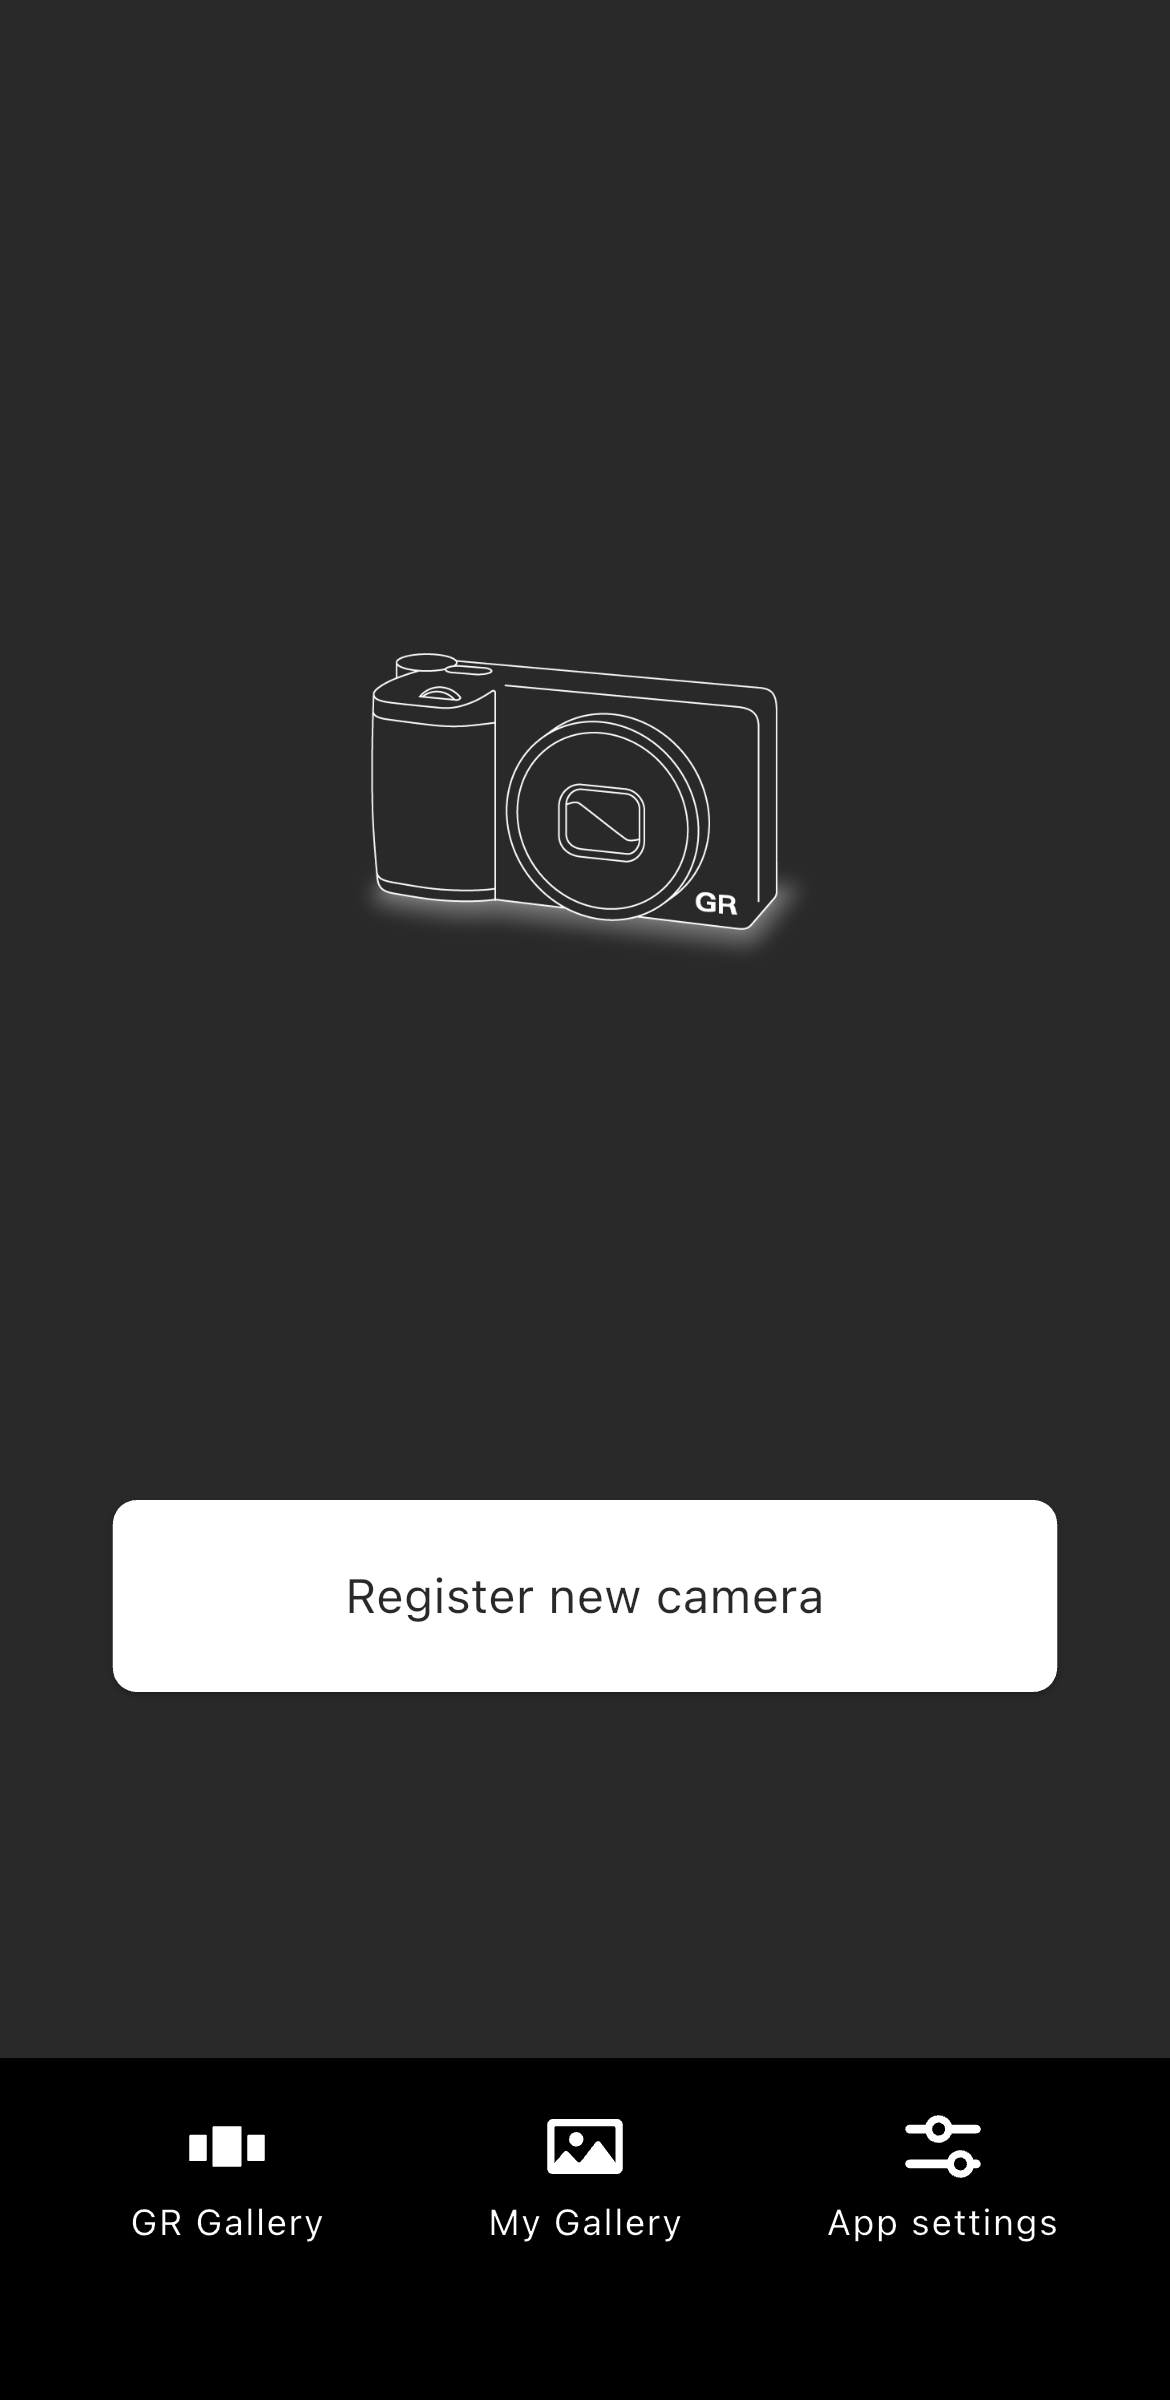
Tap "Register new camera".
* Please make sure that your smartphone's Bluetooth and location information are turned on.
If you are using GR III Street Edition / GR IIIx Urban Edition / GR III Diary Edition / GR III HDF / GR IIIx HDF, please choose this option.
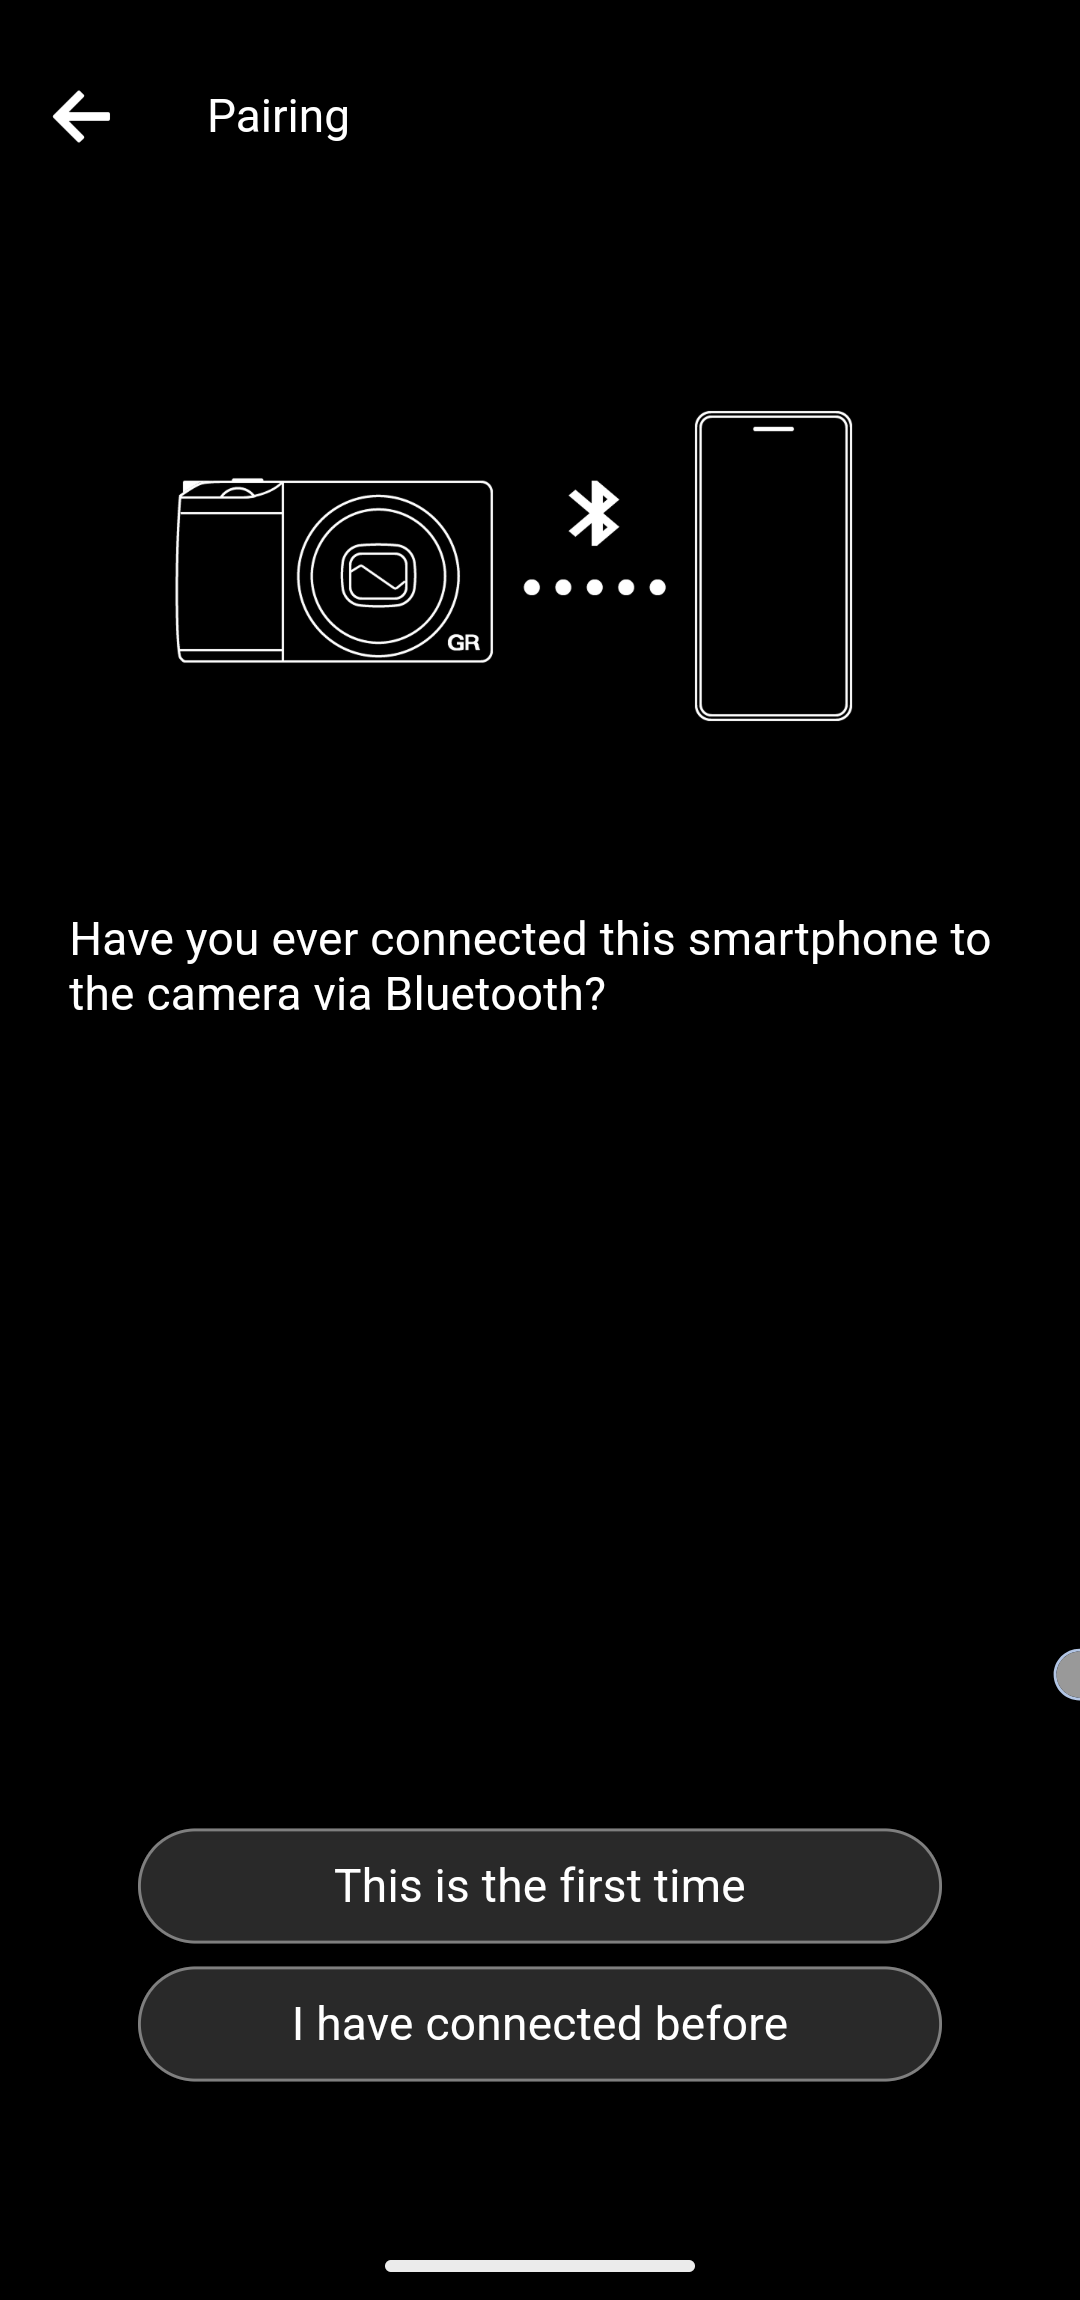
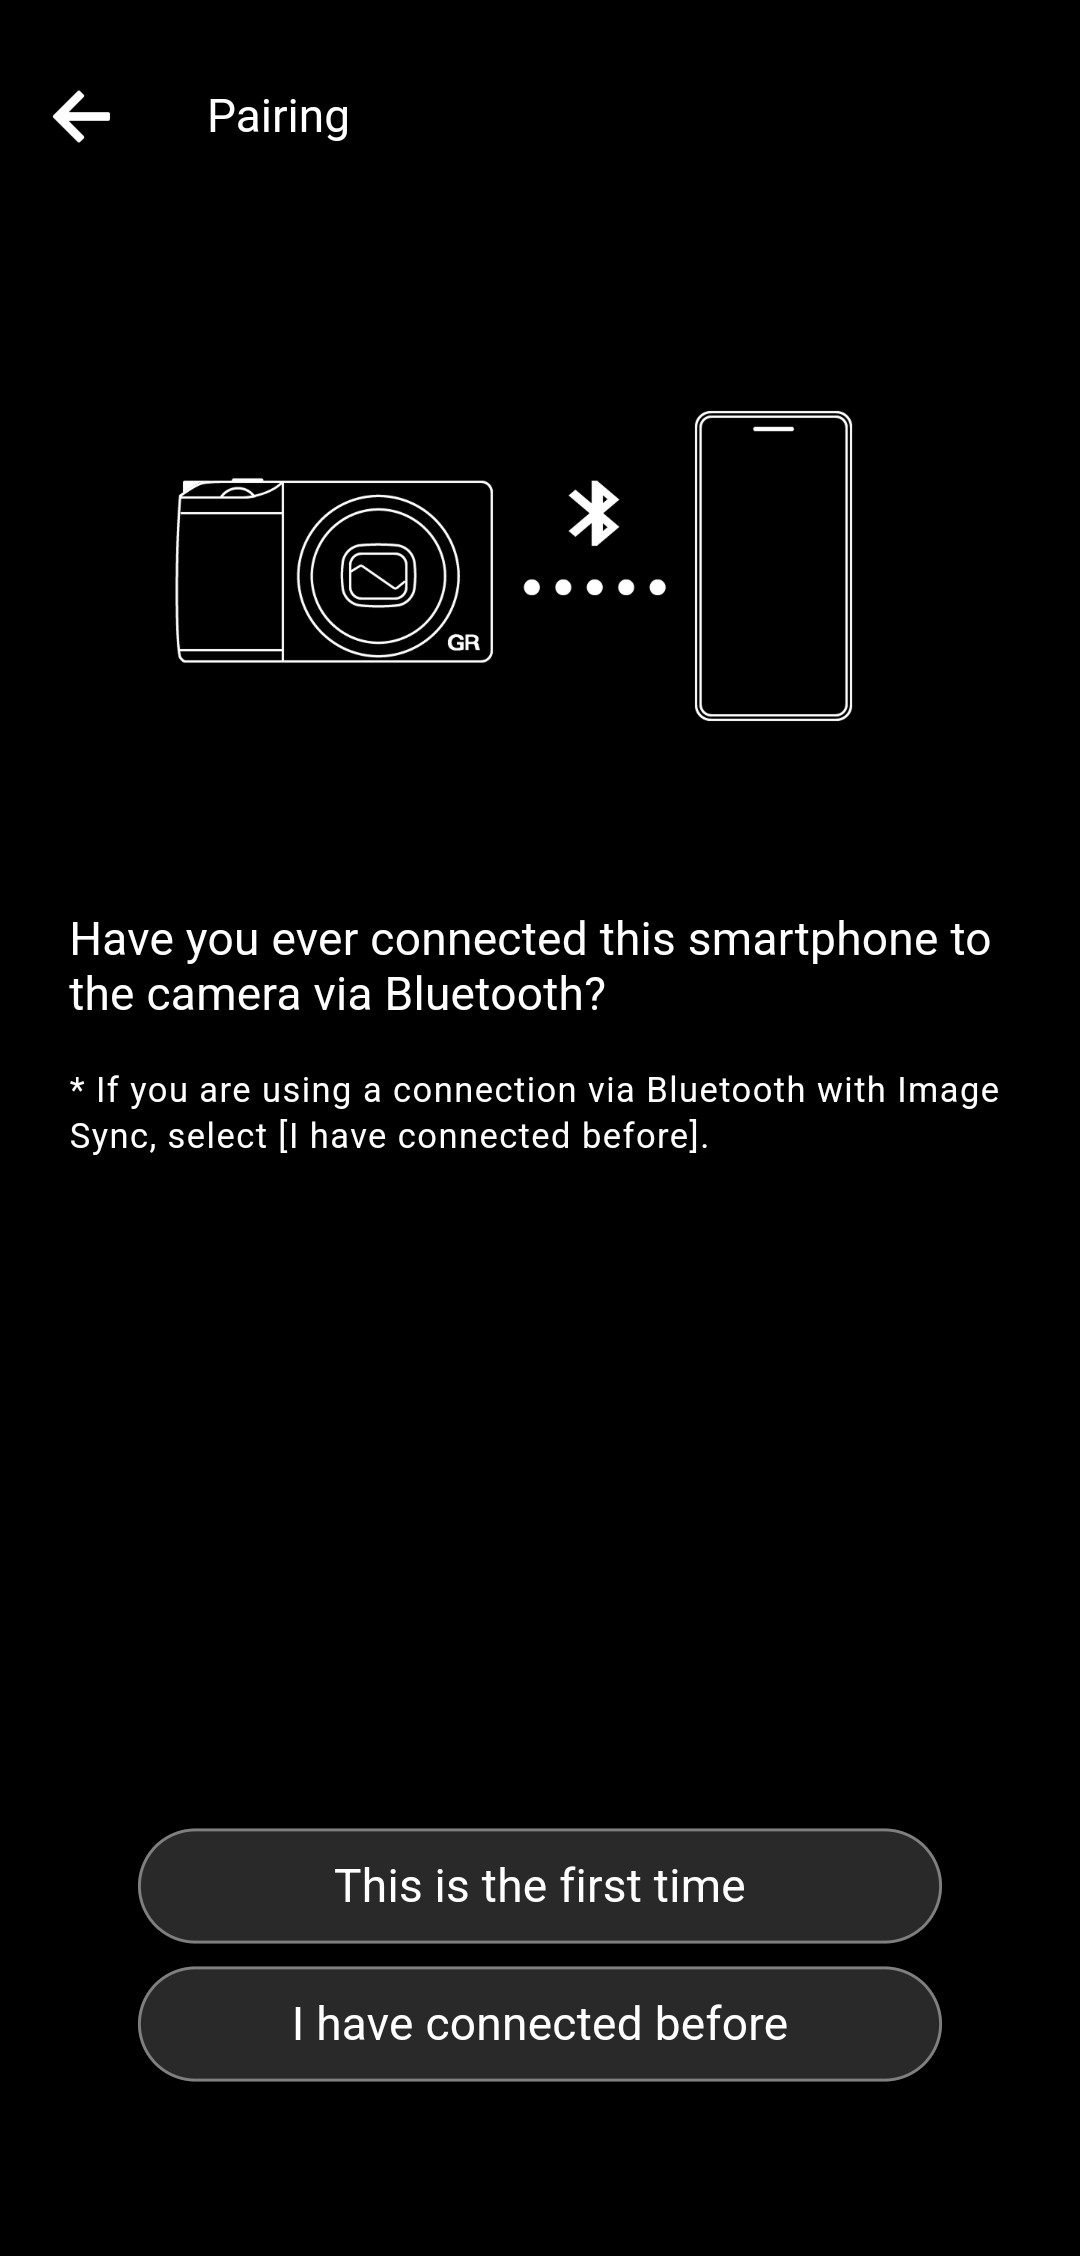
* If you are using Image Sync to connect to the camera via Bluetooth, select "I have connected before".
* If you are not sure if you have ever connected, please check the following two.
(1) Display the paired device from the camera's Bluetooth settings, and confirm that your smartphone is displayed.
(2) Display the Bluetooth settings screen of the smartphone and confirm that the device name of the camera is displayed in the list of paired devices.
If both are listed, select "Next".
If neither is displayed, go back to one screen and select "This is the first time".
If only one or the other is listed, select "Reconfigure connection".
After that, tap on "Search for cameras".


* If you have paired the smartphone and the camera once, the pairing settings at that time remain on the smartphone and camera, so use them to reconnect. Therefore, you do not need to enter an authentication code.
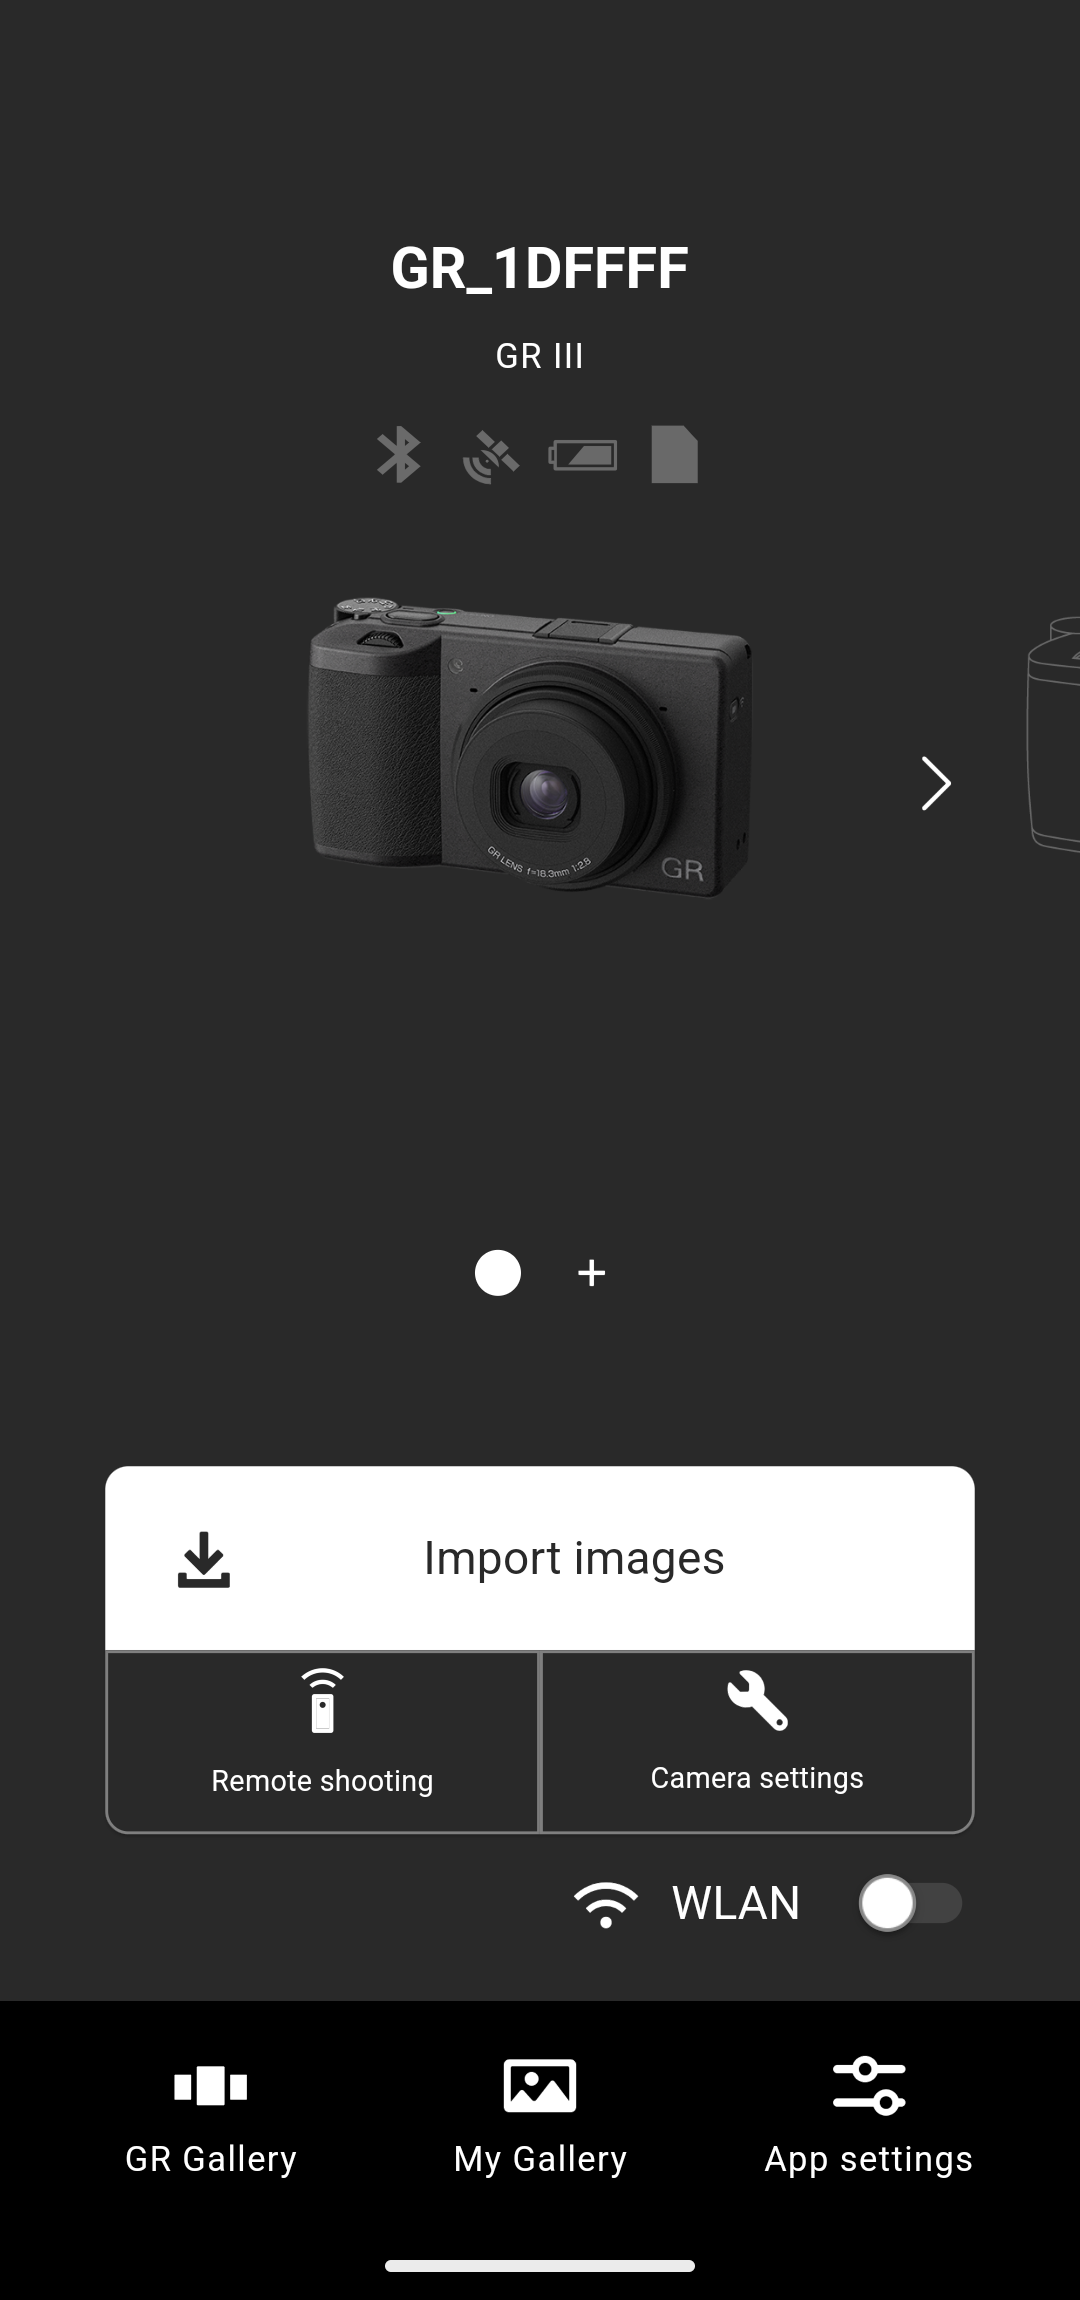
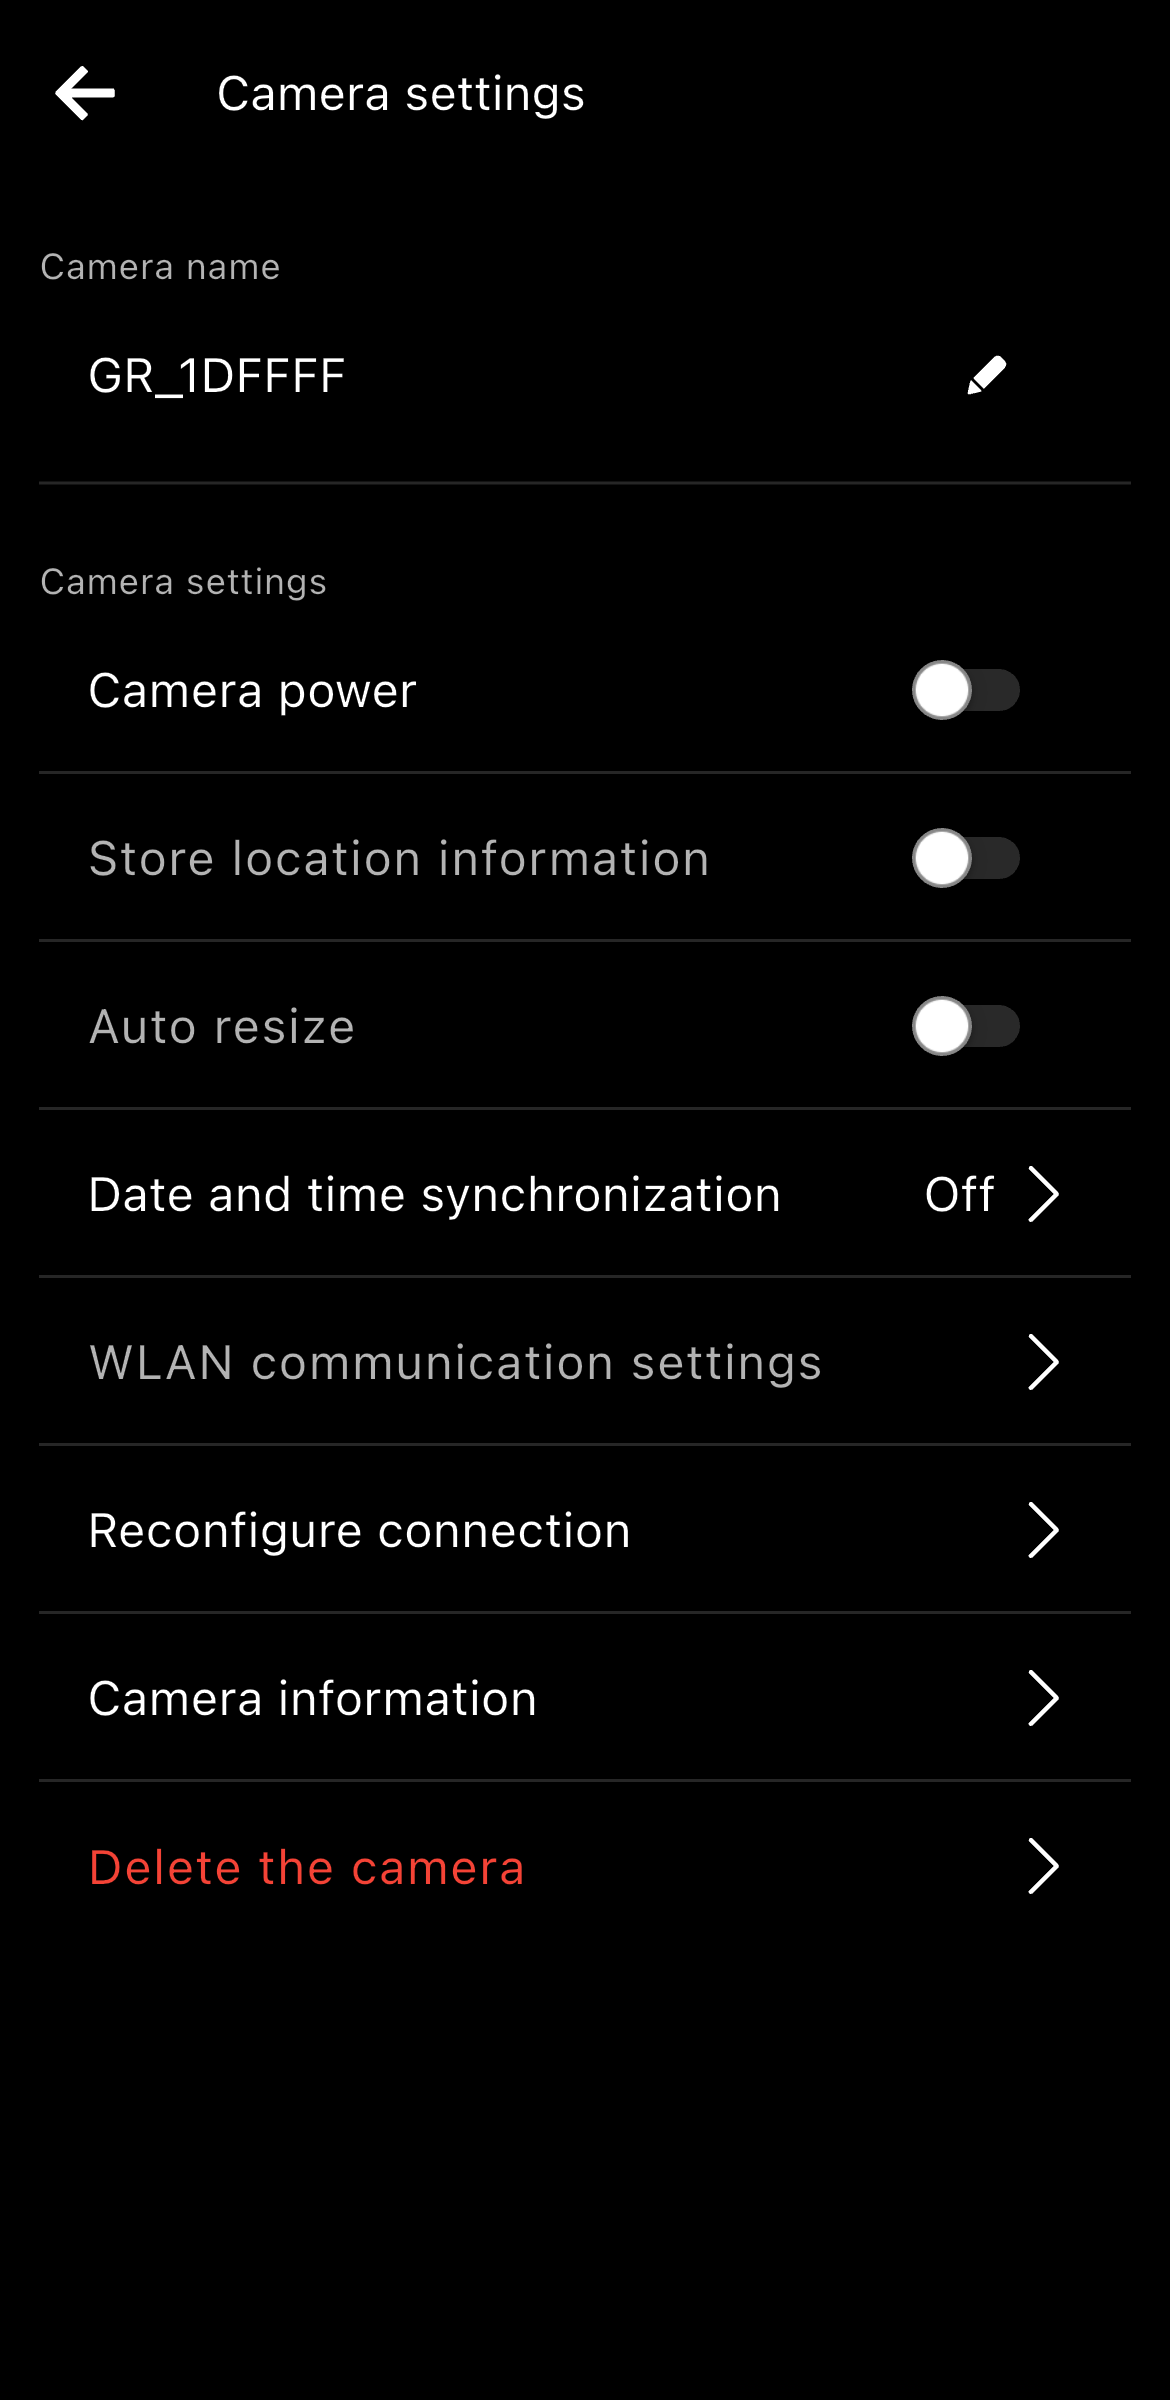
Tap "Camera Settings".
* Please make sure that your smartphone's Bluetooth and location information are turned on.

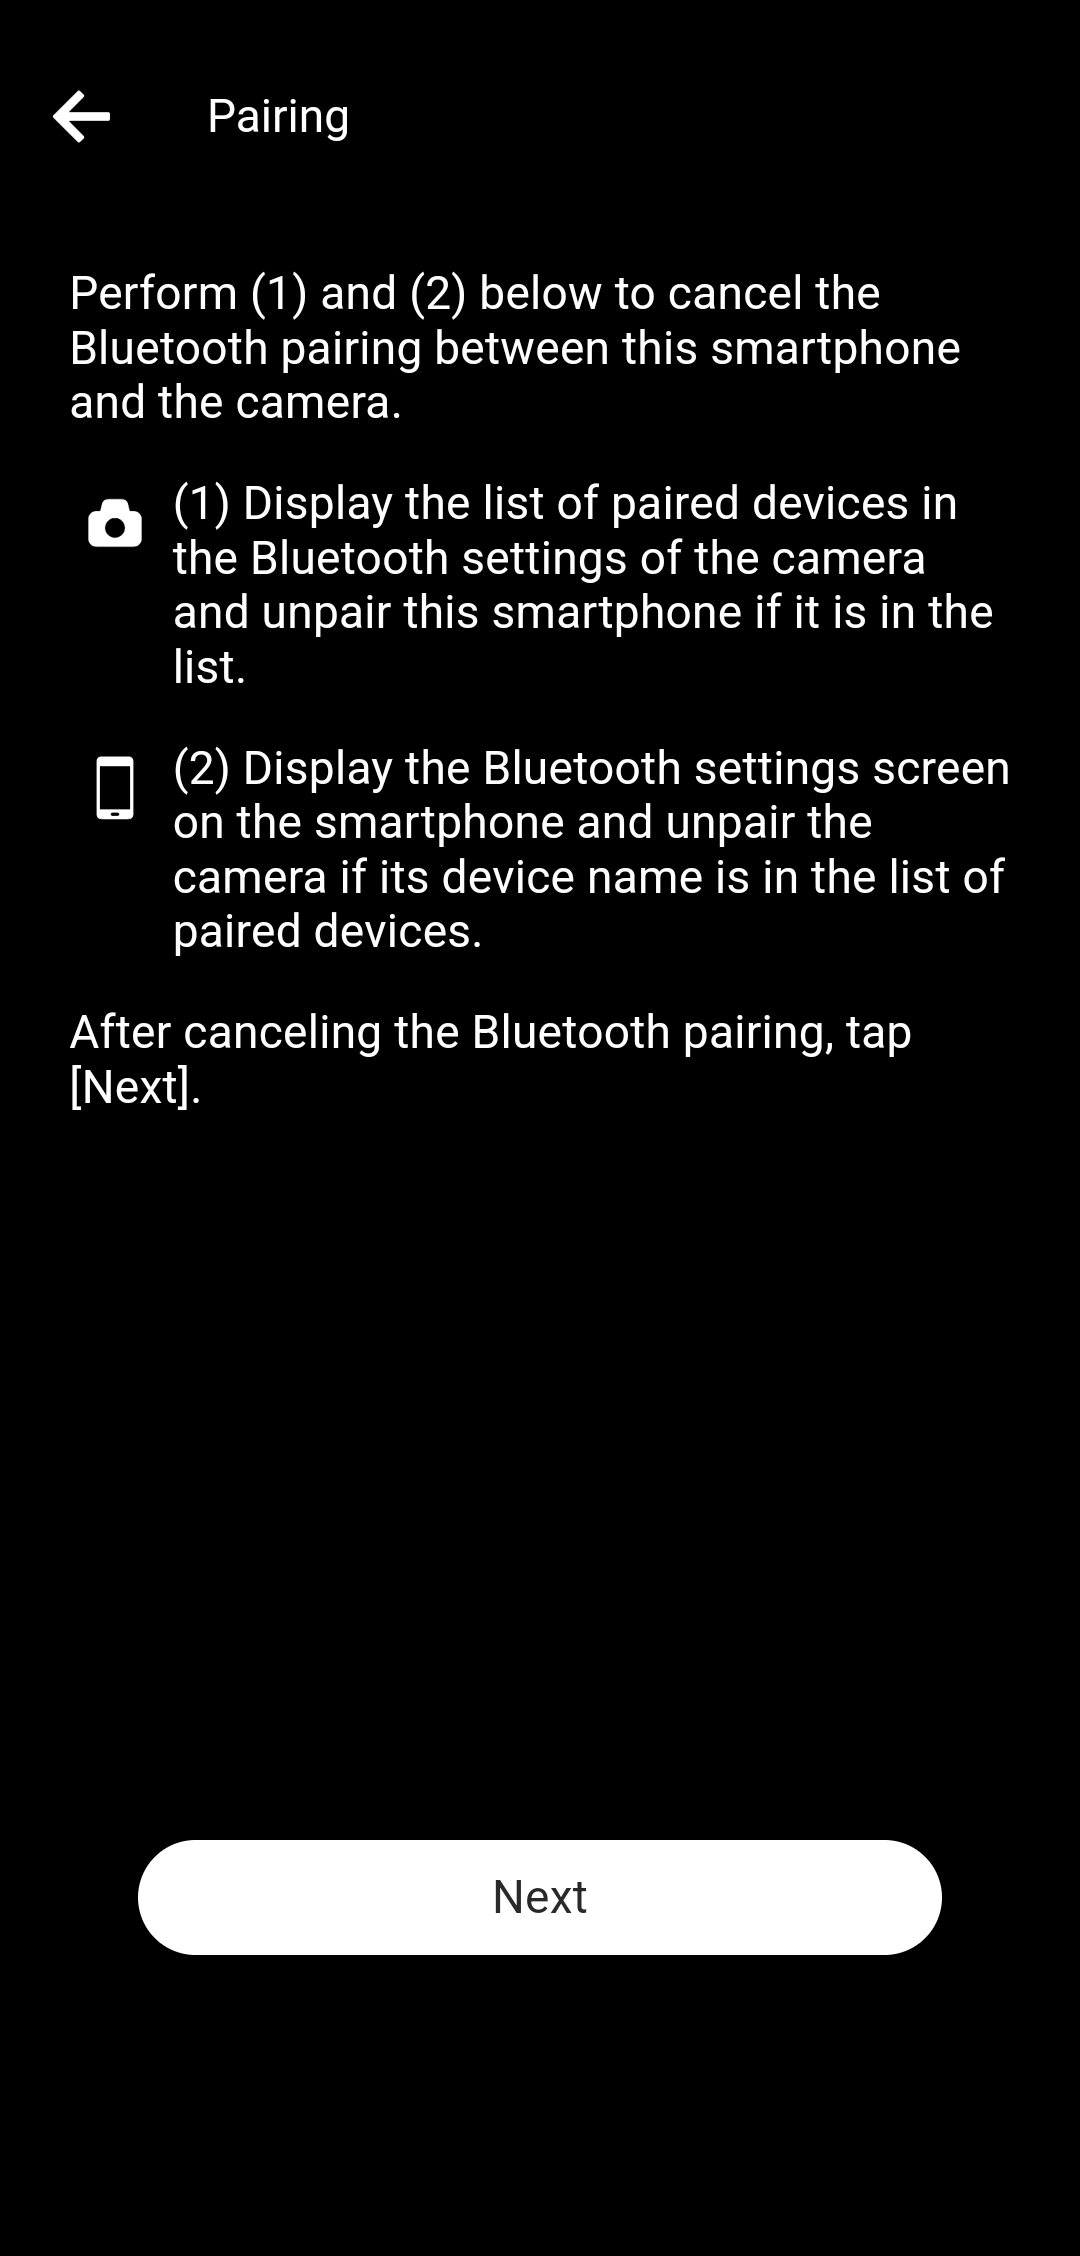
Perform (1) and (2) below to cancel the Bluetooth pairing between this smartphone and the camera.
(1) Display the list of paired devices in the Bluetooth settings of the camera and unpair this smartphone if it is in the list.
(2) Display the Bluetooth settings screen on the smartphone and unpair the camera if its device name is in the list of paired devices.
After canceling the Bluetooth pairing, tap "Next".
After that, tap on "Search for cameras".
To check whether the displayed camera is your camera, check the device name displayed on the camera's "Execute Pairing" screen.
* If the authentication code entry screen is not displayed, there may be a notification in the notification area of your smartphone asking you to enter the authentication code. Check the notification area.
* Depending on the smartphone model and OS version, the screen design and displayed messages may differ slightly.

* Please make sure that your smartphone's Bluetooth and location information are turned on.
If you are using GR III Street Edition / GR IIIx Urban Edition / GR III Diary Edition / GR III HDF / GR IIIx HDF, please choose this option.
* By allowing this permission, your smartphone will be able to find and connect to nearby cameras. If you do not allow it, you will not be able to connect to the camera, and you will not be able to use functions such as image import and remote shooting.
* Depending on the smartphone model and OS version, the screen design and displayed messages may differ slightly.
The firmware versions that can be used with this application are as follows.
・GR III / GR III HDF: V2.00 or later
・GR IIIx / GR IIIx HDF: V1.50 or later
Please note that you will not be able to connect to a camera with an older firmware version, which will result in an error.
For details on how to update the camera's firmware, please click here.
・GR III / GR III HDF
https://www.ricoh-imaging.co.jp/english/support/digital/gr3_s.html
・GR IIIx/ GR IIIxHDF
https://www.ricoh-imaging.co.jp/english/support/digital/gr3x_s.html
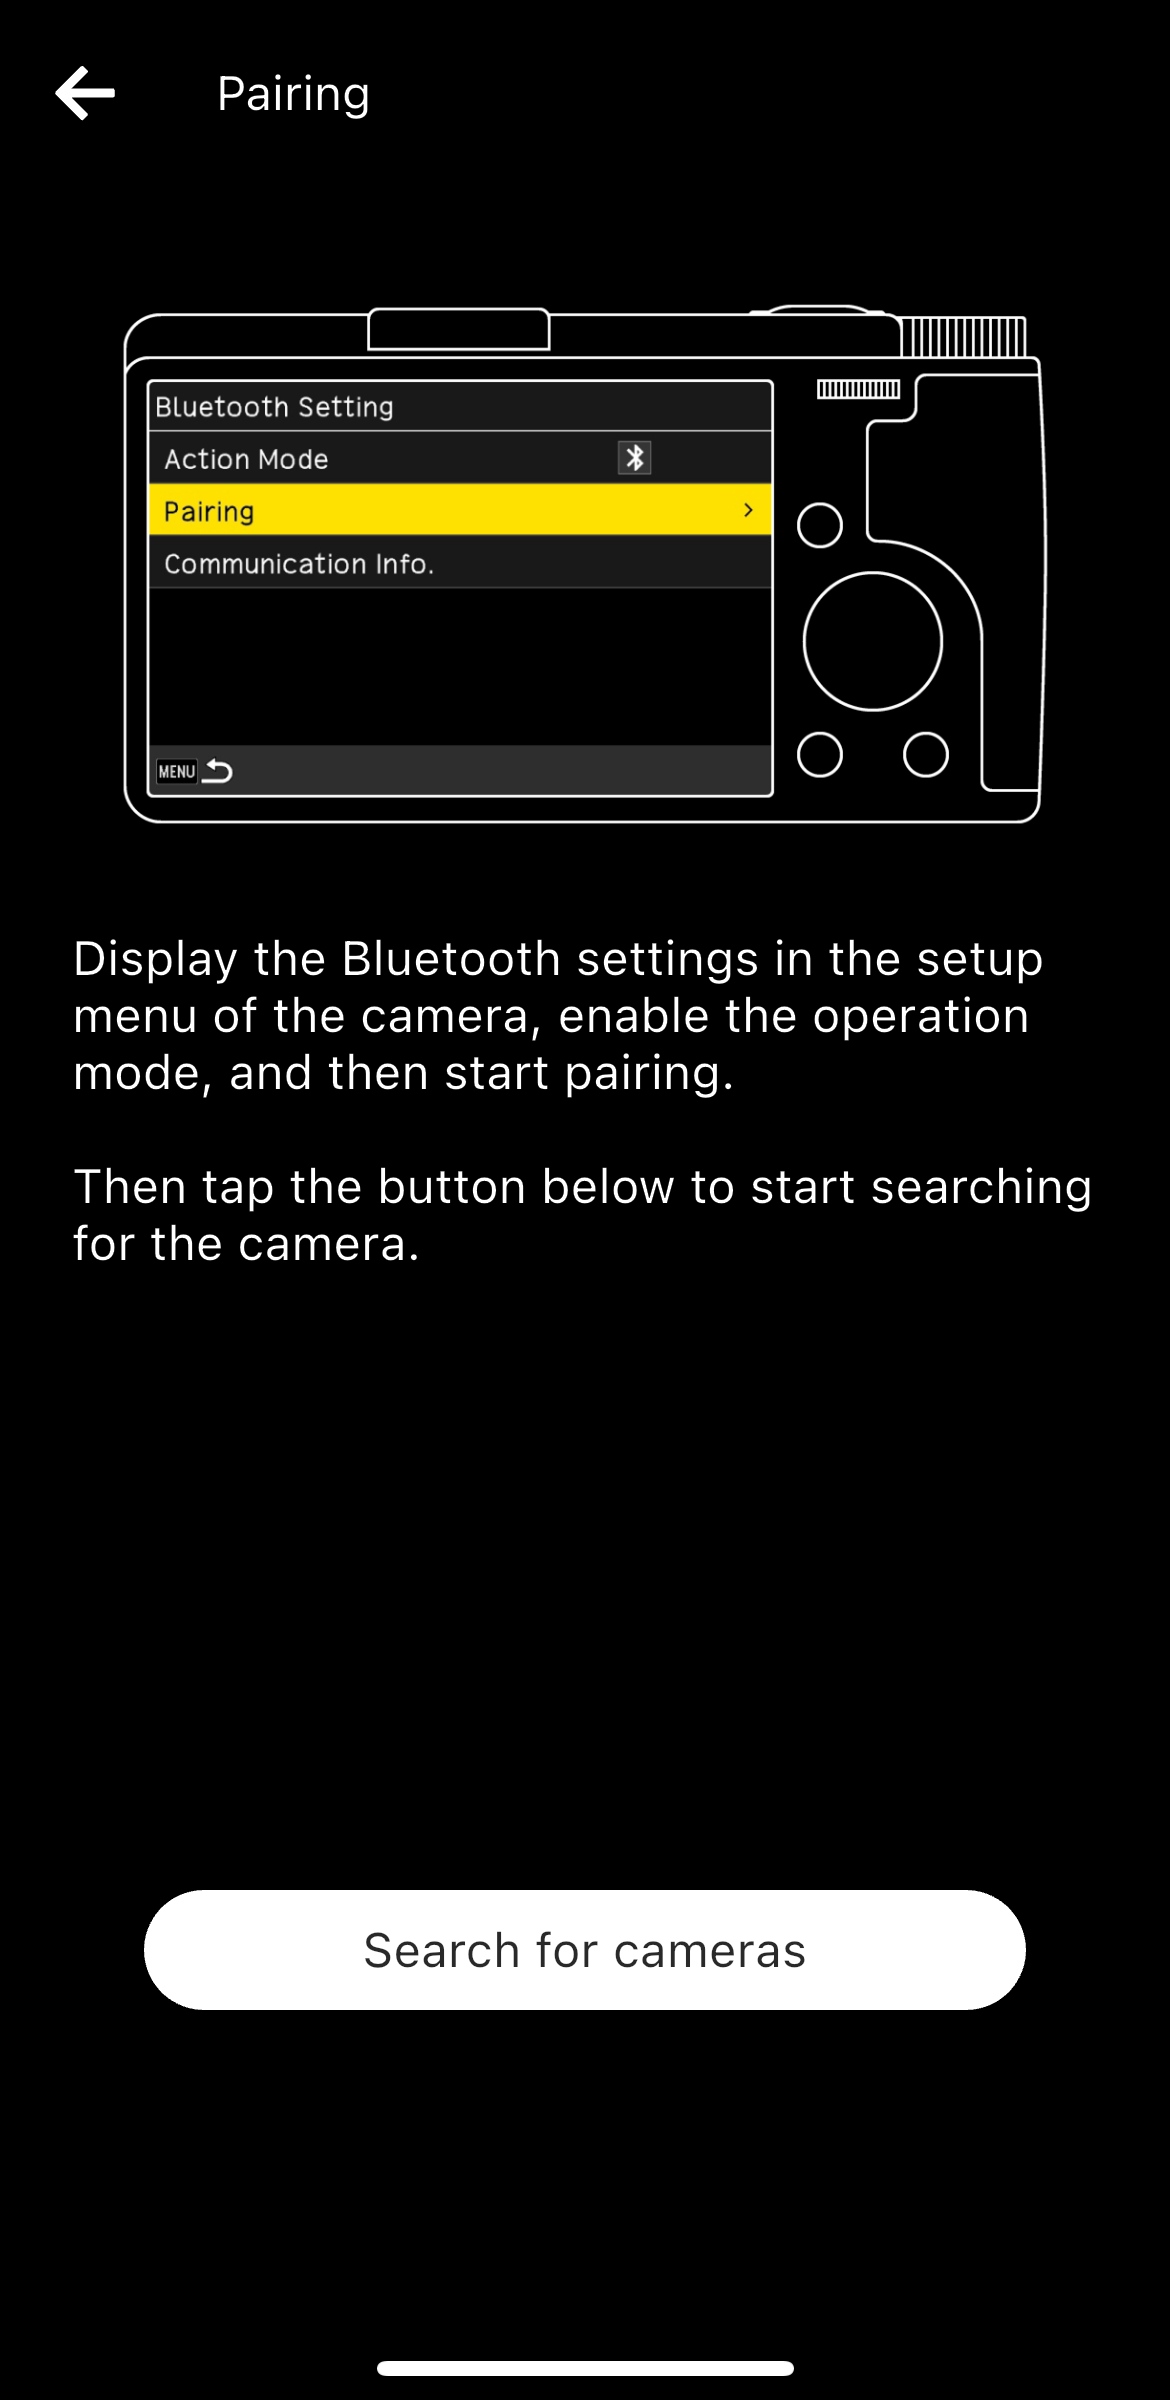
When the "Excute Pairing" message appears on the camera, tap "Search for cameras" in the app.
To check whether the displayed camera is your camera, check the device name displayed on the camera’s "Execute Pairing" screen.
* If the authentication code entry screen is not displayed, there may be a notification in the notification area of your smartphone asking you to enter the authentication code. Check the notification area.

* Paired smartphones are registered to the camera.
Open "Bluetooth Settings" in the camera's setup menu, go to "Pairing" → "Paired Devices", and the registered smartphone will be displayed.
Tap "Register new camera".
* Please make sure that your smartphone's Bluetooth and location information are turned on.
If you are using GR III Street Edition / GR IIIx Urban Edition / GR III Diary Edition / GR III HDF / GR IIIx HDF, please choose this option.
* If you are using Image Sync to connect to the camera via Bluetooth, select "I have been connected".
* If you are not sure if you have ever connected, please check the following two.
(1) Display the paired device from the camera's Bluetooth settings, and confirm that your smartphone is displayed.
(2) Display the Bluetooth settings screen of the smartphone and confirm that the device name of the camera is displayed in the list of paired devices.
If both are listed, select "Next".
If neither is displayed, go back to one screen and select "This is the first time".
If only one or the other is listed, select "Reconfigure connection".
After that, tap on "Search for cameras".
* If you have paired the smartphone and the camera once, the pairing settings at that time remain on the smartphone and camera, so use them to reconnect. Therefore, you do not need to enter an authorization code.
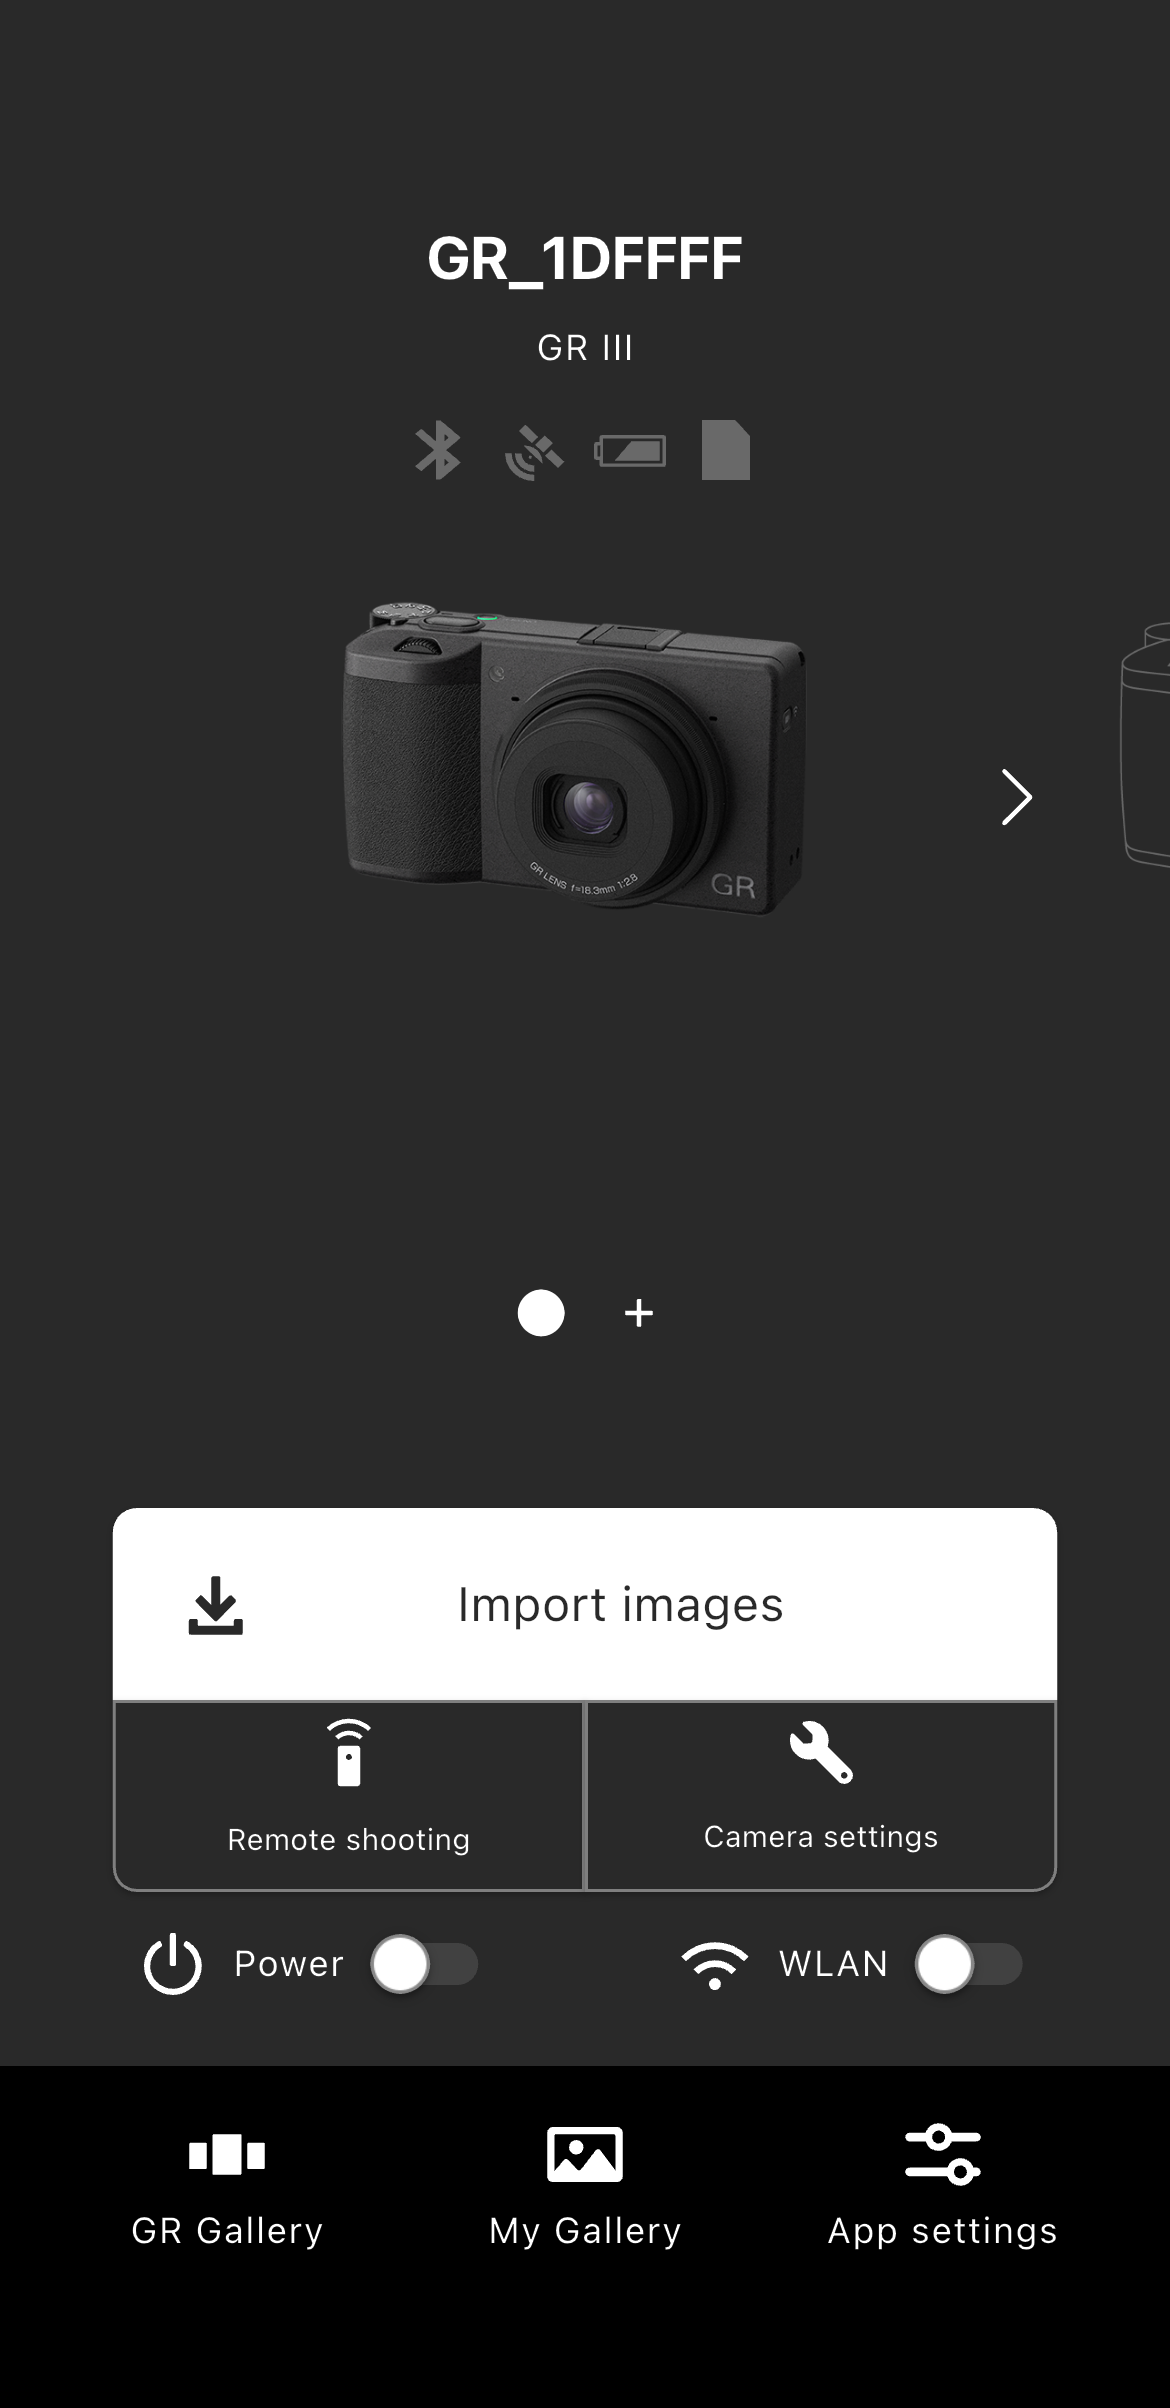
Tap "Camera Settings".
* Please make sure that your smartphone's Bluetooth and location information are turned on.
Perform (1) and (2) below to cancel the Bluetooth pairing between this smartphone and the camera.
(1) Display the list of paired devices in the Bluetooth settings of the camera and unpair this smartphone if it is in the list.
(2) Display the Bluetooth settings screen on the smartphone and unpair the camera if its device name is in the list of paired devices.
After canceling the Bluetooth pairing, tap "Next".
After that, tap on "Search for cameras".
To check whether the displayed camera is your camera, check the device name displayed on the camera's "Execute Pairing" screen.
* If the authentication code entry screen is not displayed, there may be a notification in the notification area of your smartphone asking you to enter the authentication code. Check the notification area.
* Depending on the smartphone model and OS version, the screen design and displayed messages may differ slightly.

GR II
* Please check if the Wi-Fi on your smartphone is turned on.
* This app does not support connection using Near Field Communication (NFC).
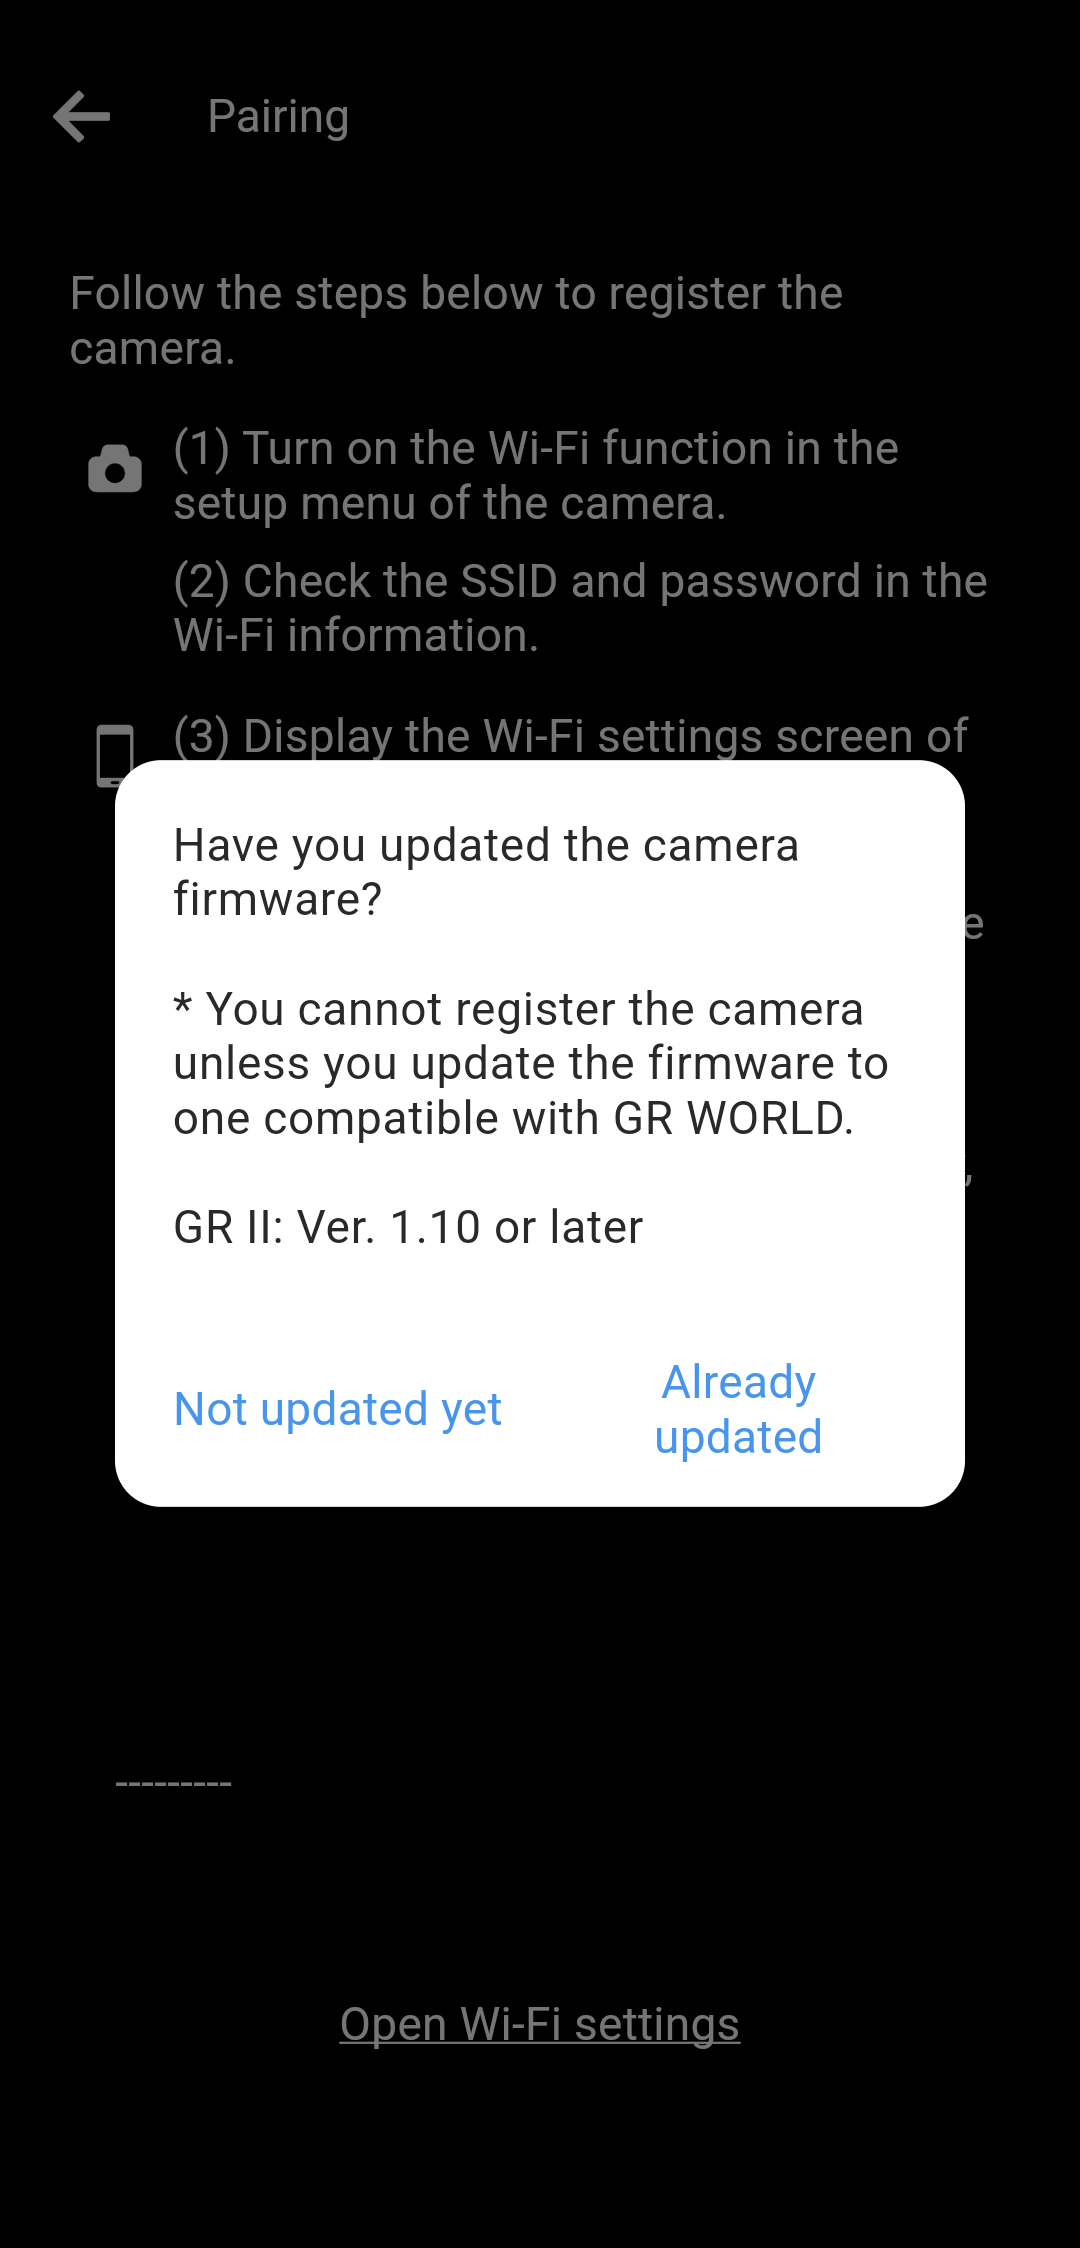
The firmware versions that can be used with this application are as follows.
・GR II: V1.10 or later
Please note that you will not be able to connect to a camera with an older firmware version, which will result in an error.
For details on how to update the camera's firmware, please click here.
・GR II
https://www.ricoh-imaging.co.jp/english/support/digital/gr2_s.html
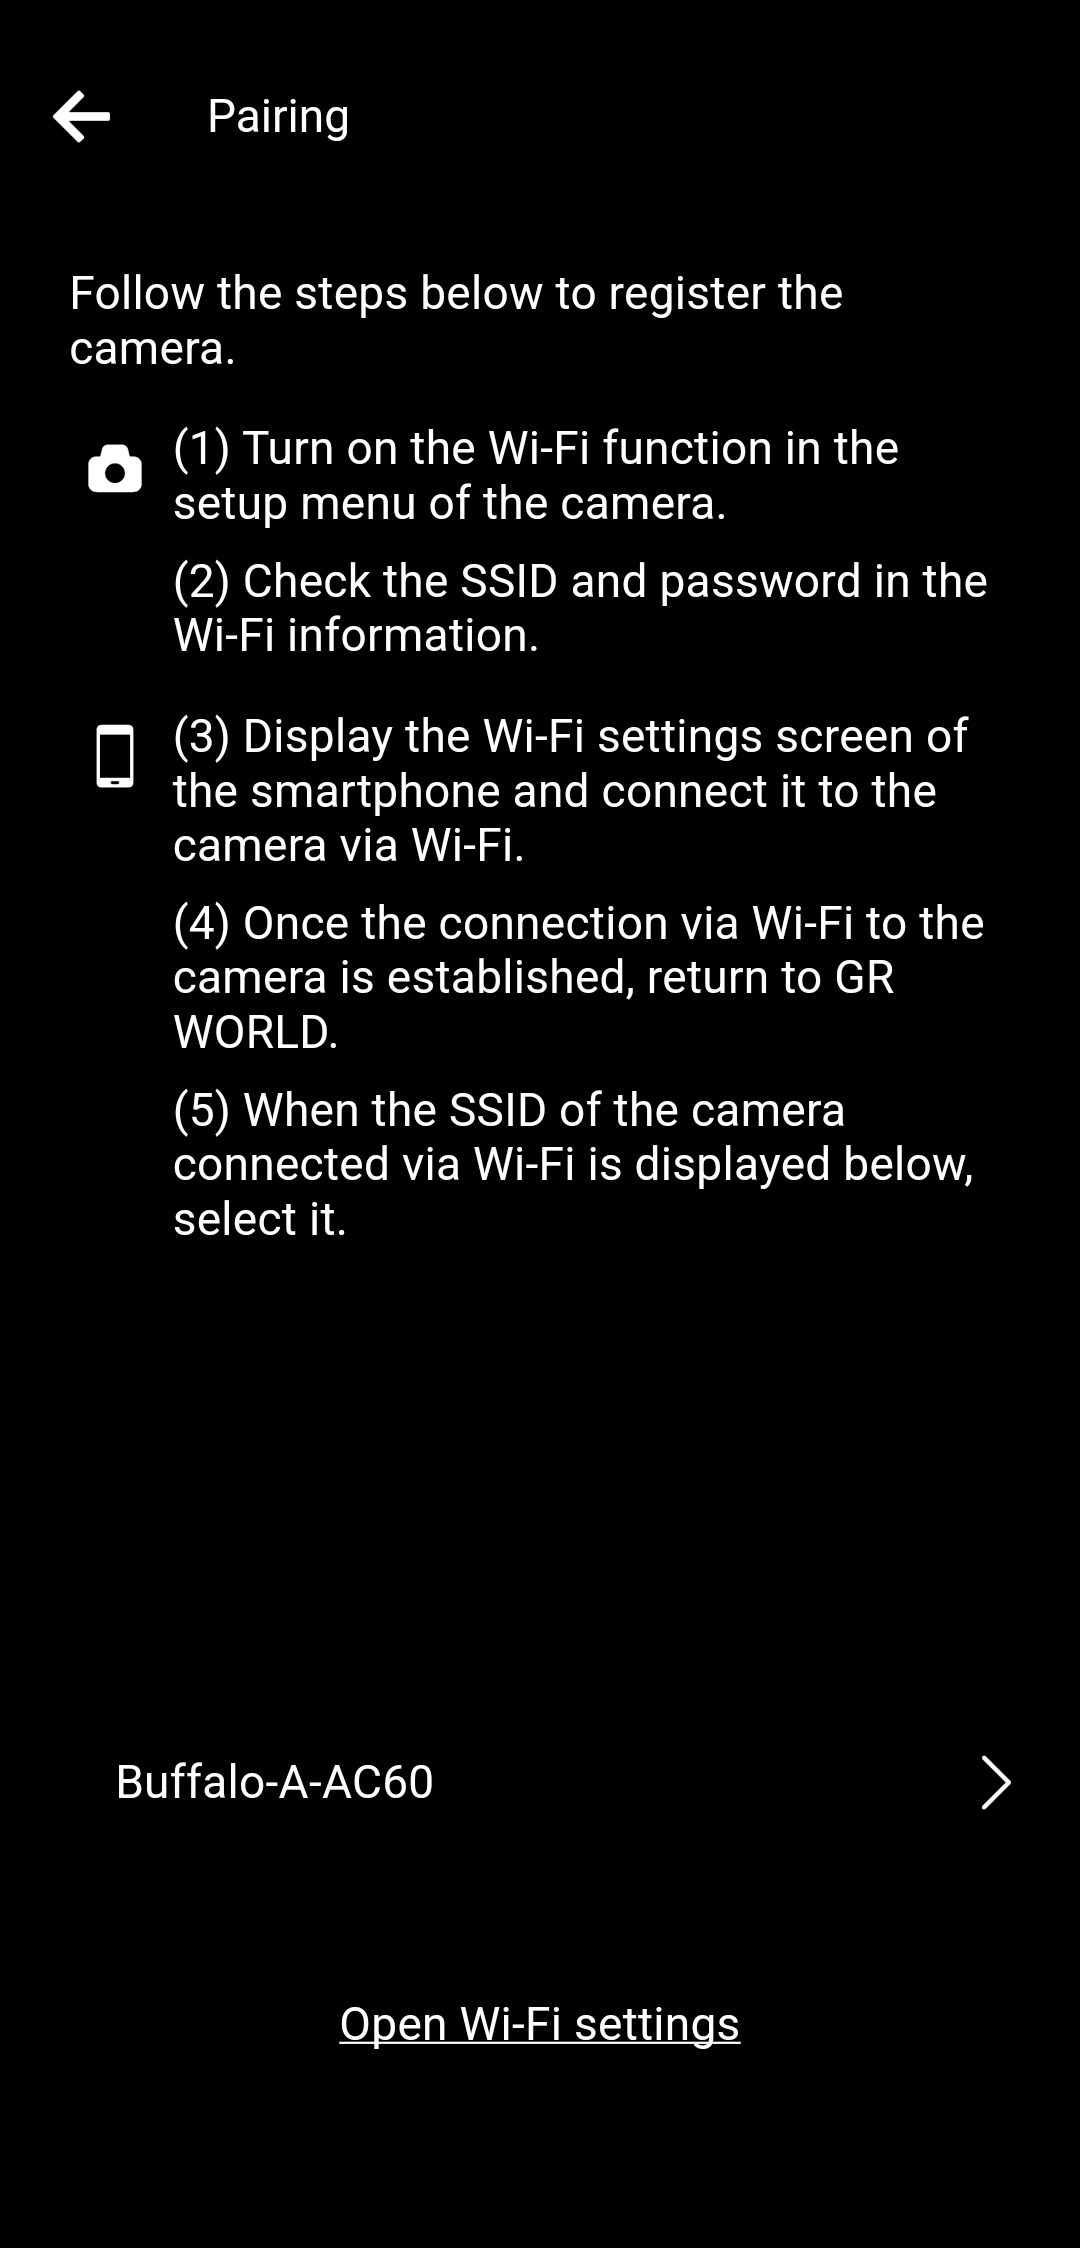
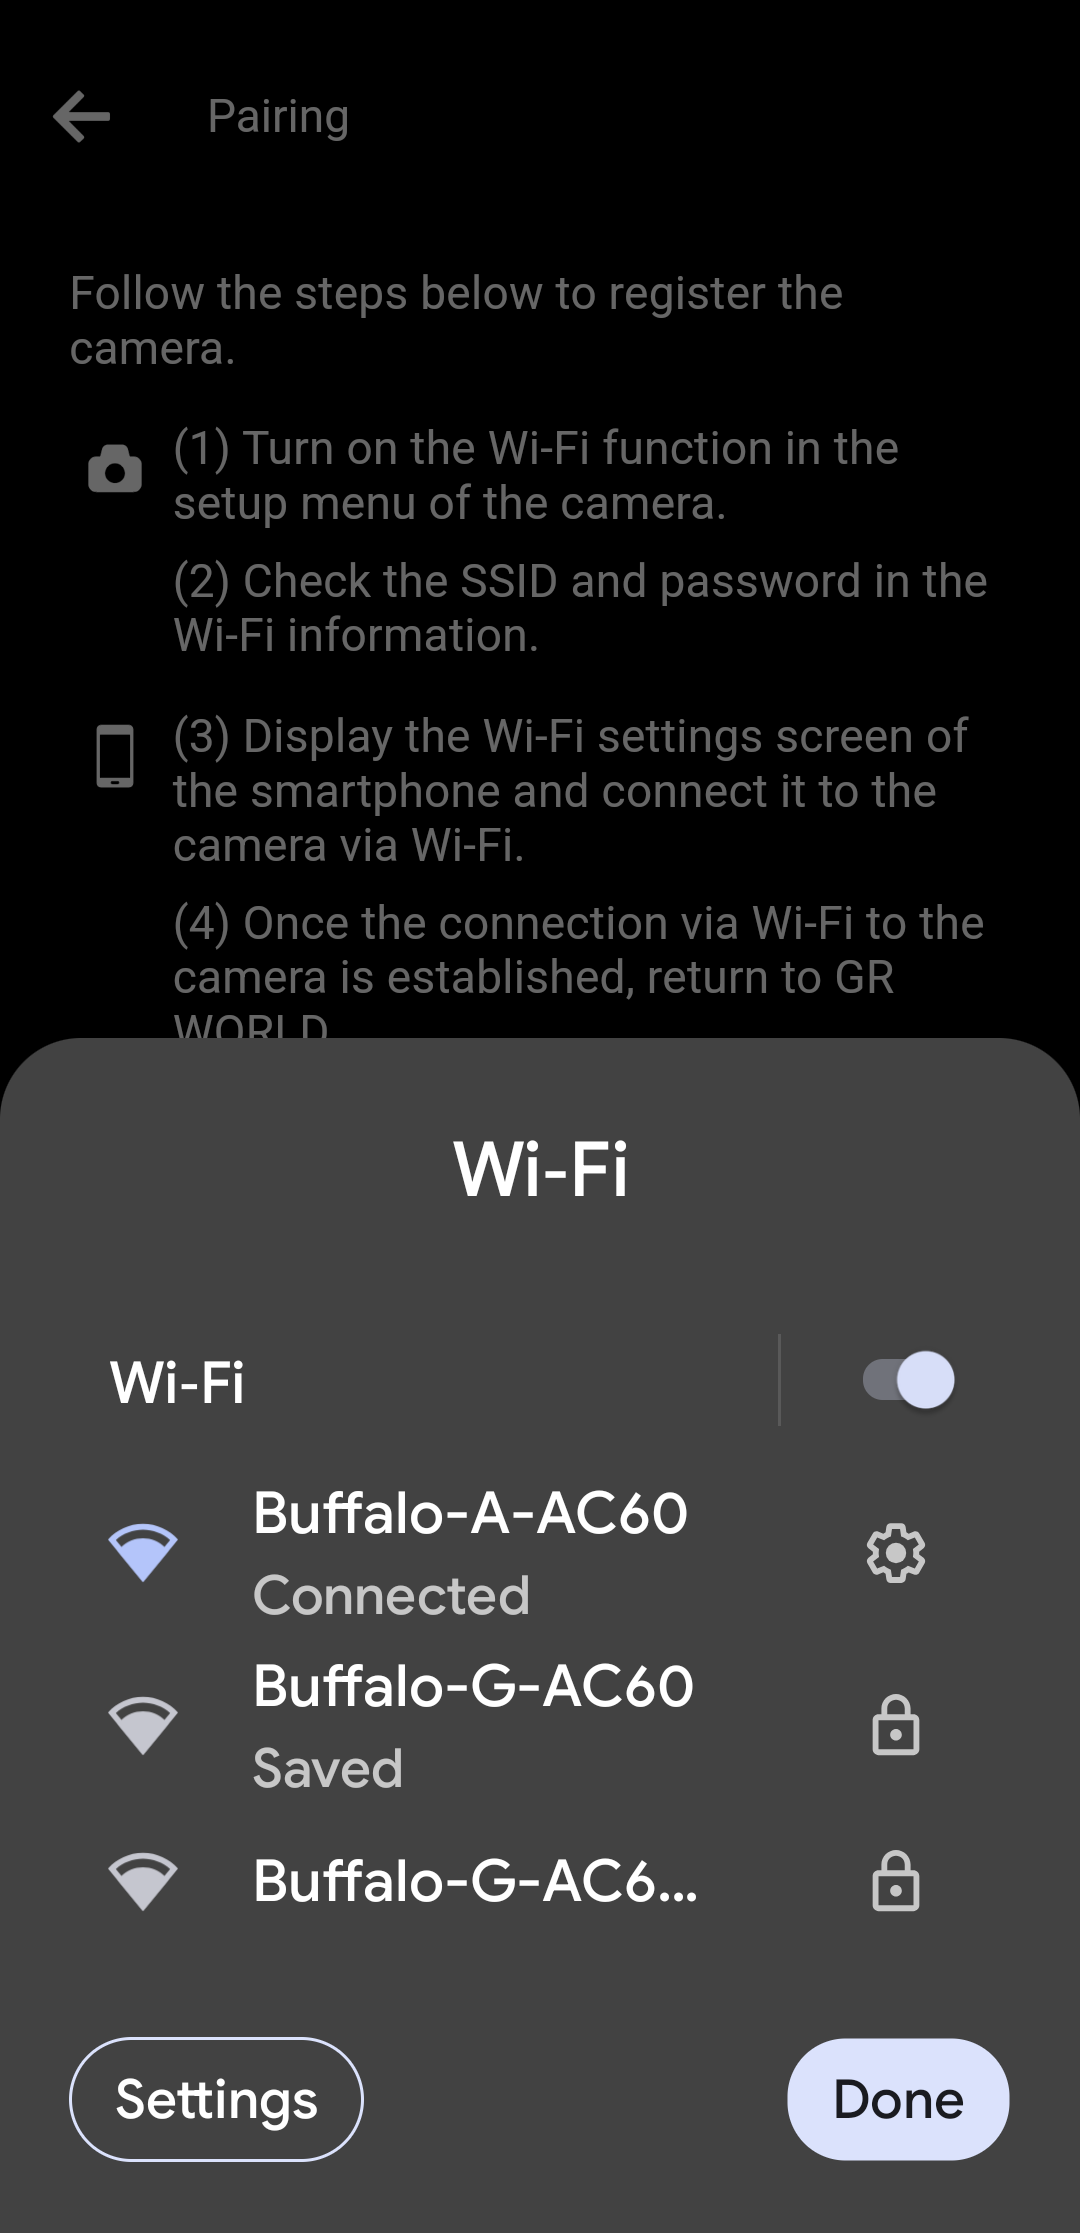
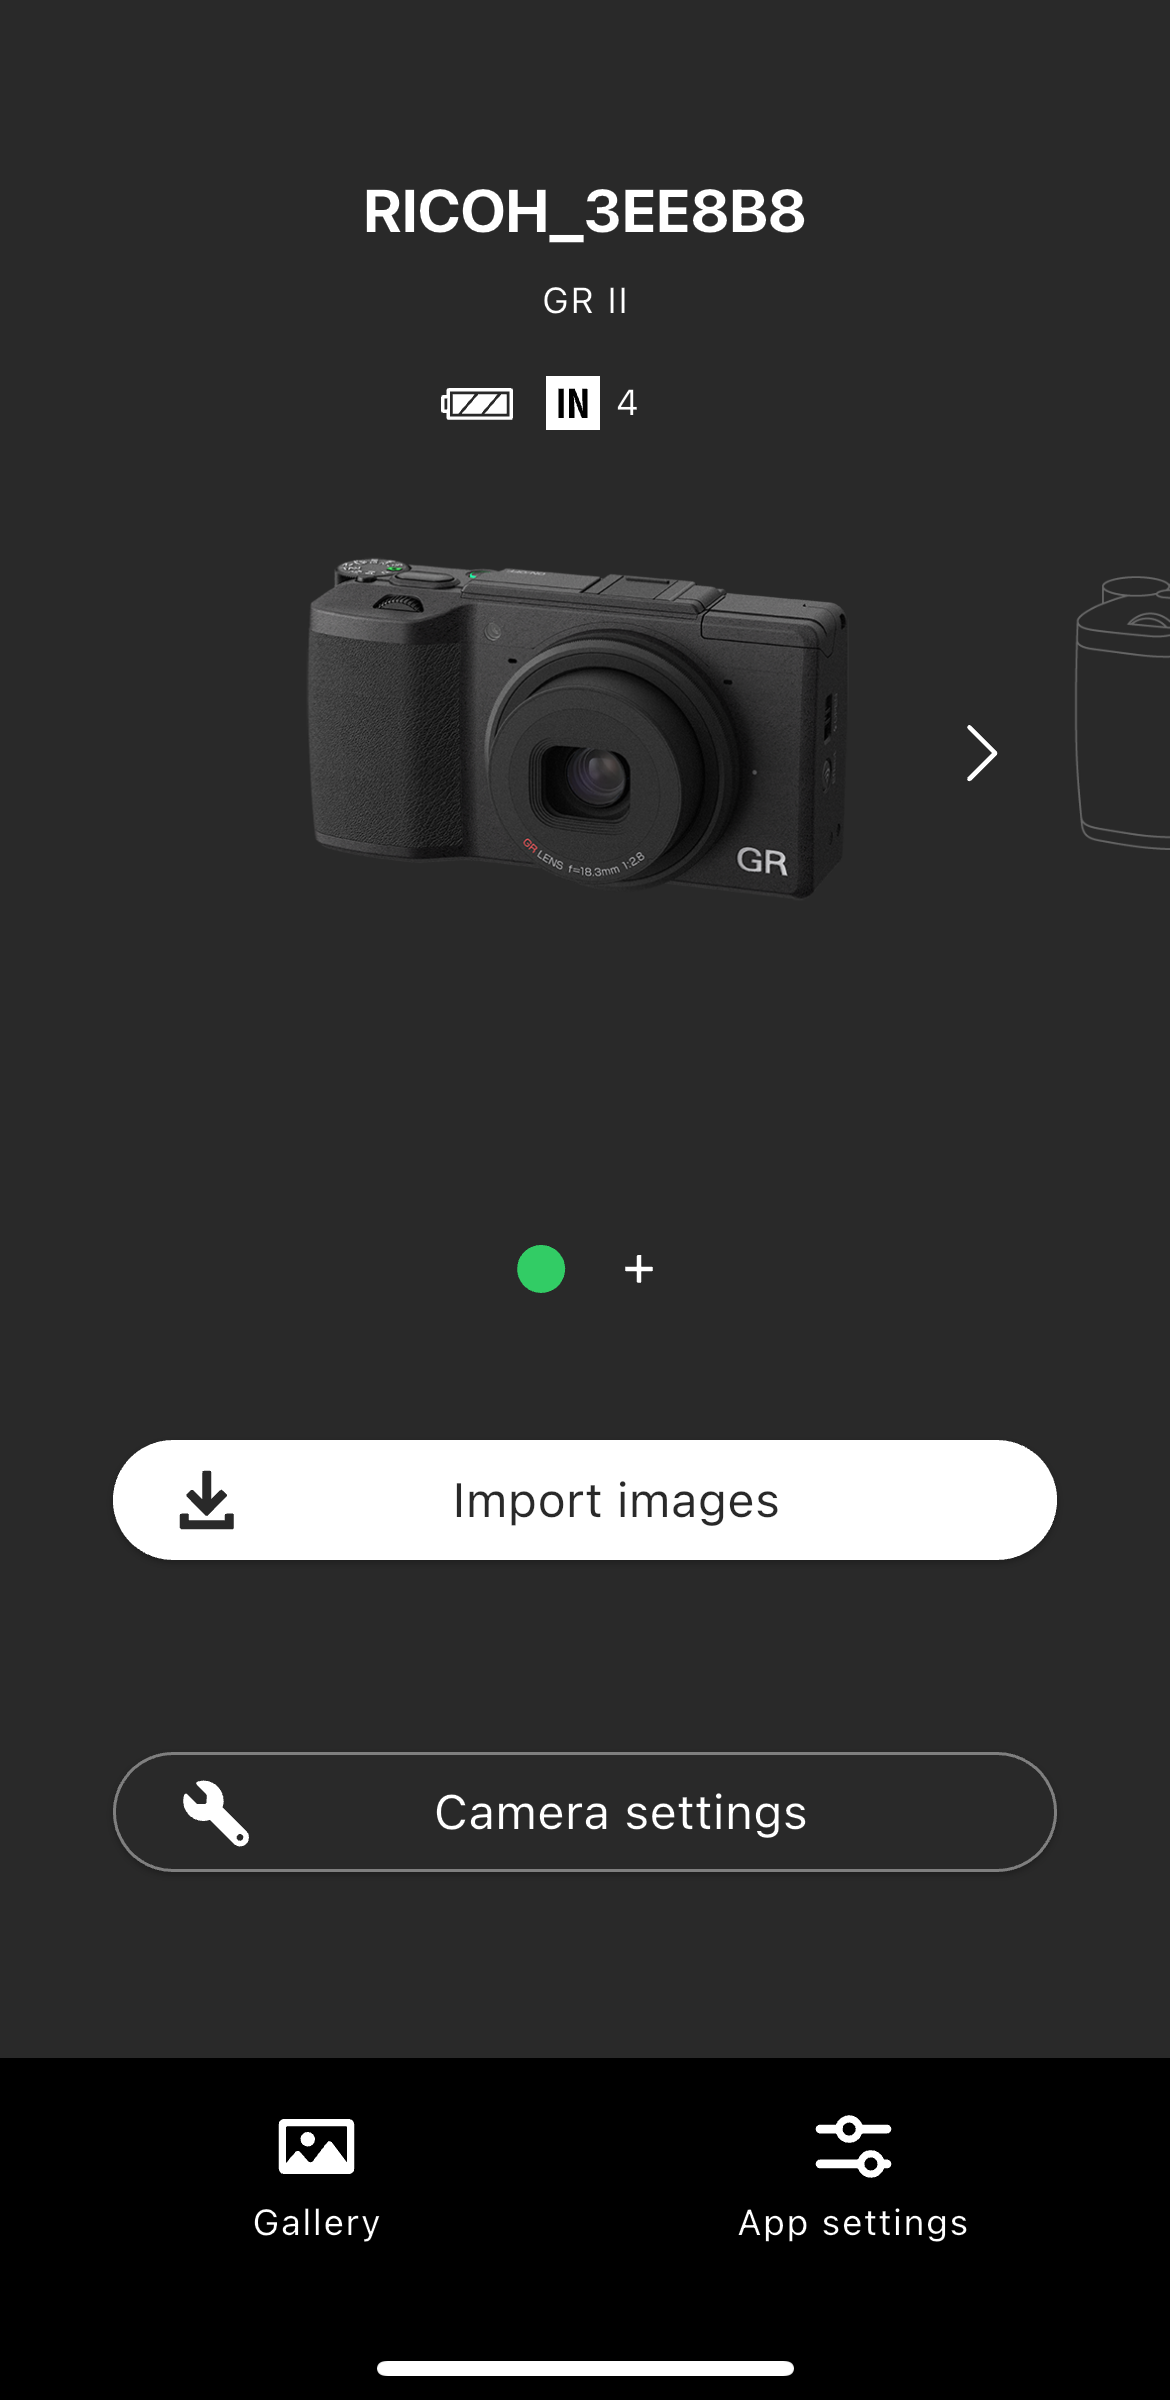
When the camera completes the operations (1) and (2), "Open Wi-Fi settings".
* Until the operation (1) and (2) is completed on the camera side, the SSID of the device currently connected to the smartphone via Wi-Fi will be displayed.
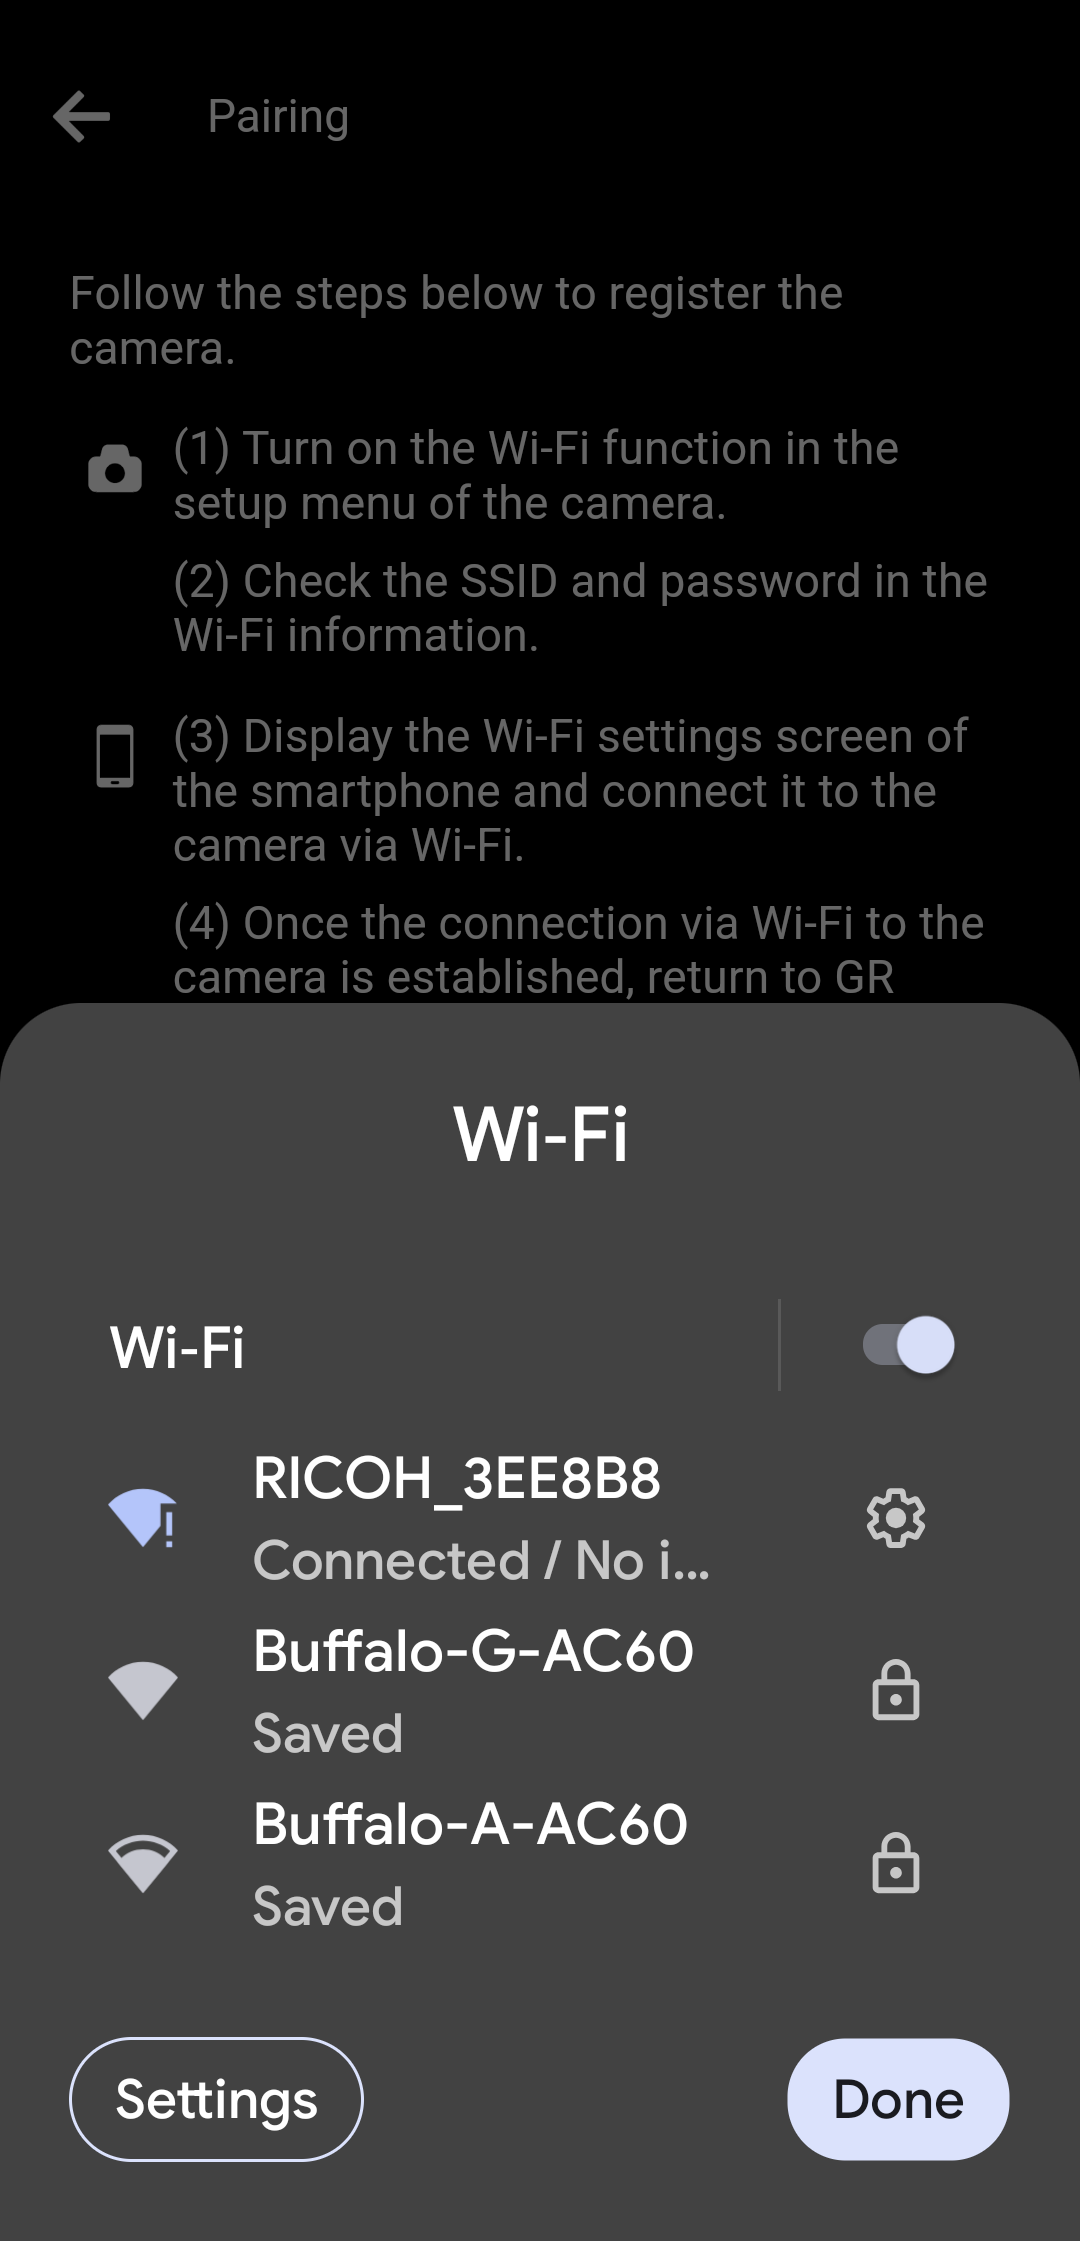
(1) If the SSID of your camera is displayed on the Wi-Fi setting screen displayed in the app, tap the SSID.
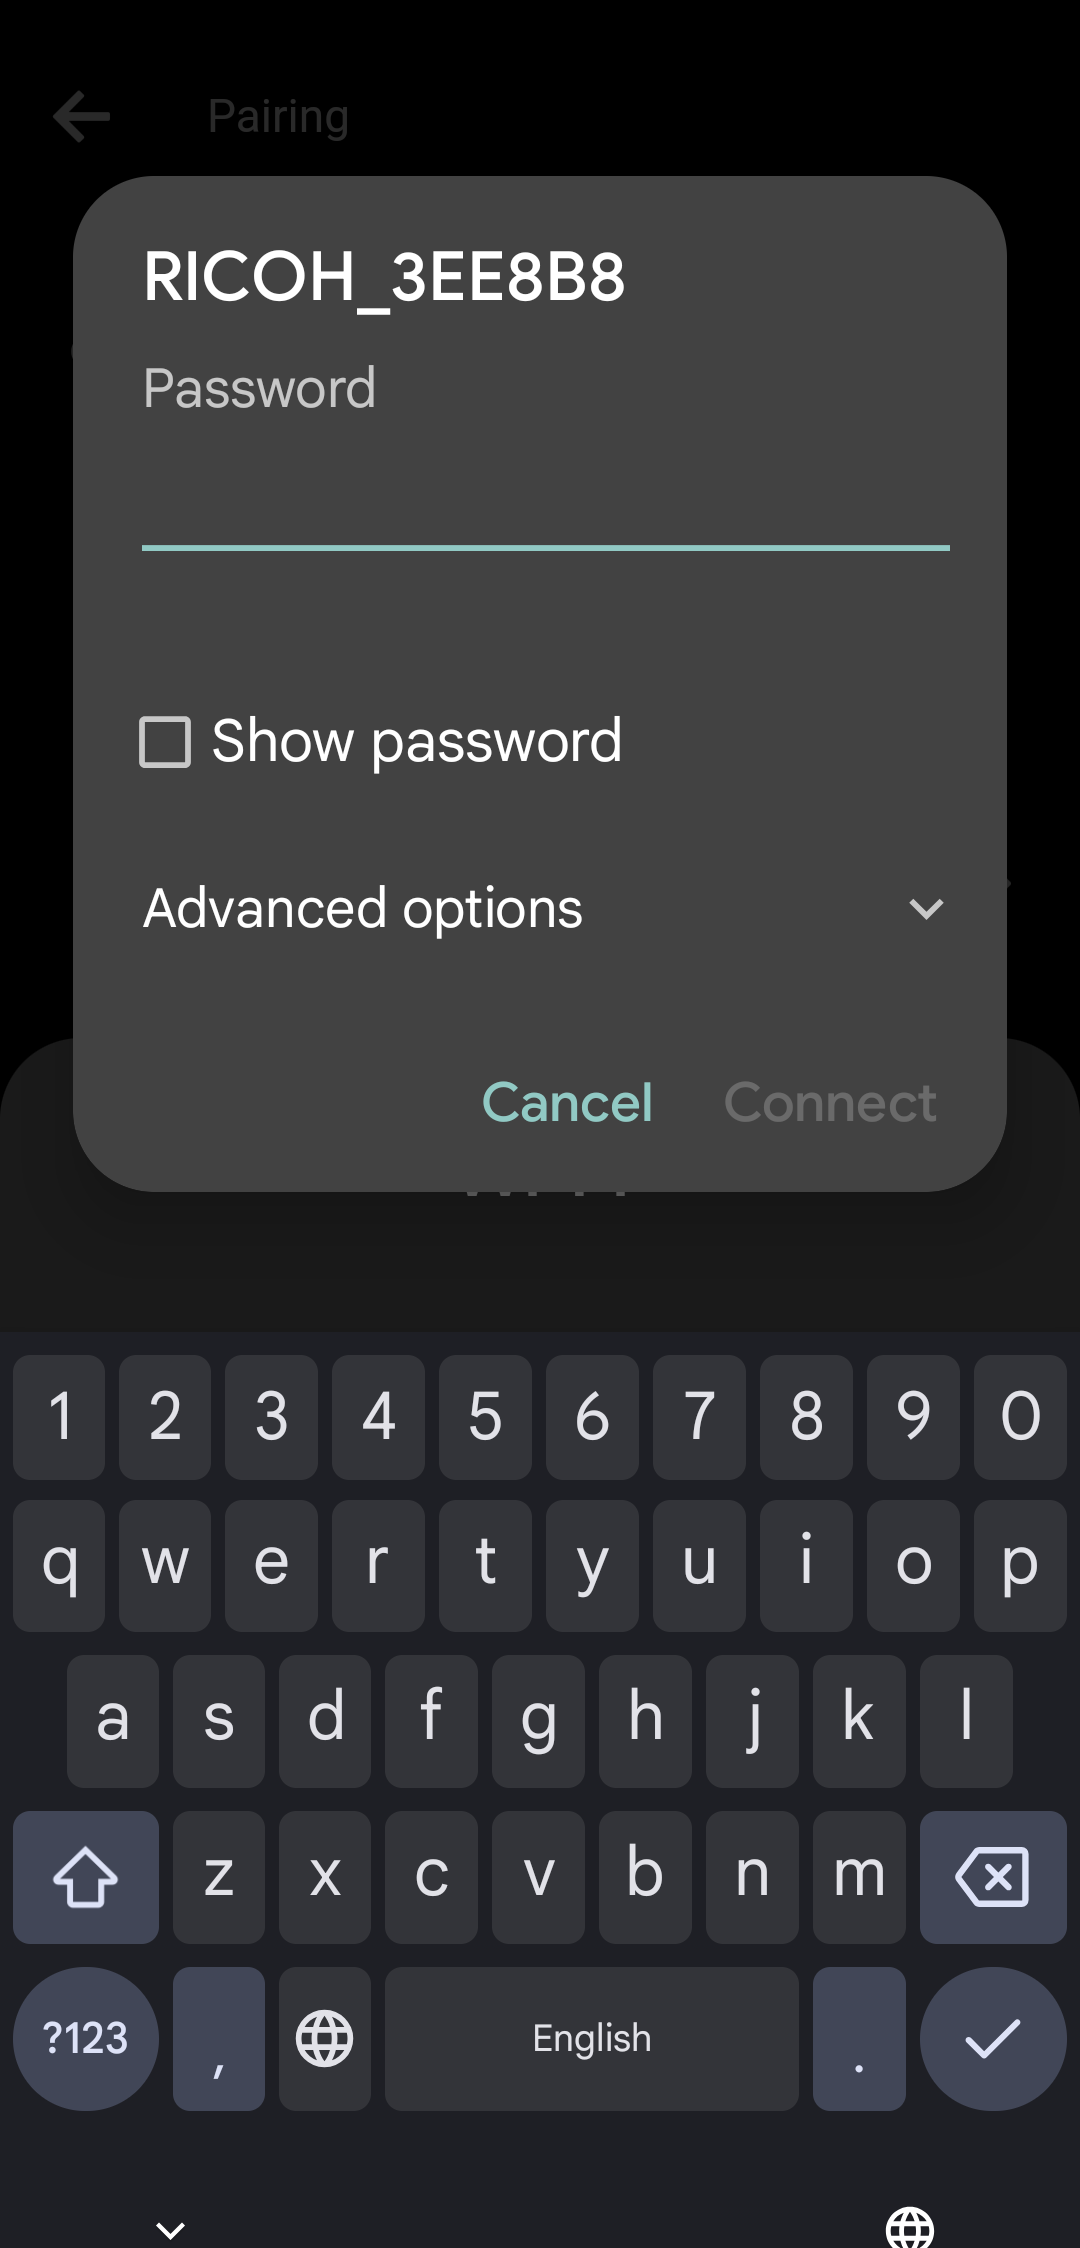
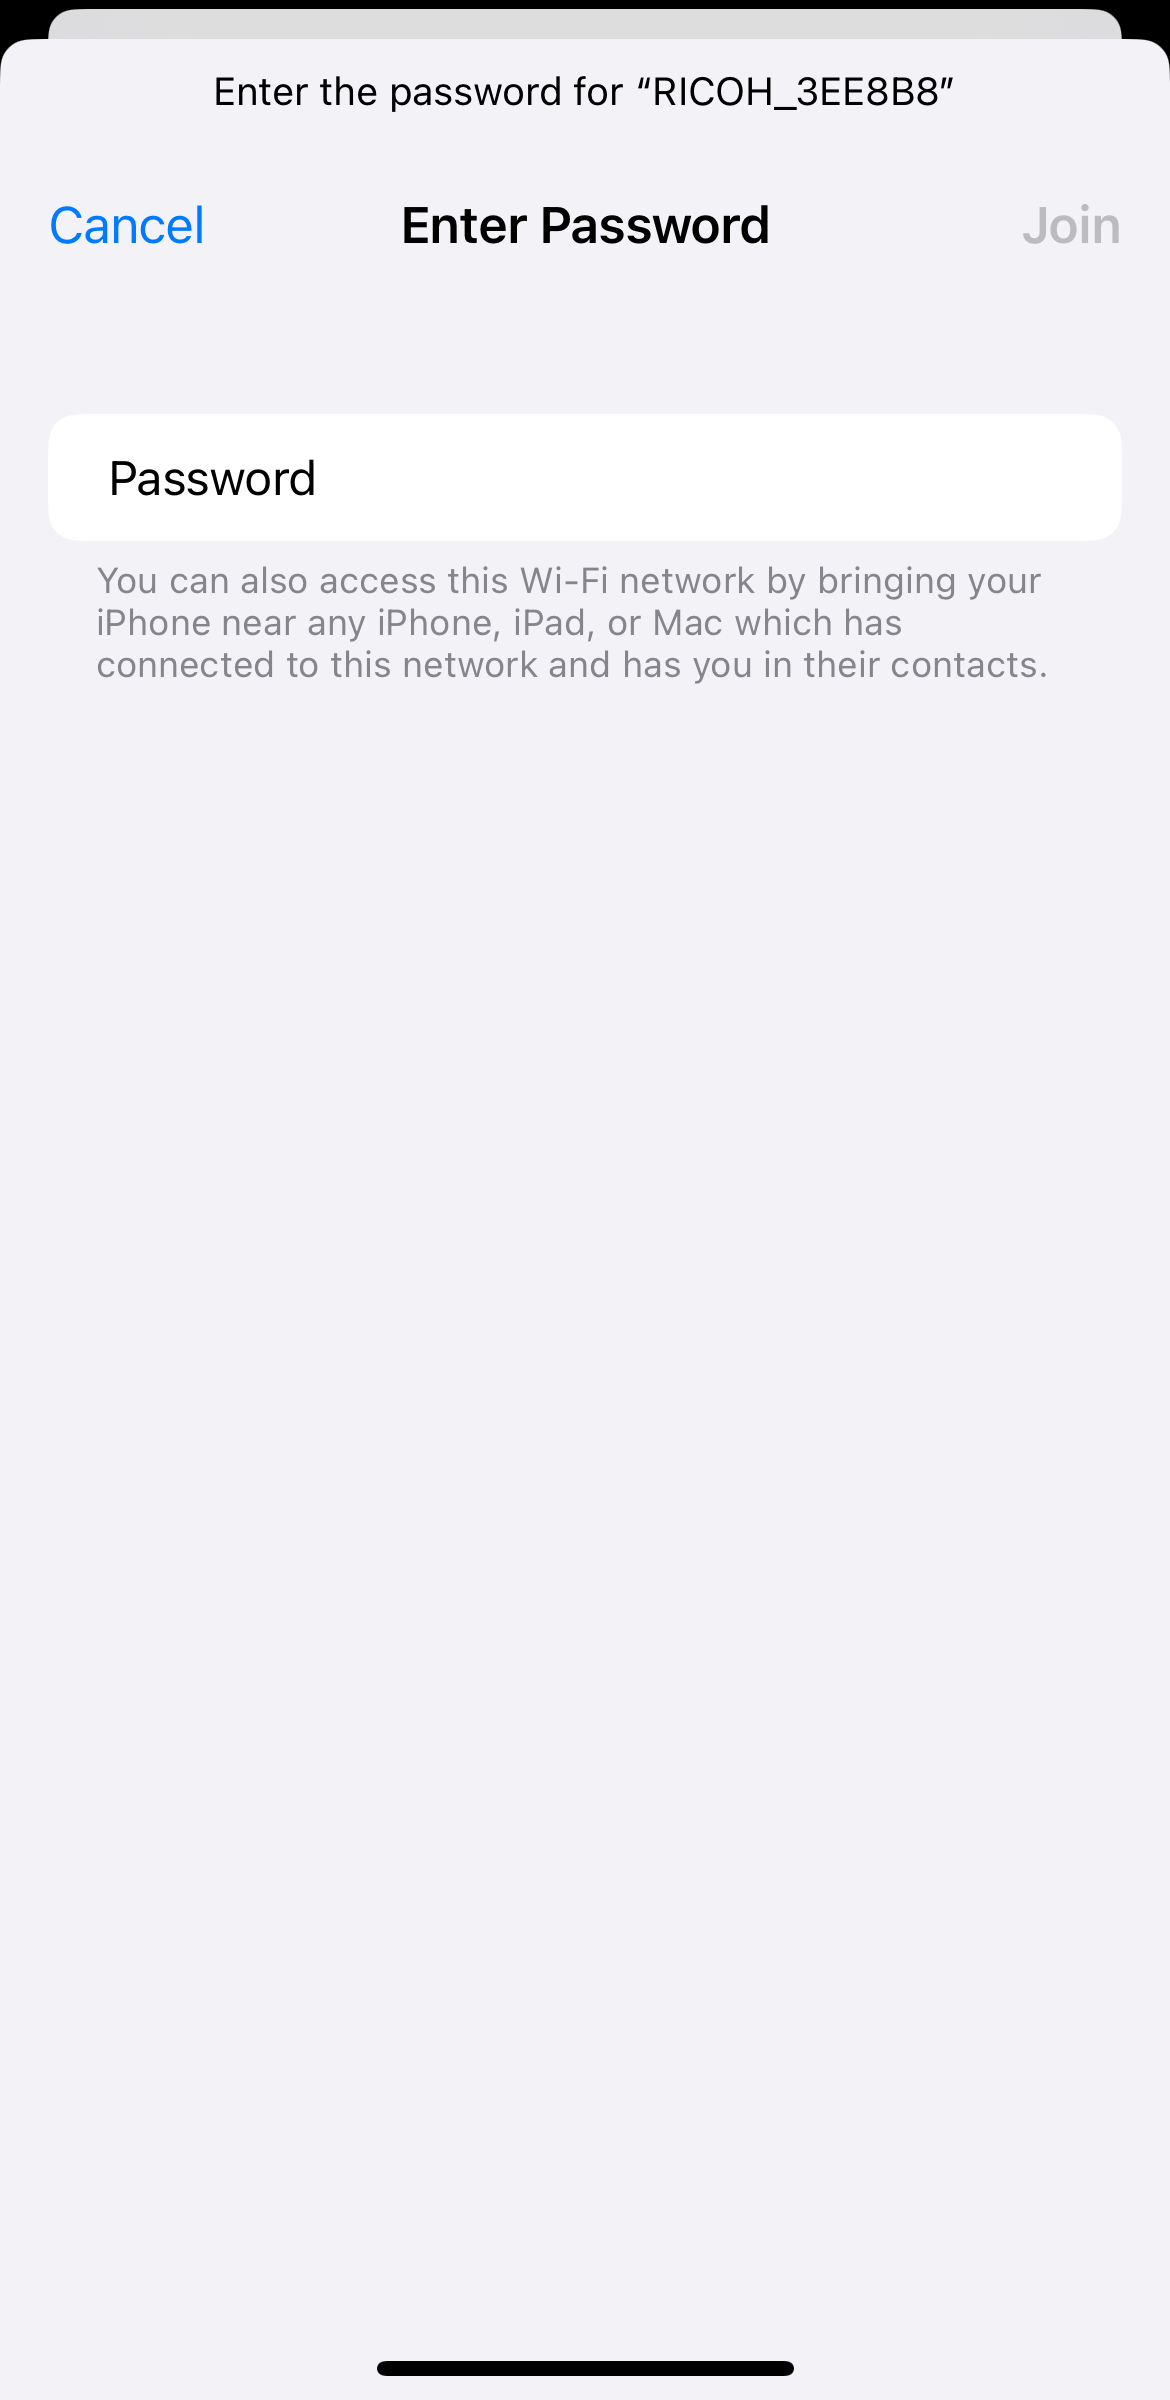
(2) Enter your password to connect to Wi-Fi.
(3) When the Wi-Fi connection with the camera is complete, tap "Done".
* Depending on the smartphone model and OS version, the screen design and displayed messages may differ slightly.
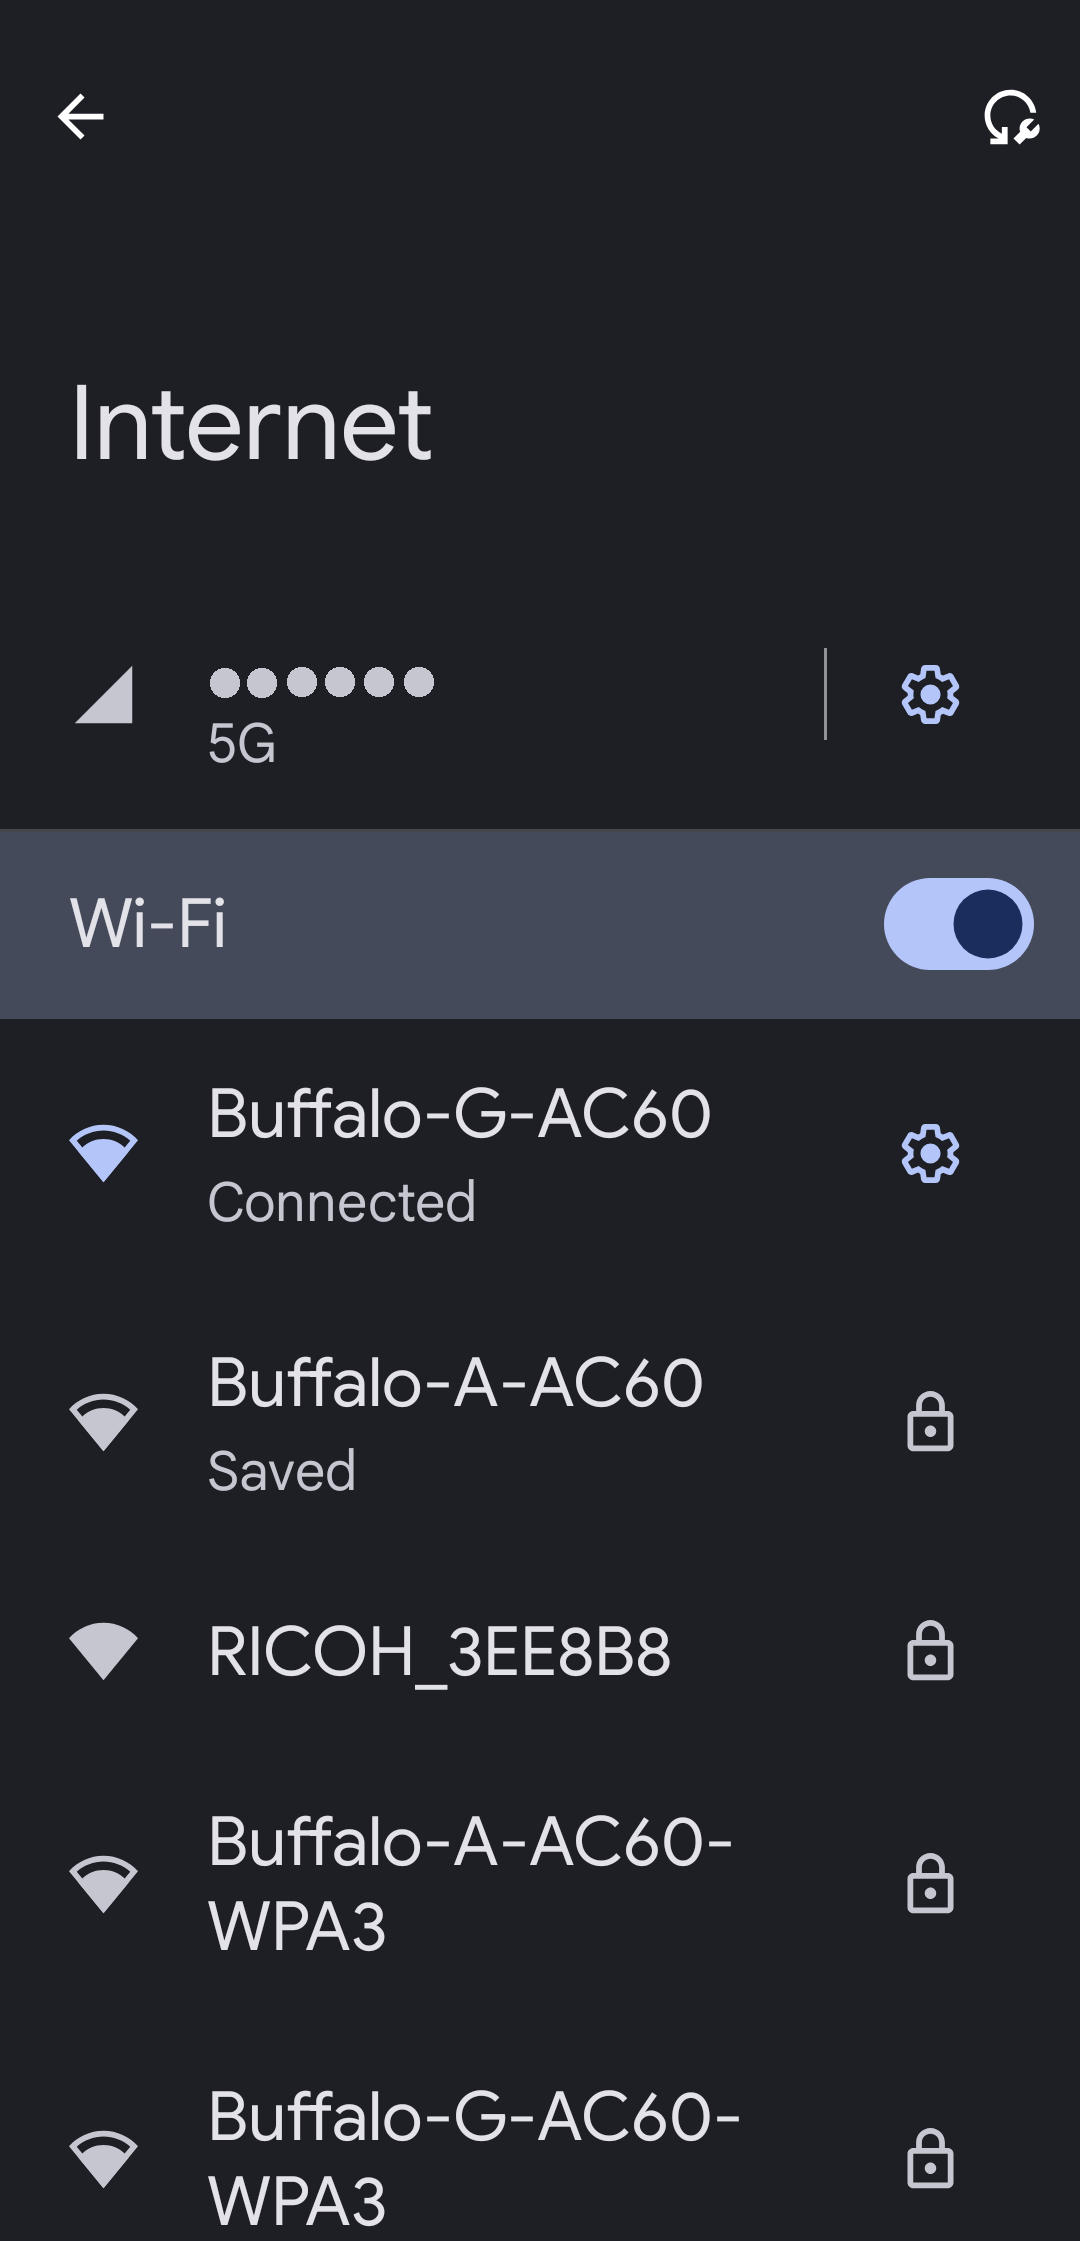
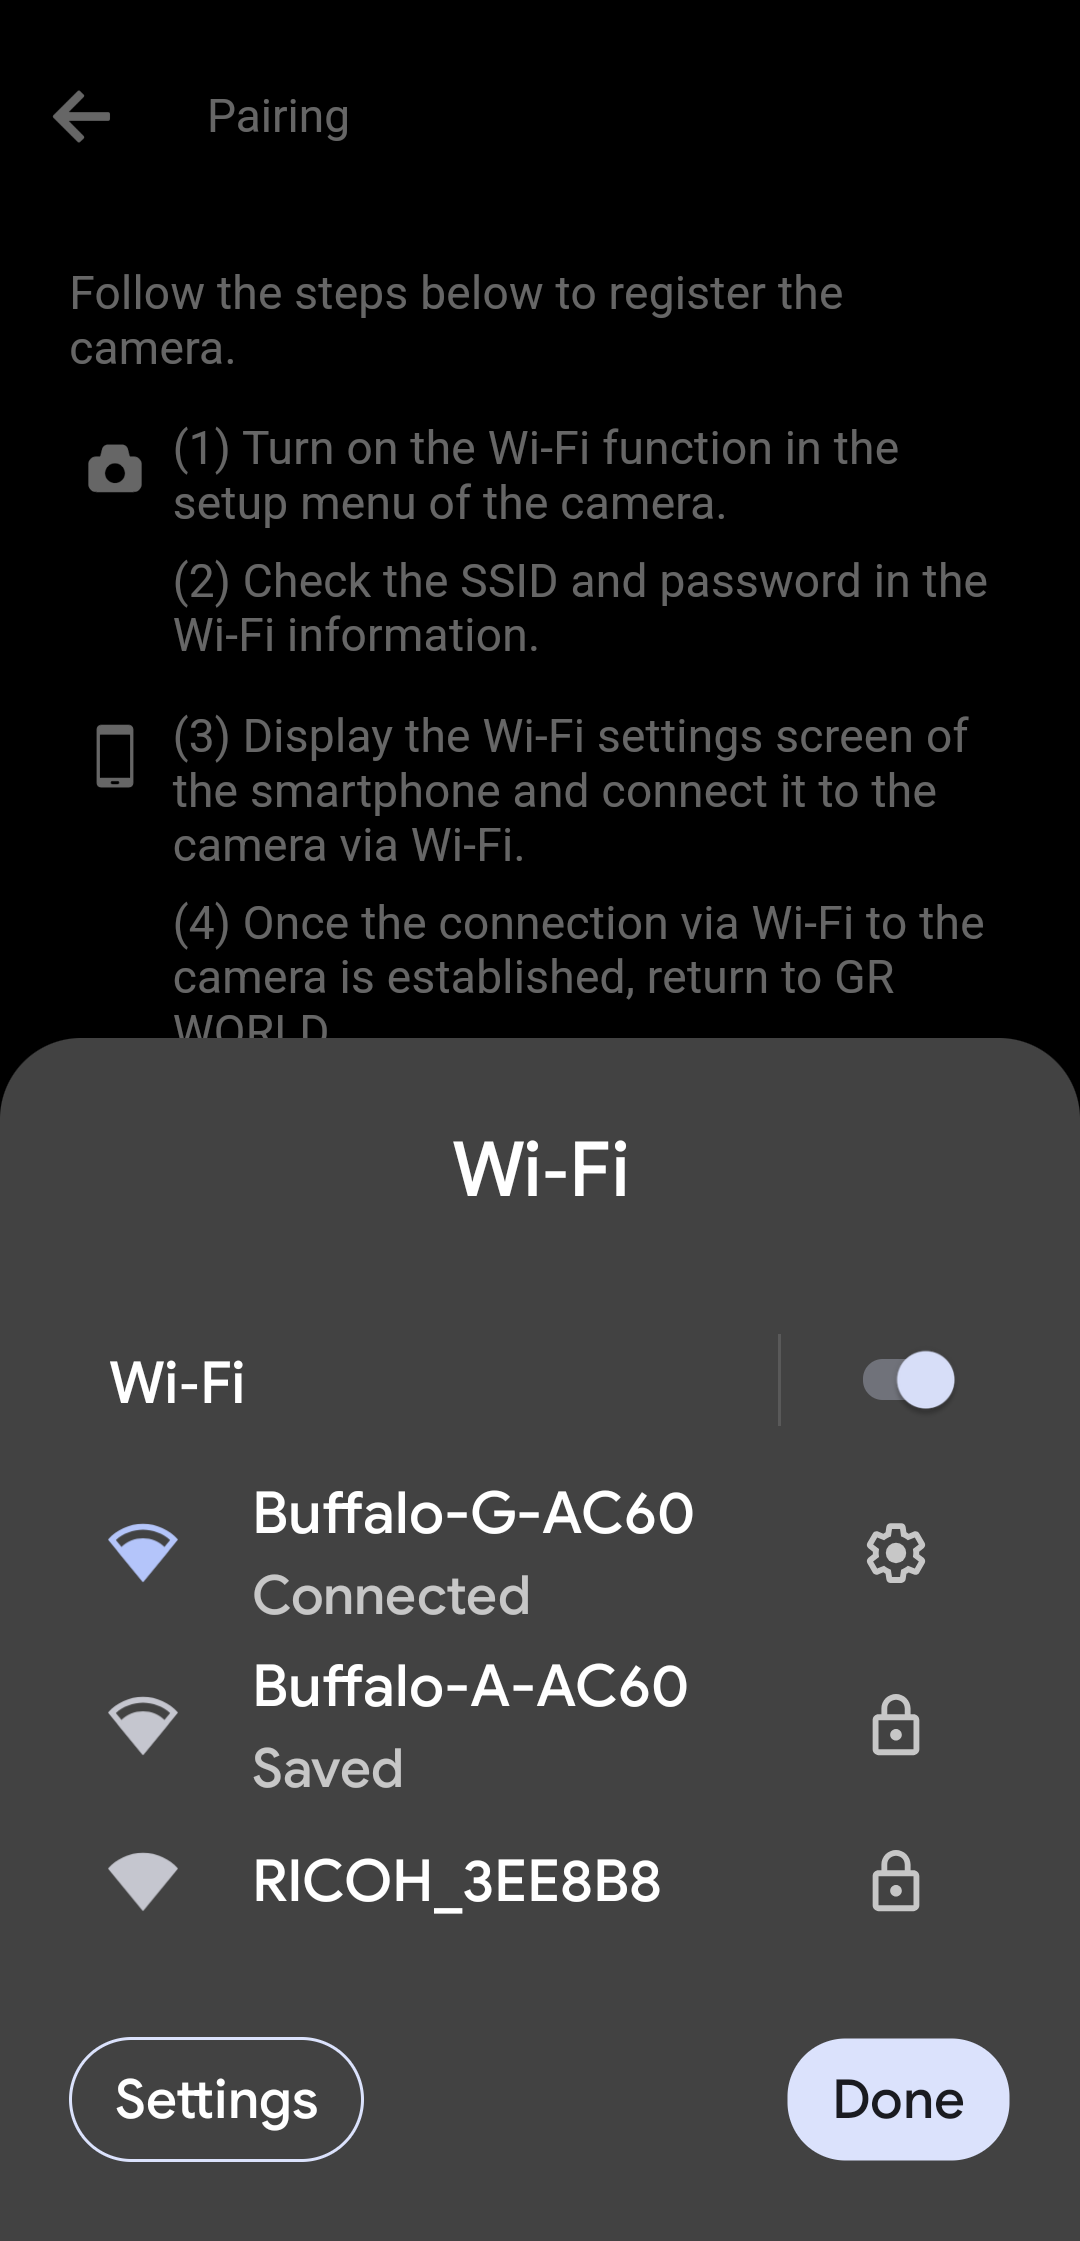
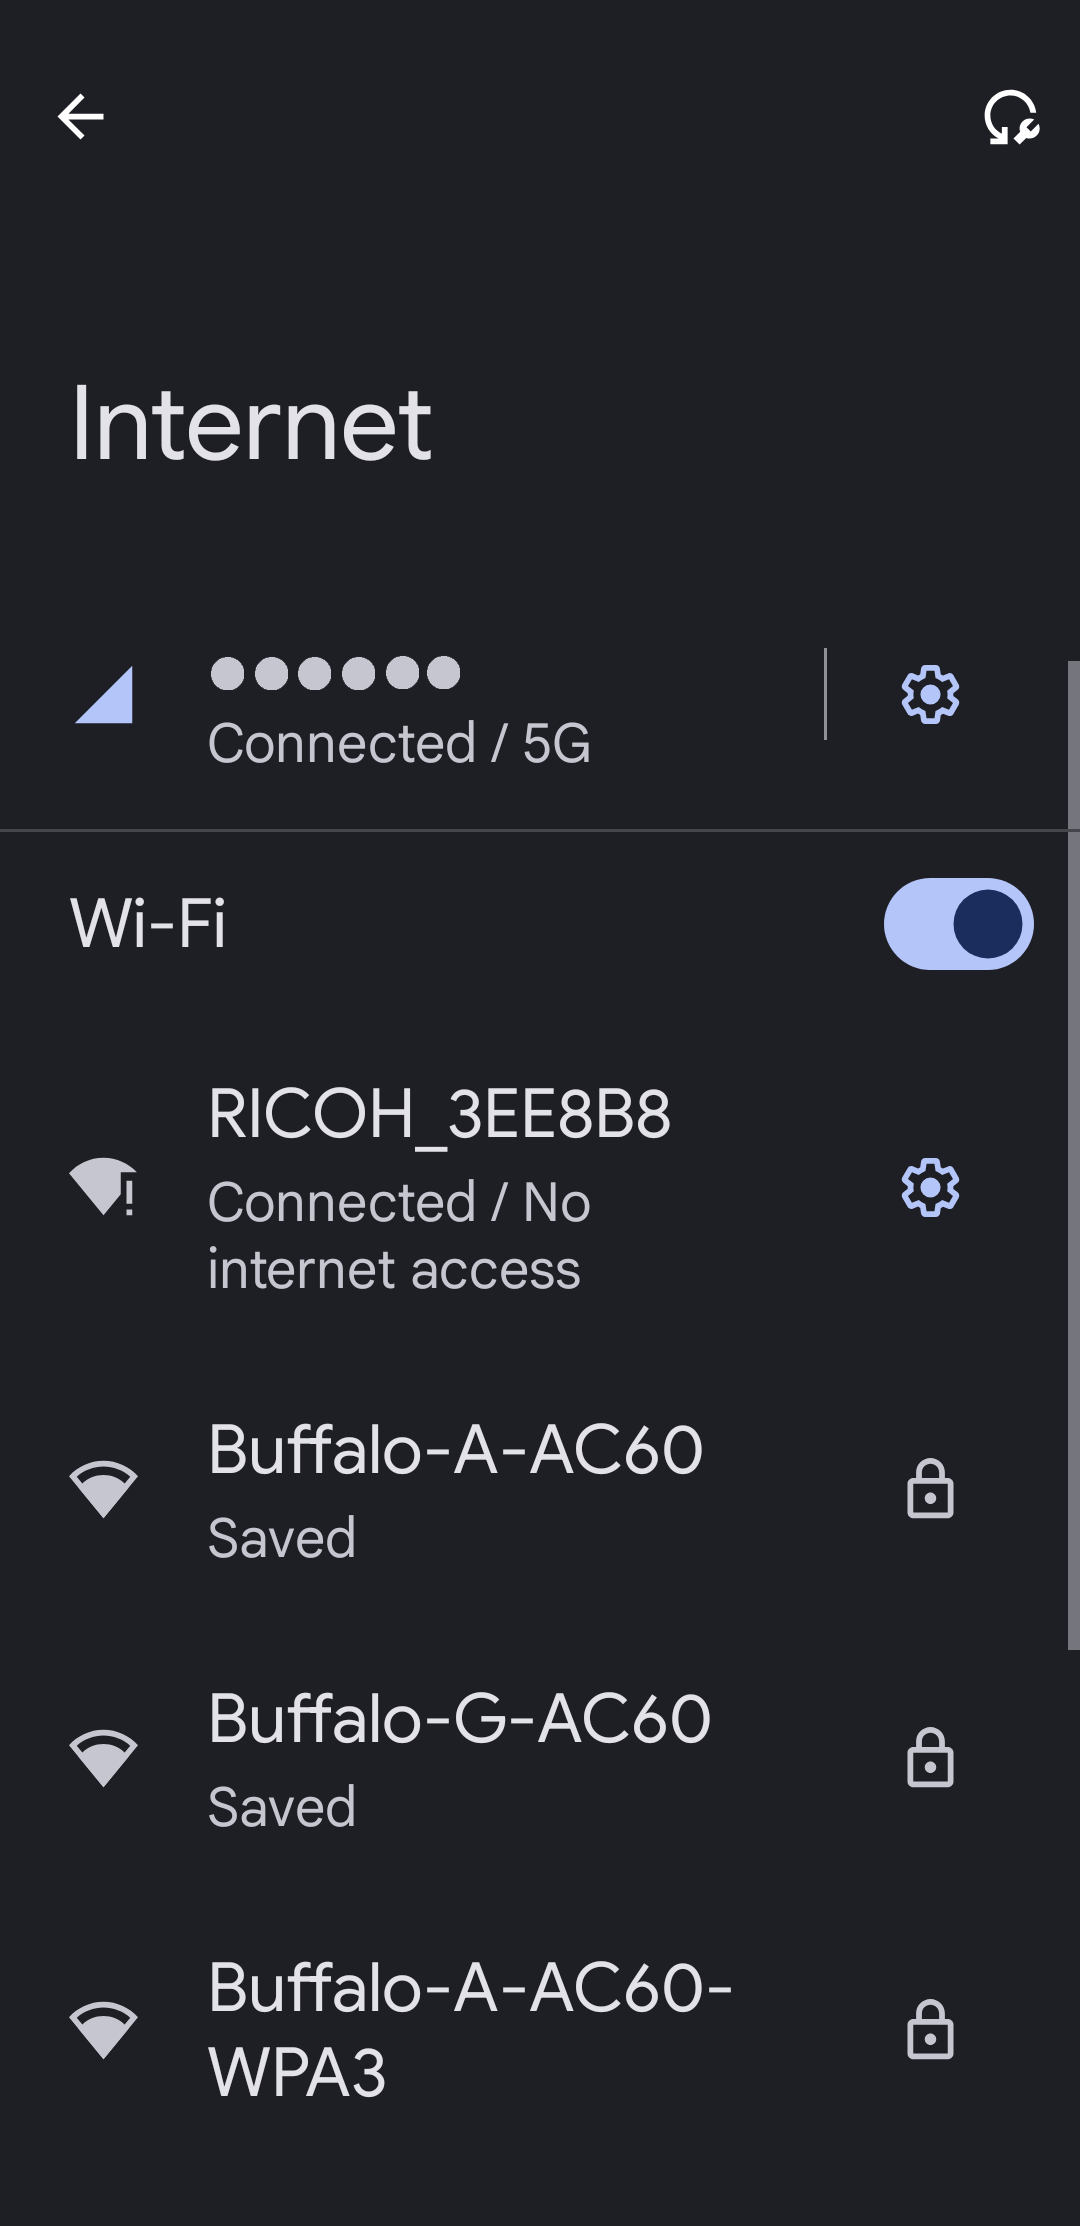
(1) If the SSID of your camera is not displayed on the Wi-Fi setting screen displayed in the app, tap "Settings" to open the Wi-Fi setting screen of the smartphone's Settings app.
(2) Tap the camera's SSID.
* Depending on the smartphone model and OS version, the screen design and displayed messages may differ slightly.
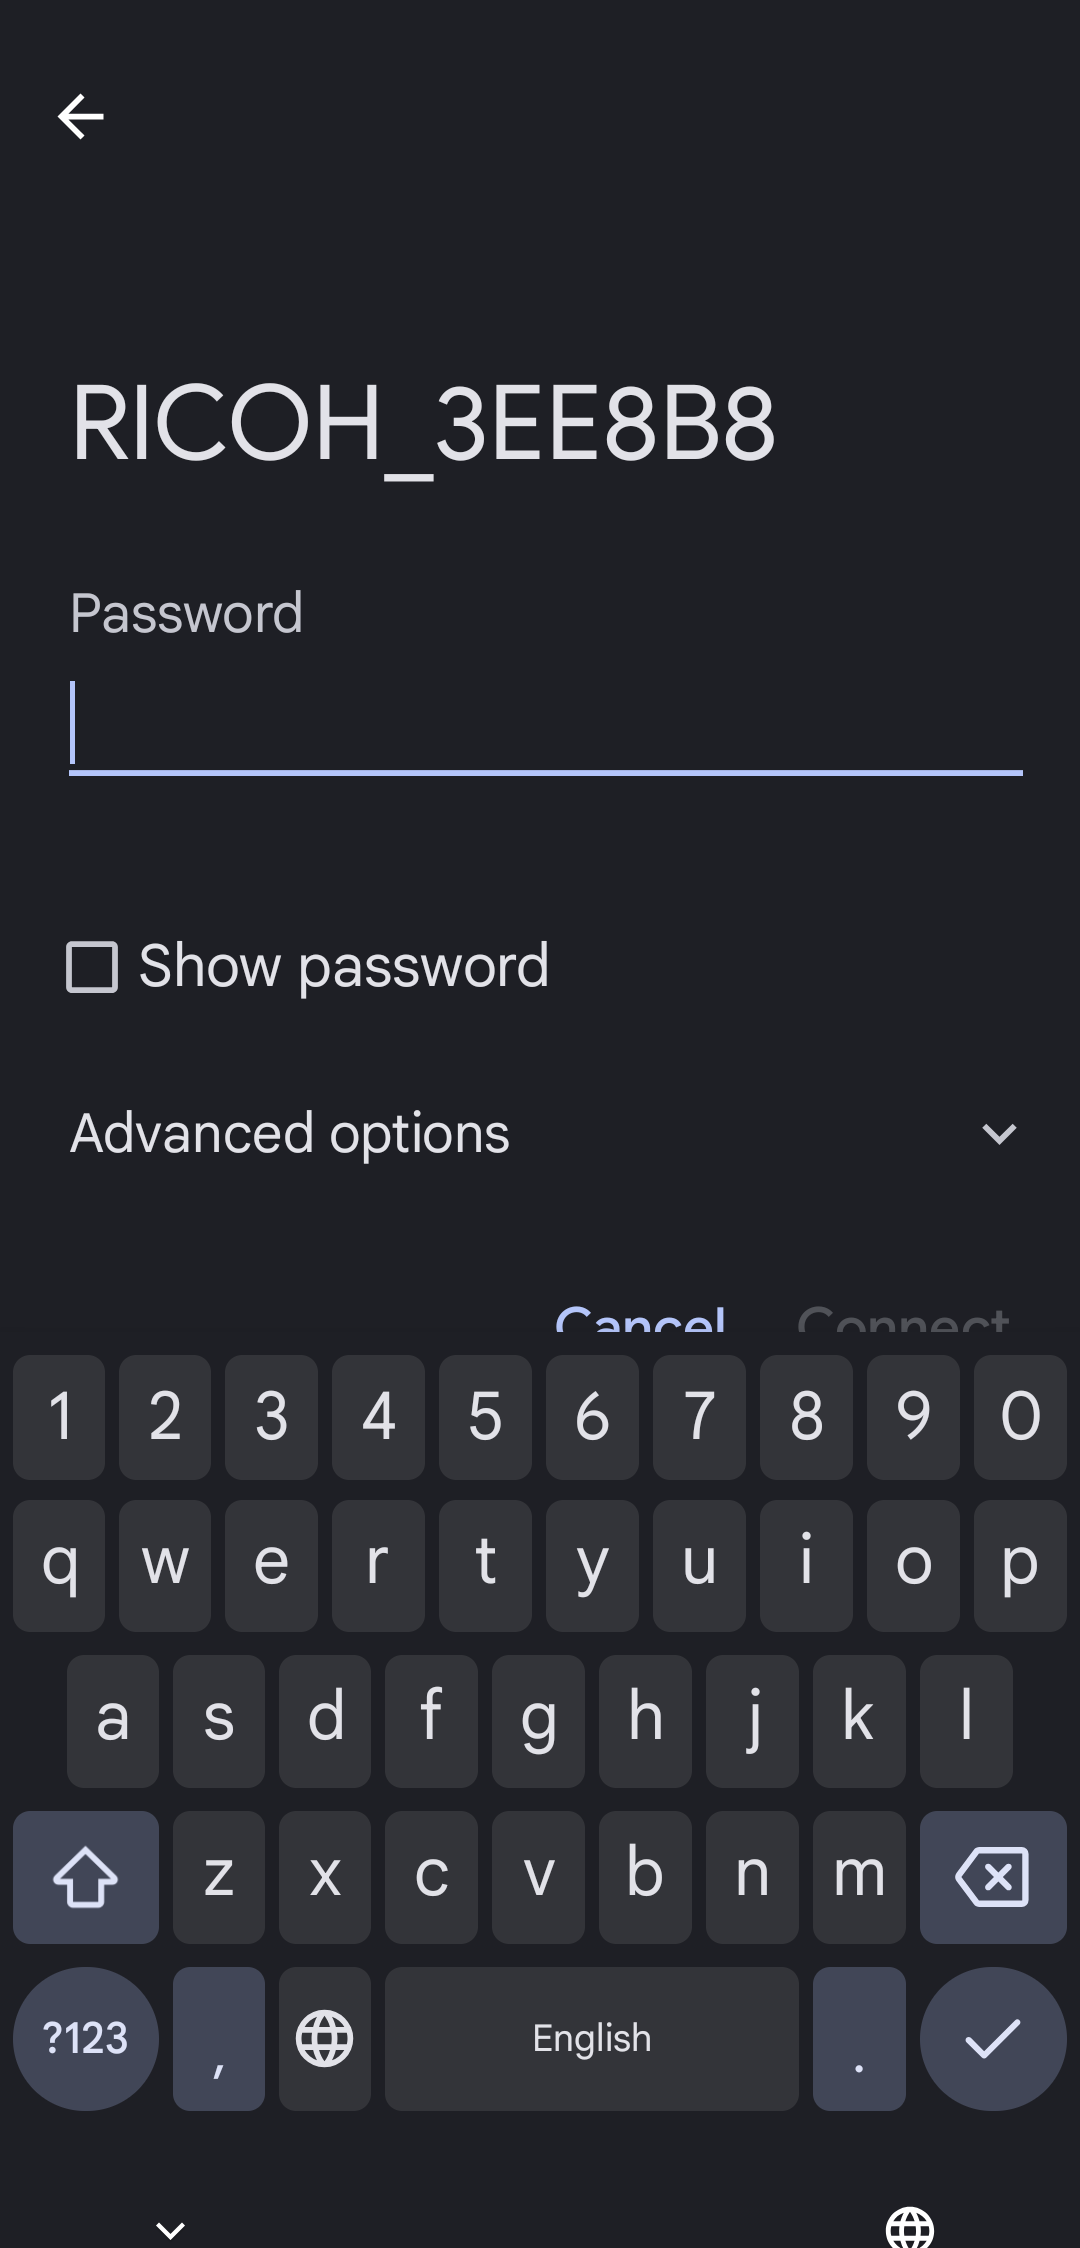
(3) Enter your password to connect to Wi-Fi.
(4) After the Wi-Fi connection with the camera is complete, return to GR WORLD.
* Depending on the smartphone model and OS version, the screen design and displayed messages may differ slightly.
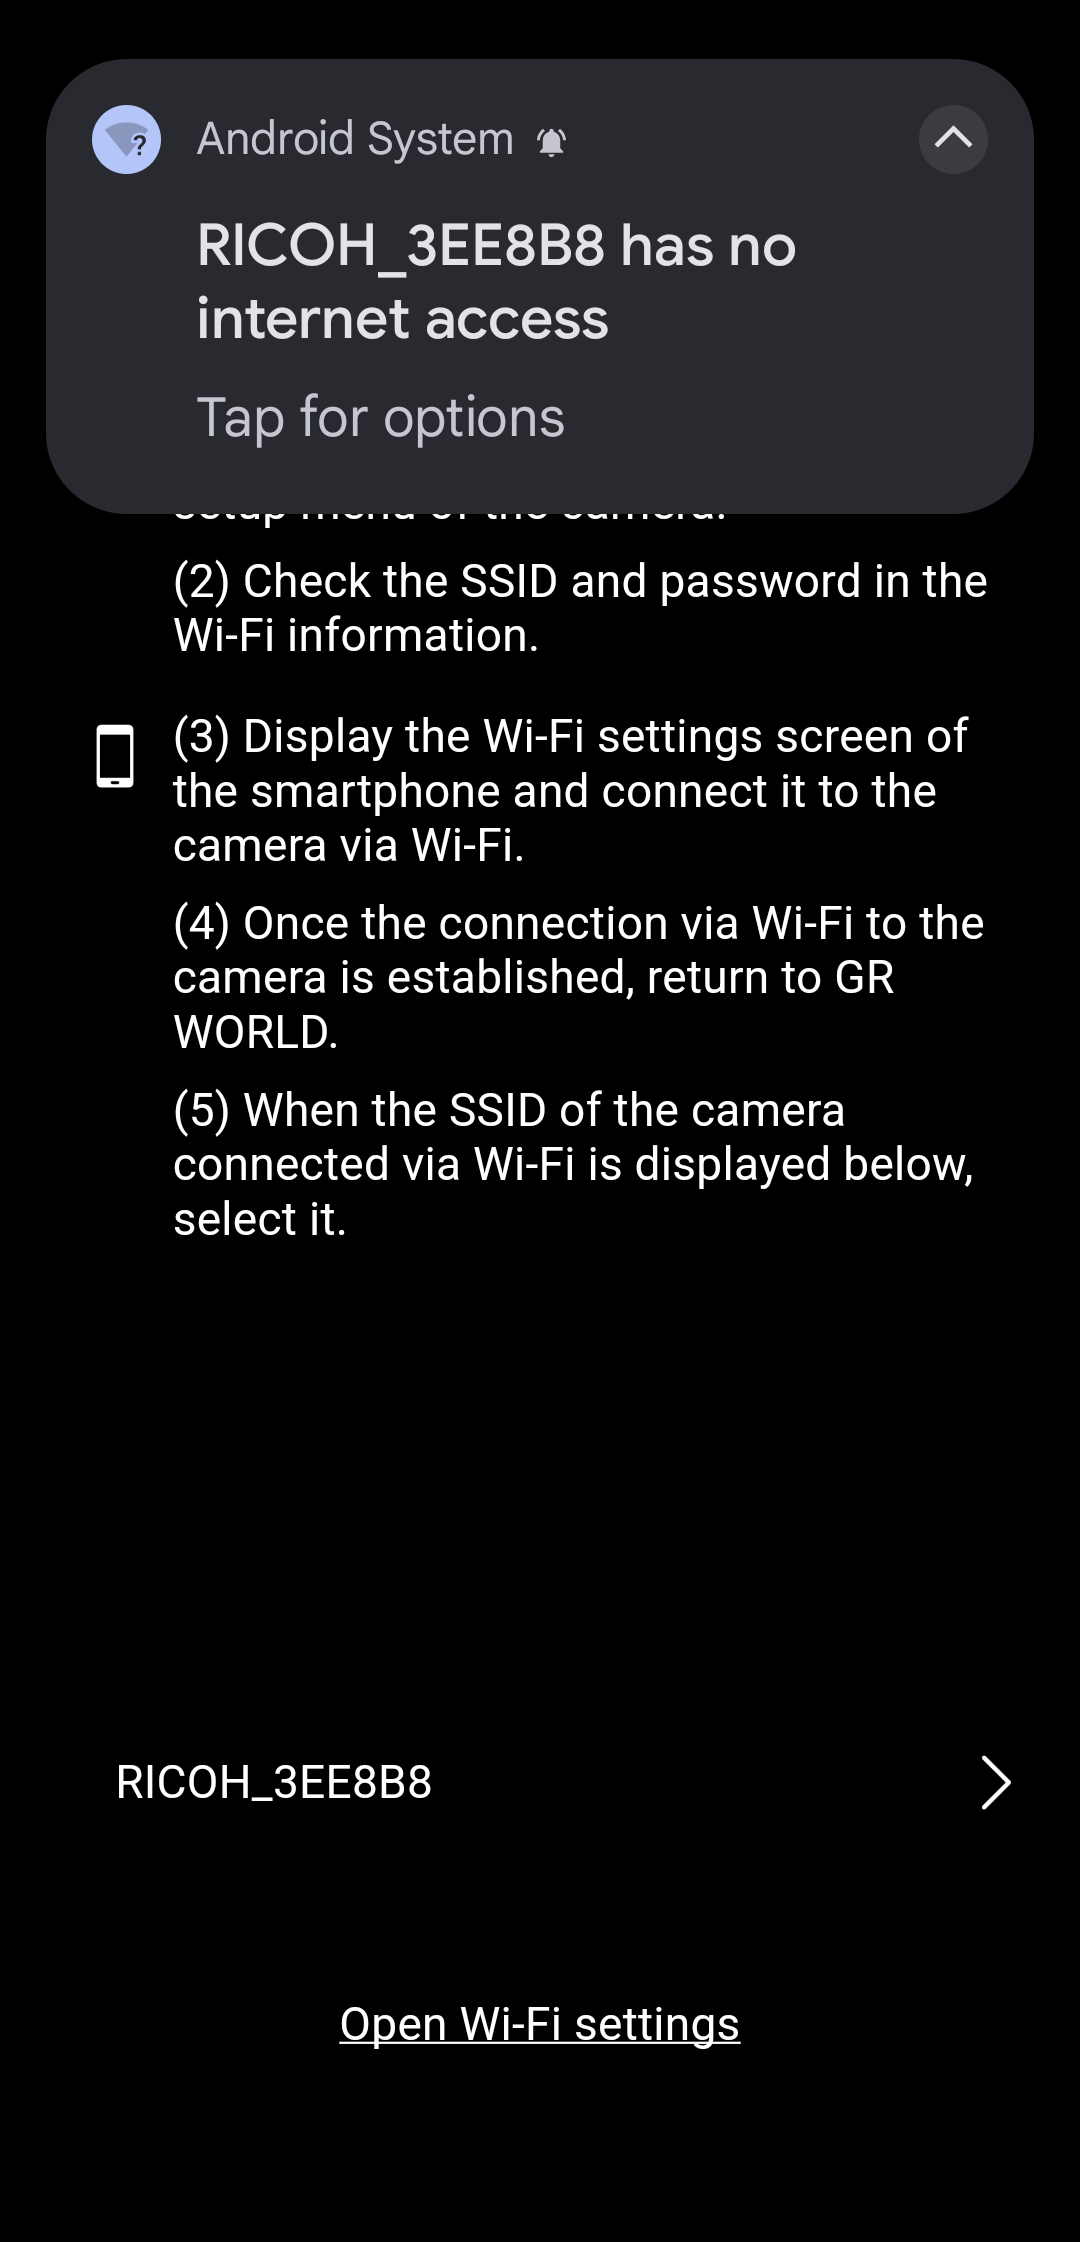
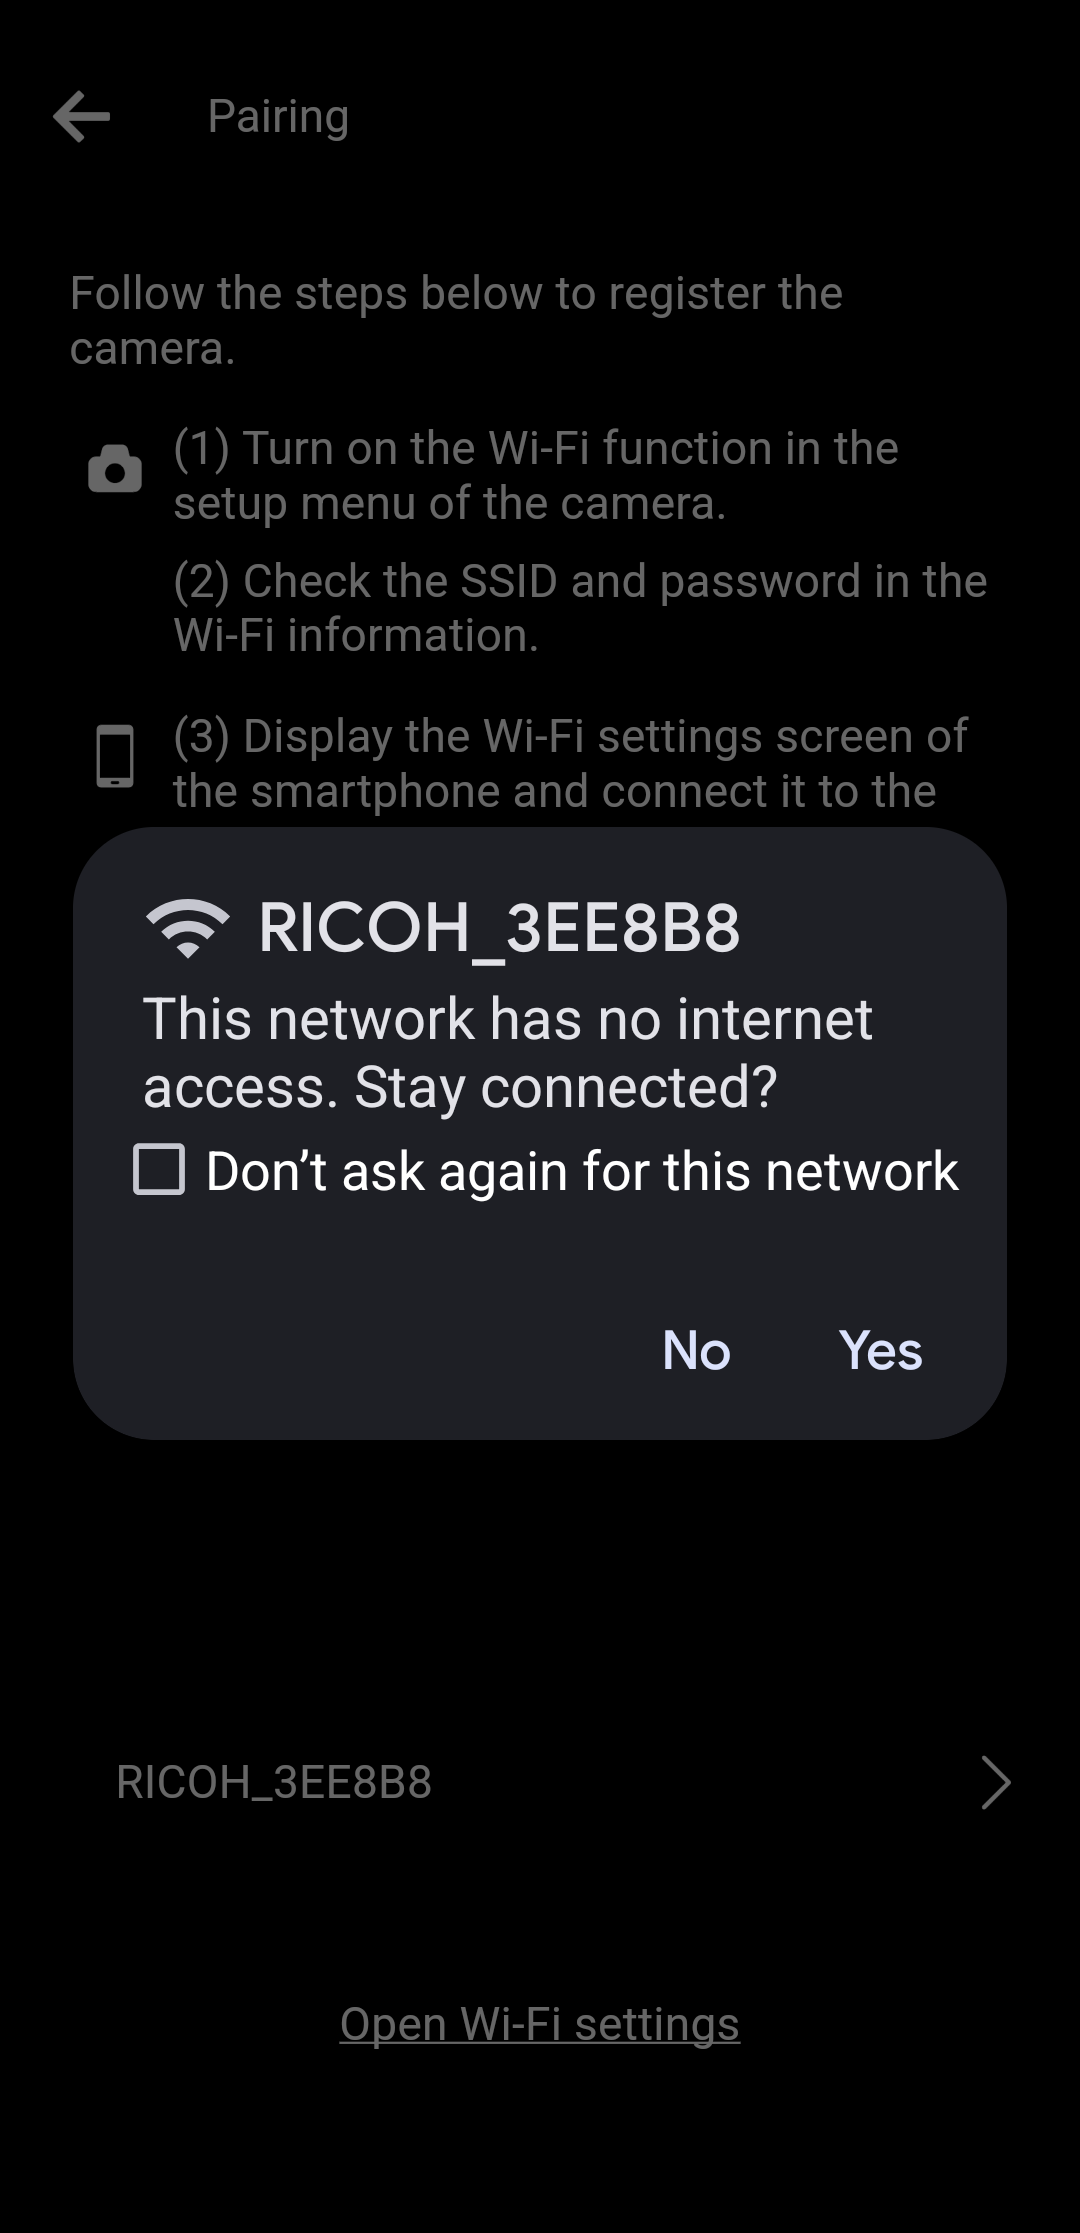
After that, you will be asked “This network has no internet access. Stay connected?” When the message is displayed, select “Yes”.
* If the notification is not displayed, please check the notification area of your smartphone.
* “This network has no internet access. Stay connected?” This message may appear when the camera and smartphone are connected via Wi-Fi. Since the camera is not connected to the internet, checking to see if the smartphone continues to use the Wi-Fi connection with the camera. In order for the app to communicate with the camera, it must maintain a Wi-Fi connection with the camera. So, when prompted, select "Yes".
* Depending on the smartphone model and OS version, the screen design and displayed messages may differ slightly.


* Please check if the Wi-Fi on your smartphone is turned on.
* This app does not support connection using Near Field Communication (NFC).
The firmware versions that can be used with this application are as follows.
・GR II: V1.10 or later
Please note that you will not be able to connect to a camera with an older firmware version, which will result in an error.
For details on how to update the camera's firmware, please click here.
・GR II
https://www.ricoh-imaging.co.jp/english/support/digital/gr2_s.html
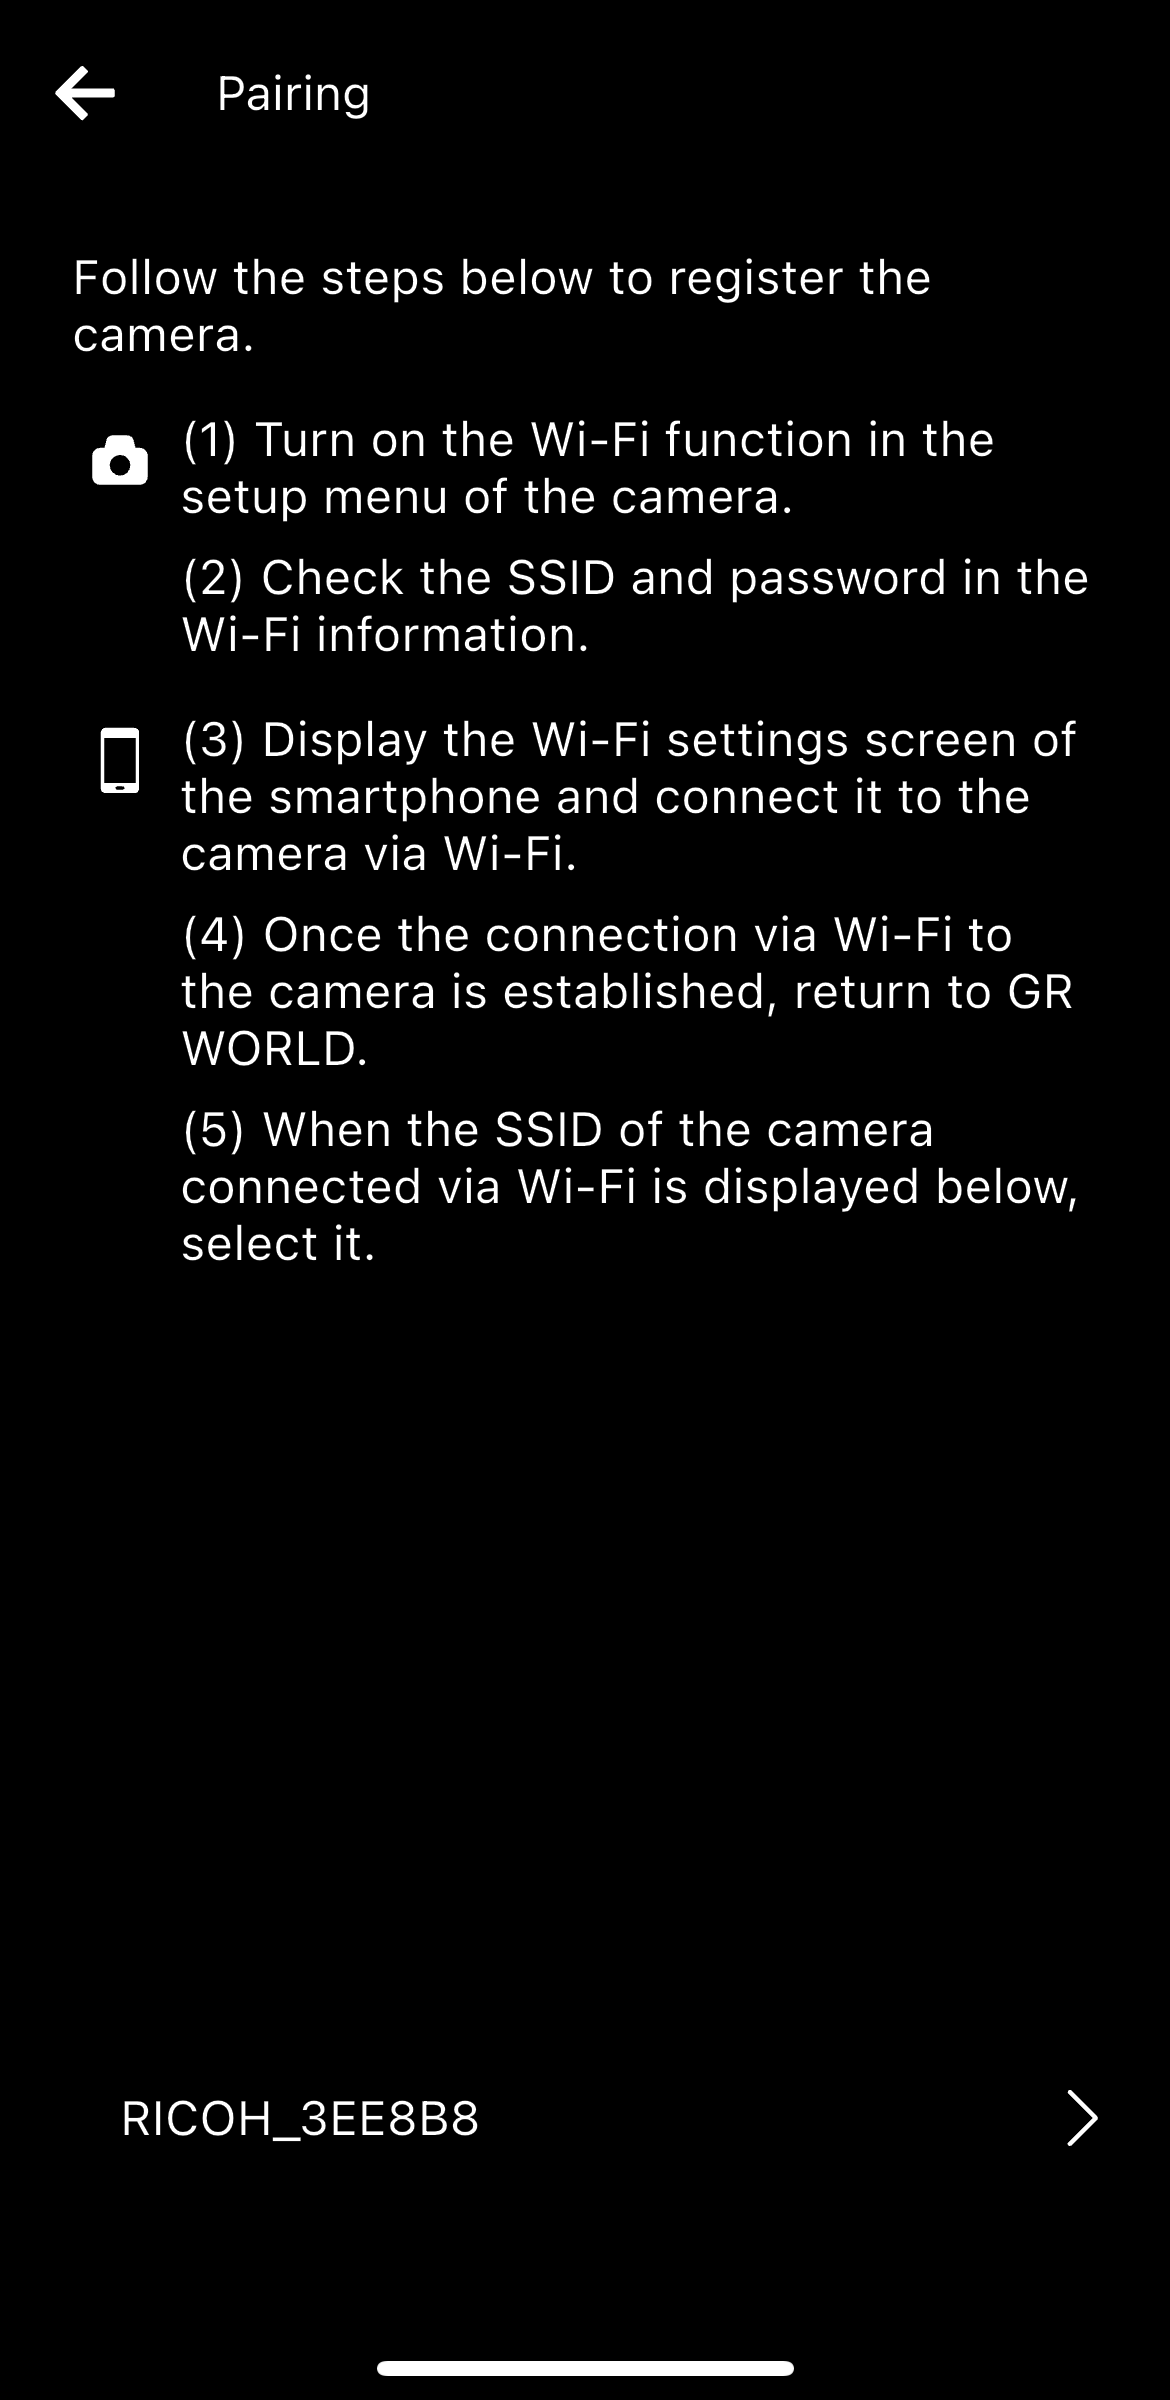
When the camera completes the operations (1) and (2), tap "Go to Wi-Fi setting screen".
* Until the operation (1) and (2) is completed on the camera side, the SSID of the device currently connected to the smartphone via Wi-Fi will be displayed.
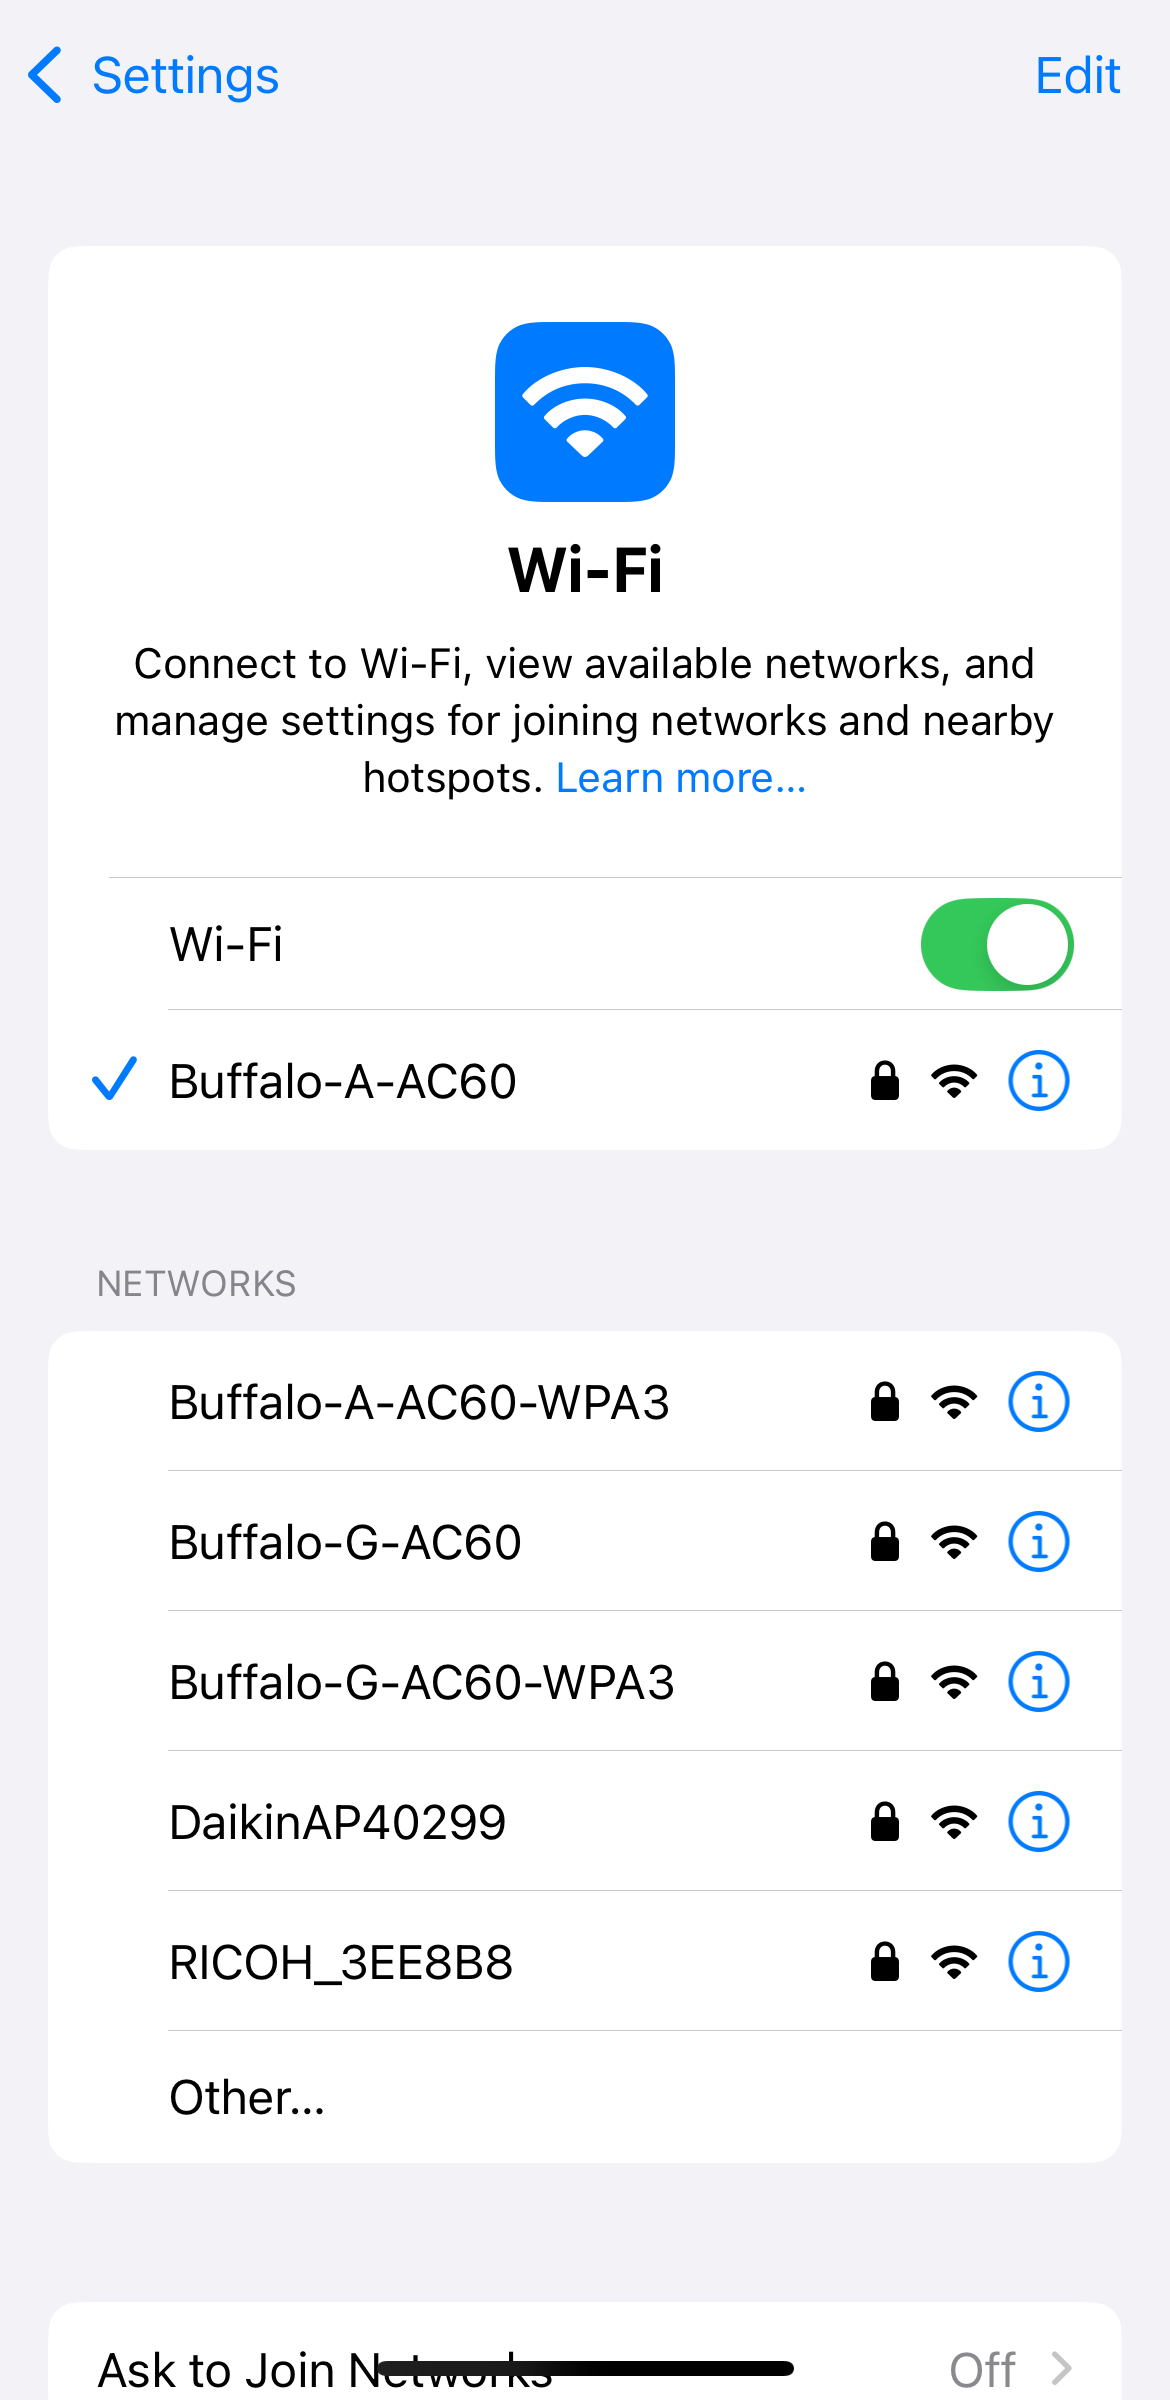
(1) Open the Wi-Fi setting screen of the smartphone's settings app.
(2) Tap the camera's SSID.
(3) Enter your password to connect to Wi-Fi.
* Depending on the smartphone model and OS version, the screen design and displayed messages may differ slightly.

(4) After the Wi-Fi connection with the camera is complete, return to GR WORLD.
* Depending on the smartphone model and OS version, the screen design and displayed messages may differ slightly.
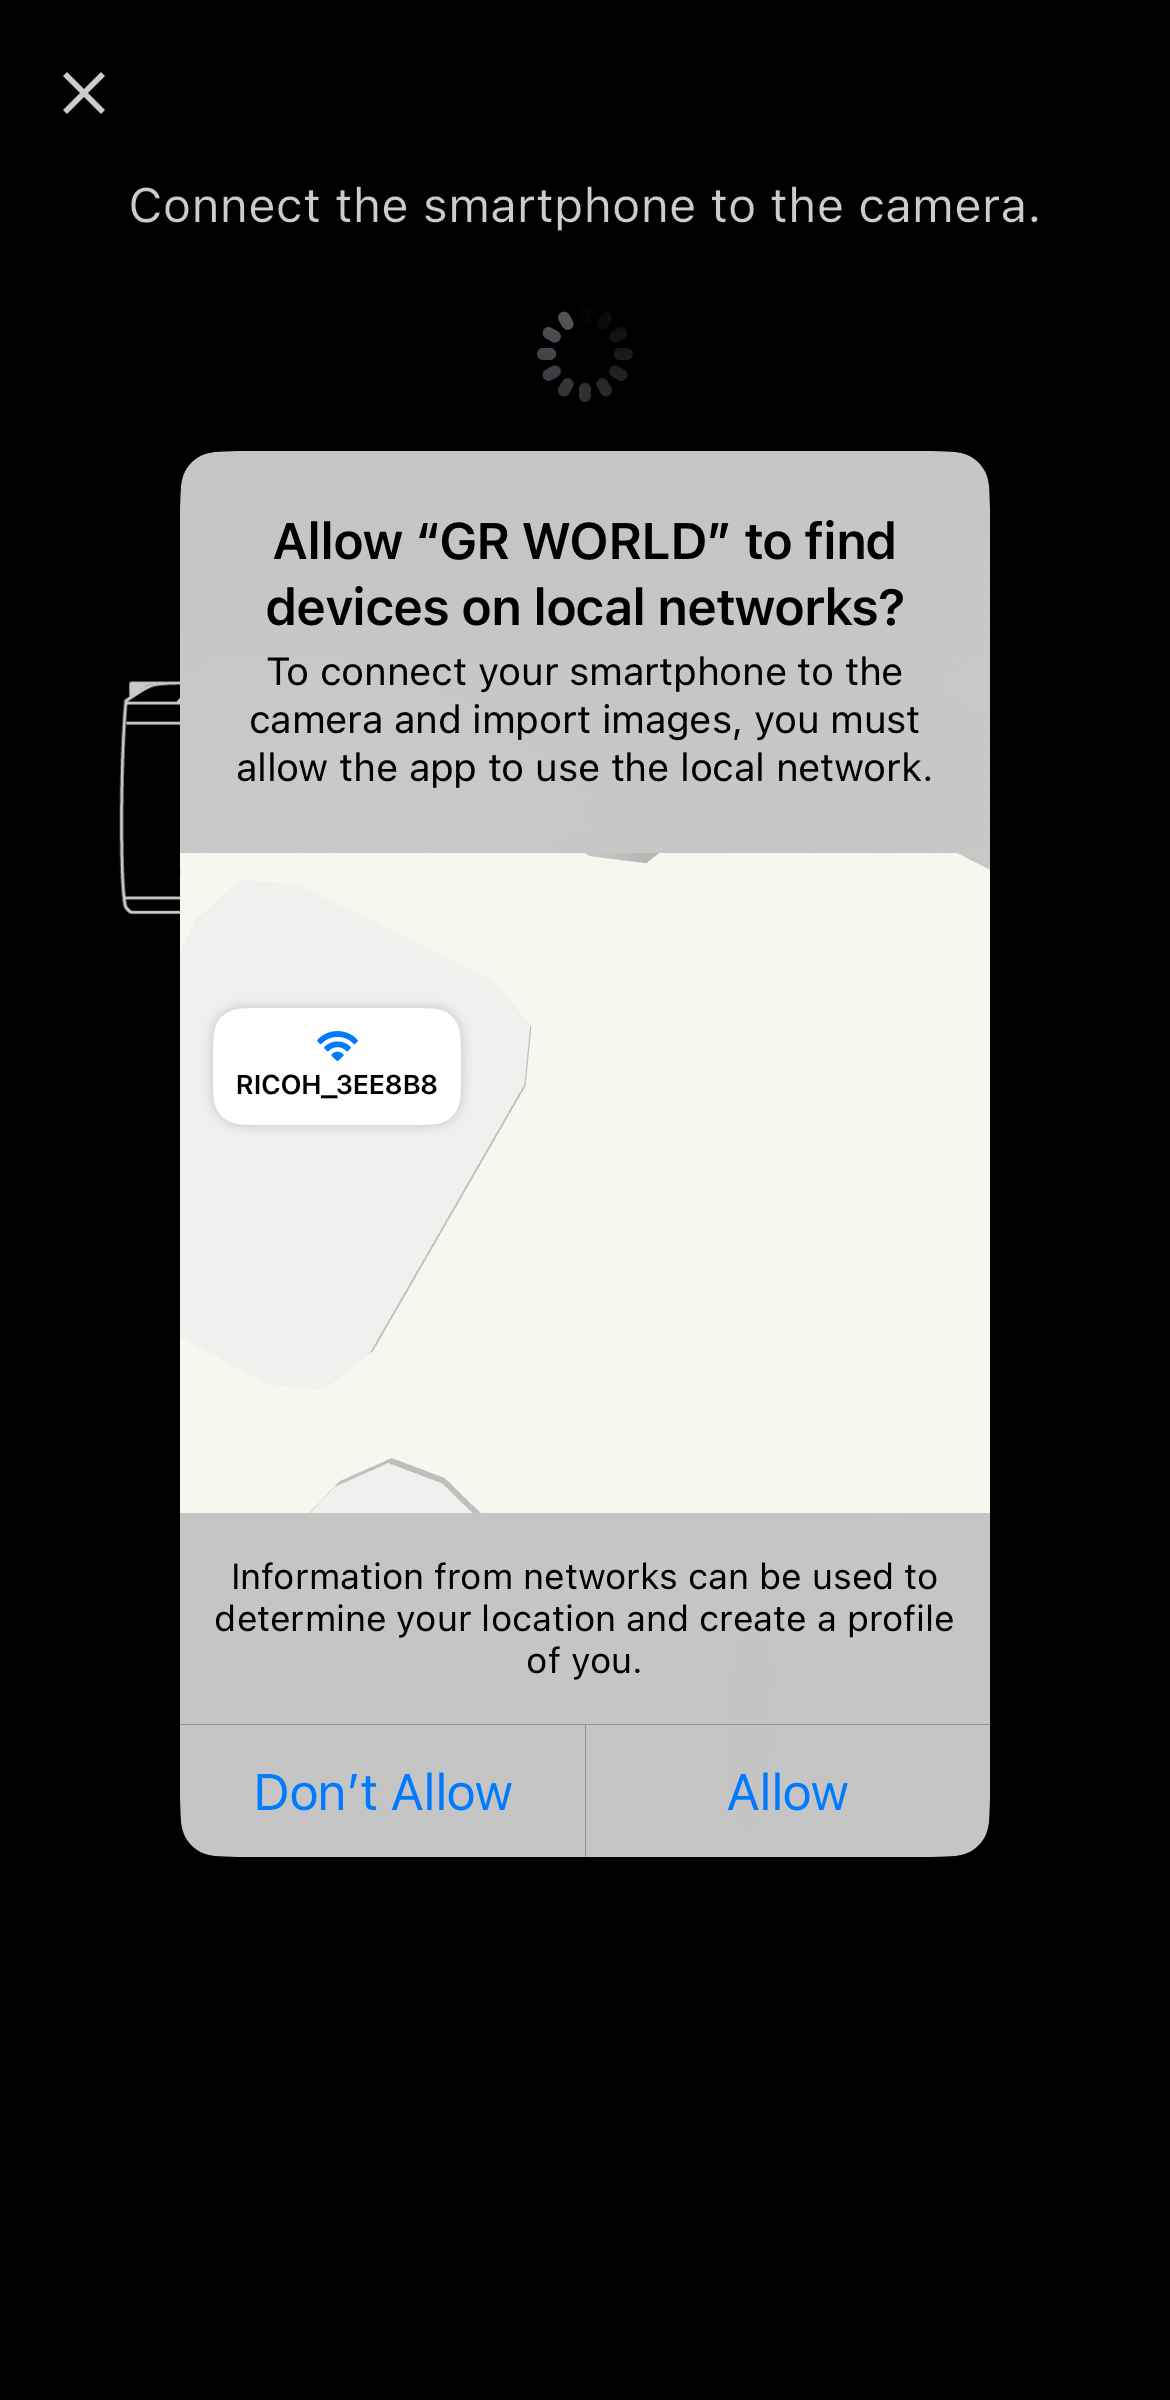
* By allowing this permission, the smartphone will be able to access devices on the same network (local network). If you do not allow it, you will not be able to connect to the camera, and you will not be able to use functions such as image import and remote shooting.
* Depending on the smartphone model and OS version, the screen design and displayed messages may differ slightly.