There are two types of blurring: "camera shake blurring" that happens when the hand holding the camera moves, and "motion blur," which occurs due to the movement of the subject.
Recent digital cameras*1 often feature a "camera shake correction function" to minimize the effects of camera shake blurring.
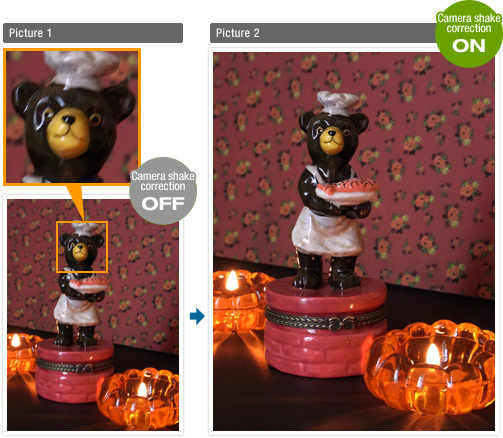
What kinds of scenes are best for this function? What are the differences when the function is turned OFF and ON? We decided to do a little research.
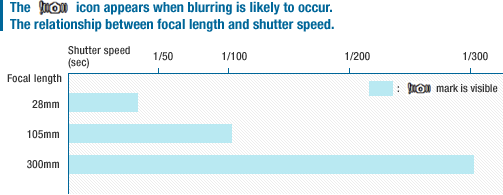
The icon, which tells you to watch out for camera shake, appeared under the above conditions*2.
Take a look at the diagram and you'll see that there is a higher chance of camera shake when the shutter speed is slow, and also when you zoom in.
In our experiment, we shot using zoom with a slow shutter speed.
*1. Some models do not include this function. Refer to the product manual for more information.
*2. When you press the DISP. button, a prompt will appear to notify you that the camera is switching to icon mode (CX2). This varies according to model. Refer to the product manual for more information.
Camera: CX2 ●Focal length:85mm ●ISO200 ●1/16sec (1/15sec for the picture on the right) ●F4.6 ●EV-1.0
Camera: CX2 ●Focal length:300mm ●ISO200 ●1/17sec (1/16sec for the picture on the right) ●F5.6 ●EV+0.3
So, turning camera shake correction ON when you're shooting in a dimly-lit indoor environment or at a high zoom level gives you clearer, less blurred pictures than shooting with correction OFF.
* Focal lengths are equivalent to those of 35mm film cameras.


 icon, which tells you to watch out for camera shake, appeared under the above conditions*2.