In #1:, we saw that using the "camera shake correction function" helped reduce camera shake.
"Auto high sensitivity (AUTO-HI)*1" helps minimize the effects of the other type of blurring - "motion blur."
How is the ISO sensitivity "AUTO-HI" setting different than the "AUTO" setting? What sorts of scenes are best for the "AUTO-HI" setting? We did a bit of experimentation with this setting together with the camera shake correction function.
*1. Some models do not include this function. Refer to the product manual for more information.
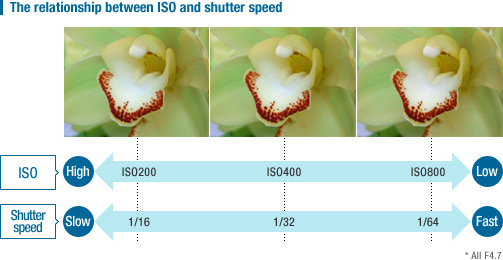
As you can see in the picture above, doubling the ISO value also doubles the shutter speed.
The maximum value for the CX2 ISO [AUTO] setting is 200, but [AUTO-HI] lets you set the maximum to 400, 800, or 1600, which makes it easier to find the right settings for various scenes.
We decided to take a closer look at some scenes where you might want to speed up the shutter speed, such as scenes with moving subjects or dim lighting.
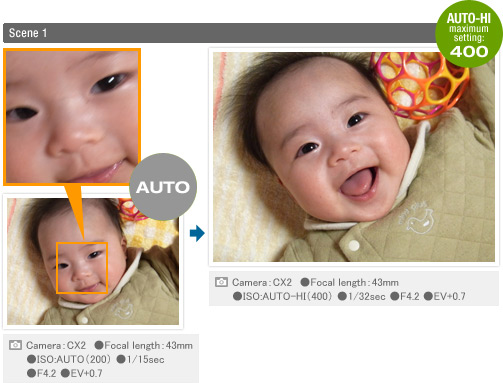
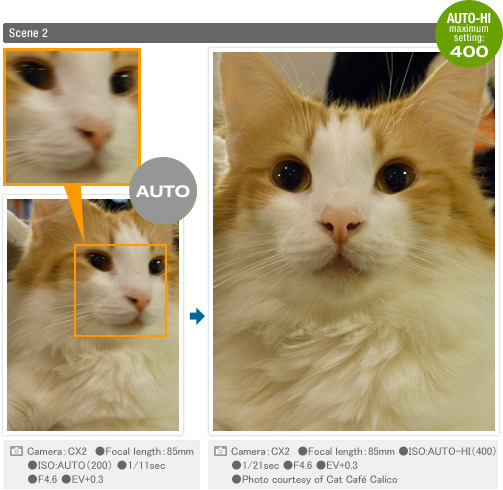
When you're taking photos of children or pets, like the subjects in scenes 1 and 2, pictures can end up blurry when the subject moves - even when you use a tripod. AUTO-HI, though, increases shutter speed and reduces blurring.
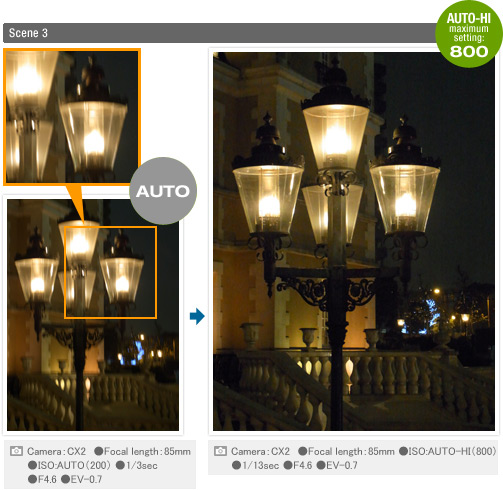
Although the subject in scene 3 is stationary, the dark lighting makes it difficult to prevent camera shake even with camera shake correction. By using AUTO-HI, we were able to speed up the shutter speed and get a good, un-blurred shot without a tripod.
You can select fixed ISO values, but it's difficult to choose a specific value if you're not fully accustomed to using the camera. AUTO-HI, which automatically chooses the optimal ISO in the maximum setting range based on the light intensity of the environment, proved to be an extremely useful function.
See below for more setup information.
* Focal lengths are equivalent to those of 35mm film cameras.
ISO AUTO-HI Settings
You can adjust the AUTO-HI (auto high sensitivity) ISO maximum from "ISO Sensitivity" on the shooting menu.
Display the setup menu
-
Refer to page 166 of the user's guide for operation procedures.
Press the ADJ./OK button ▼ to select the ISO AUTO-HI setting, and then press the ▶ button.
Press ▲▼ to choose a setting.
Press the ADJ.OK button.
If the ISO level is set too high, the image might become grainy.