


Calibration is a means of properly adjusting the O-GPS1's setup so the GPS unit can obtain accurate location data. The O-GPS1 must be calibrated before each use.
There are two types of calibration: simple calibration for general use, and "high-precision calibration" for the ASTROTRACER function.

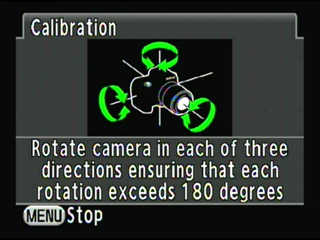
Recall the calibration screen from the camera's main menu.
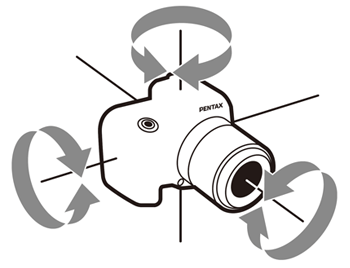
Rotate the camera at least 180 degrees in three directions, as illustrated above.
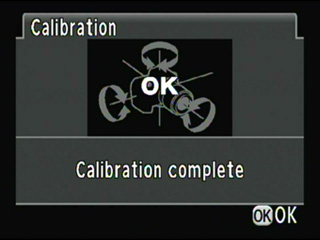
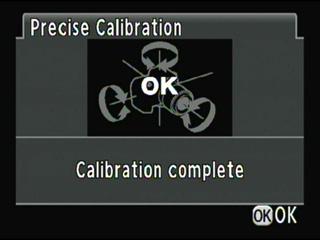
When the O-GPS1 is successfully calibrated, the letters "OK" will appear on the camera's LCD monitor.

Recall the calibration screen from the camera's main menu, and move the camera as instructed in the illustration and video above.

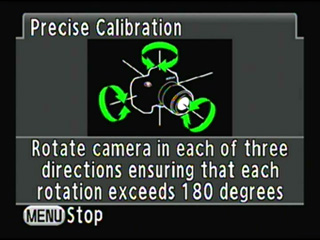
Recall the high-precision calibration screen from the camera's main menu, and move the camera as shown in the illustration and video above.

- * Do not swing or twirl the camera while changing your grip on it.
- * When calibration is unsuccessful, face in a different direction and/or slightly change the angle of grip, then try again.
- * Calibration data is retained even when the O-GPS1's power is turned off.
- * Calibration can be made regardless of GPS signal reception status.
- * At locations that are strongly affected by environmental magnetism, it may be difficult to make a successful calibration, or the O-GPS1 may not point in the proper direction when calibration is completed. The same may result when the O-GPS1 is calibrated indoors.
- * At locations affected by geomagnetism, such as in volcanic regions, it may be difficult to make a successful calibration, or the O-GPS1 may not point in the proper direction when calibration is completed.
- * When the lens or LCD monitor's angle is changed after calibration/high-precision calibration is completed, the environmental magnetism may be affected and may not point in the proper direction.
- * Calibration/high-precision calibration and shooting are recommended when LCD monitor is stored.