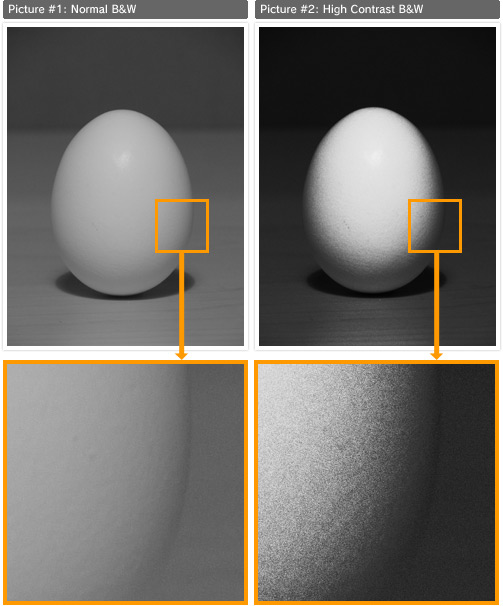
High Contrast B&W mode gives photos more contrast than Normal B&W and also lets you take pictures with a grainy look. How is this mode different from Normal B&W mode? We performed some experiments to find out.
To get an image like picture #2, with bold contrast and textured gray areas, all I had to do was select "High Contrast B&W" from the SCENE mode and snap a photo.
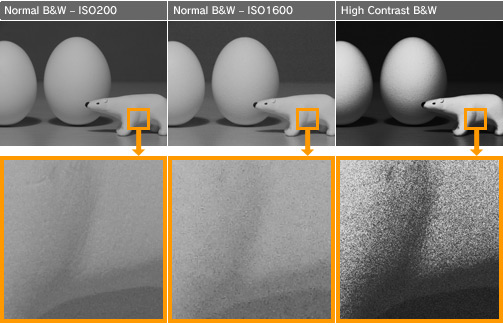
If you put the high contrast B&W photo side by side with the normal B&W photo (picture #1) you can see a clear difference. Increasing the ISO value does give the image a grainier look (see The Lab – Experiment #2: Extras), but can we get a different roughness in High Contrast B&W mode?
After a little experimenting, these are the photos we got. With a higher ISO, the image has noise, giving it a spotty look and a low-quality feel. However, there is no noise in the high contrast B&W image – instead, the picture seems to be made of large, contrasted particles, making it look snappy and bold (in High Contrast mode, ISO settings are configured automatically).
See below for more details.
Photography in SCENE mode (High Contrast B&W)
High Contrast B&W mode gives images more accentuated contrast than Normal B&W mode. With this mode, photos will look like images taken by film cameras with ultrasensitive film, or pictures developed using push processing.
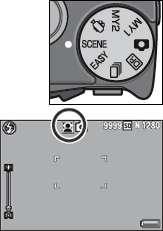
Turn the mode dial to SCENE
・
The camera is ready to shoot and the selected SCENE mode is displayed at the top of the picture display.
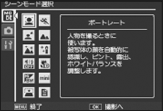
Press the MENU button when you want to change the SCENE mode
・
The SCENE mode selection screen appears.
Press the ADJ./OK button and select SCENE mode
Press the ADJ./OK button
・
The SCENE mode type is displayed at the top of the picture display.
Press the shutter button to take the picture
When you want to change shooting menu/setup menu settings in SCENE mode:
In shooting mode, press the MENU button and use the ADJ./OK button to select the "MODE" tab. Then press the ADJ./OK button once to access the shooting menu, or twice to access the setup menu.