
GR IV MonochromeProducts Information
Below is a list of frequently asked questions and corresponding answers for the GR IV Monochrome digital camera.
General function and specification
NOTE: For information on items not covered below, please refer to the GR IV FAQ.
https://www.ricoh-imaging.co.jp/english/support/qa/gr-4/index.html
 What to do first?
Please follow the steps below:
- Check the included items according to the enclosed Start Guide.
- Refer to the Start Guide to review the precautions for use, then insert the rechargeable battery (DB-120) and a commercially available microSD memory card.
* Even without a microSD card, you can still record images using the camera’s built-in memory (approx. 53 GB).
- Charge the lithium-ion battery (DB-120) following the instructions in the Start Guide.
- Turn on the power and complete the initial setup when starting the camera for the first time.
- If you insert a commercially available microSD memory card, make sure to format it with the GR IV before shooting.
- Perform a test shot by pressing the shutter button and confirm that the image is recorded correctly.
- Access the GR IV Monochrome User Guide, which provides more detailed information, via the QR code or URL on the cover of the Start Guide.
- Follow the instructions in the Start Guide or the User Guide to complete the settings, and enjoy shooting with your GR IV Monochrome.-
What accessories are provided with this camera?
The following accessories are providing with this camera.
・Strap O-ST198
・USB cable I-USB198 (Type C to Type C)
・Rechargeable lithium-ion battery DB-120
・Hot Shoe Cover (attached to camera) O-HC198
・Ring Cap: GN-3 (MB) (attached to camera)
・Start guide-
What are the optional accessories for this camera?
The optional accessories are as follows:
Battery
・Rechargeable Lithium-ion Battery DB-120
・Battery Charger BJ-12
AC Adapter
・AC Adapter Kit K-AC166J (AC Adapter + AC Cable)
External Viewfinder
・External Viewfinder GV-1
・External Mini Viewfinder GV-2
External Flash
・External Flash GF-2
Conversion Lens
・Wide Conversion Lens GW-4
・Lens Adapter GA-3
Case
・Soft Case GC-14
・Soft Case GC-12
・Soft Case GC-11
Metal Hotshoe Cover
・GK-2
Strup
・Neck Strap GS-3
・Neck Strap ST-2
・Hand Strap GS-2
・Finger Strap GS-4
USB Cable
・USB Cable I-USB198 (Type C to Type C)
Ring Cap
・GN-3 (DG)
Note: For more information, please click here.
https://www.ricoh-imaging.co.jp/english/products/GRⅣ/accessories/index.html-
What else to do need besides the included items when purchasing?
The GR IV Monochrome has approximately 53 GB of built-in memory.
To store a large number of images, please use a microSD memory card with sufficient capacity.-
What is the difference between the GR IV and the GR IV HDF?
The GR IV HDF features newly developed components dedicated to monochrome photography, including:
・A dedicated image sensor
・A dedicated image processing engine
・A dedicated lens unit
・Dedicated image control
The ISO sensitivity can be set from ISO 160 to ISO 409,600.
The GR IV is equipped with an ND filter, the GR IV HDF features a Highlight Diffusion Filter, and the GR IV Monochrome features a red filter.
The power button lamp and status lamp are green on the GR IV and GR IV HDF, whereas they are white on the GR IV Monochrome.
The AF assist lamp and self-timer lamp use a warm-toned color rather than green.
When the power is turned off, the display shows a screen unique to the Monochrome model.
Power supply / Battery
NOTE: For information on items not covered below, please refer to the GR IV FAQ.
https://www.ricoh-imaging.co.jp/english/support/qa/gr-4/index.html
-
What type of battery can be used?
The compatible battery is the rechargeable DB-120 battery.
Batteries used in the GR III series (DB-110), as well as in the GR, GR II, and GR DIGITAL series (DB-65 and AA batteries), cannot be used.
Memory Card
NOTE: For information on items not covered below, please refer to the GR IV FAQ.
https://www.ricoh-imaging.co.jp/english/support/qa/gr-4/index.html
-
What type of memory card can be used?
The camera uses microSD cards in size and shape.
It supports microSD, microSDHC, and microSDXC memory cards.
microSDHC and microSDXC cards are compatible with the UHS-I standard.
The maximum transfer speed of the UHS-I standard is 104 MB/s.
The following memory cards have been tested for compatibility:
• KIOXIA (Toshiba) and SanDisk
o microSDHC memory cards: up to 32 GB
o microSDXC memory cards: up to 1 TB
Note: For video recording, it is recommended to use a high-speed memory card with a speed class of Class 6 or higher.
Note: The camera has approximately 53 GB of built-in memory.
As of February 2026
“Tested for compatibility” means that the camera has been tested by the manufacturer for operational confirmation to assist customers. This does not constitute a guarantee to the customer.-
Is there anything I need to do before using a microSD memory card?
When using a new memory card, or one that has been used with another device such as a PC, be sure to back up any data on the card to a PC or other device first. Then, always format the card in the camera before use.
Note: Formatting will erase all data on the memory card.-
Does the camera support the UHS speed class?
Yes, it is compatible with the UHS-I standard for microSDHC and microSDXC memory cards.
The maximum transfer speed of the UHS-I standard is 104 MB/s.
Shooting Functions
NOTE: For information on items not covered below, please refer to the GR IV FAQ.
https://www.ricoh-imaging.co.jp/english/support/qa/gr-4/index.html
-
What is the Image Control function?
The Image Control function allows you to capture images with adjusted saturation, contrast, and other settings.
By selecting an image finishing option, you can capture images with distinctive characteristics and make fine adjustments such as contrast and grain.
How to Set
From the MENU, select “Still Image Settings”, then choose “Image Control” under “Image Processing Settings”, and press the direct key (Right).
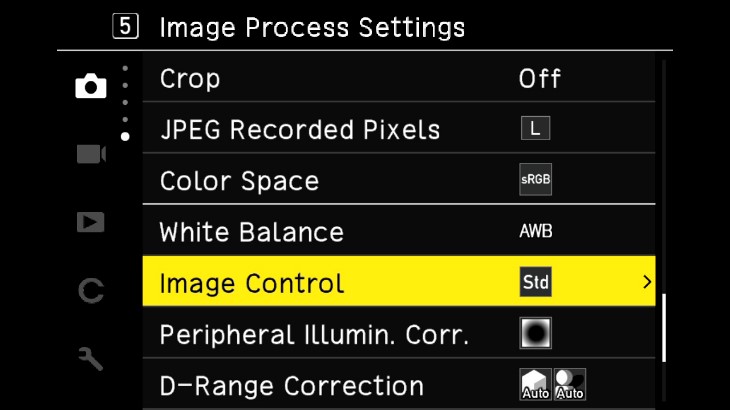
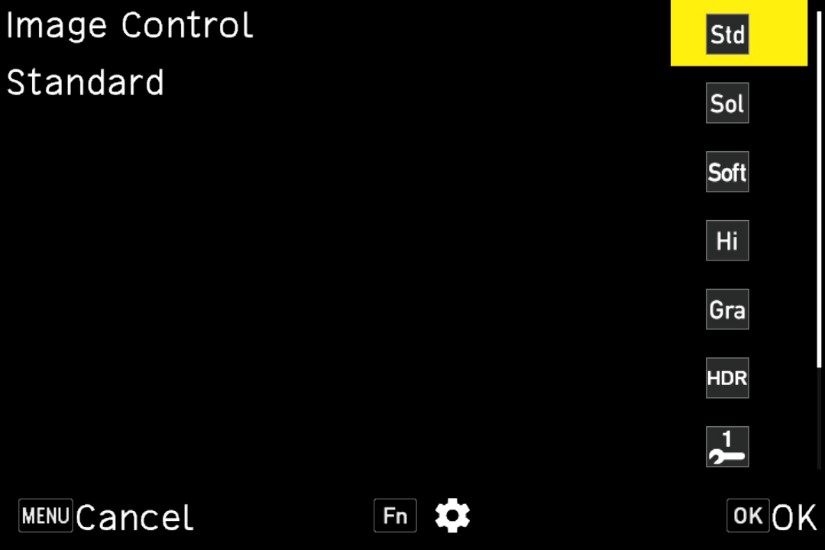
The following screen will appear. Use the direct keys (Up) and (Down) to make your selection.
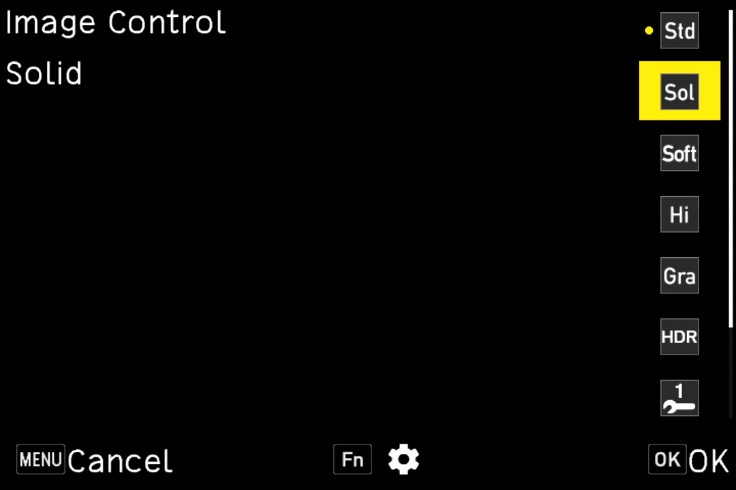
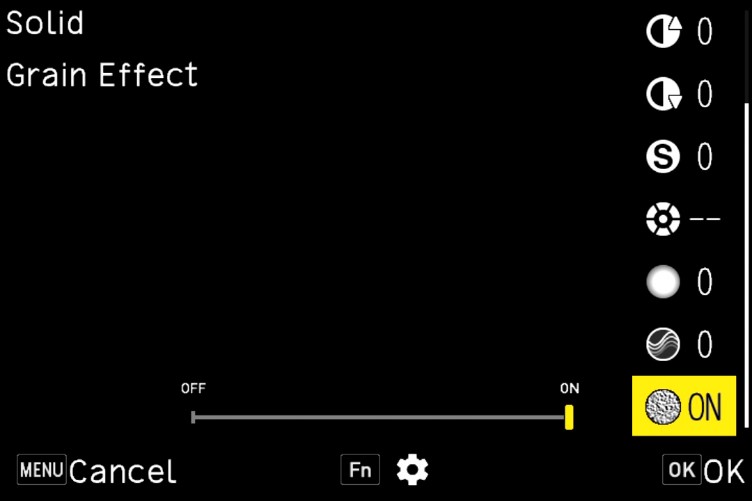
When Image Control is selected on the above screen, pressing the Fn button allows you to adjust the following parameters in detail: Key, Contrast, Sharpness, Color Tone, Shading, Clarity, and Grain.
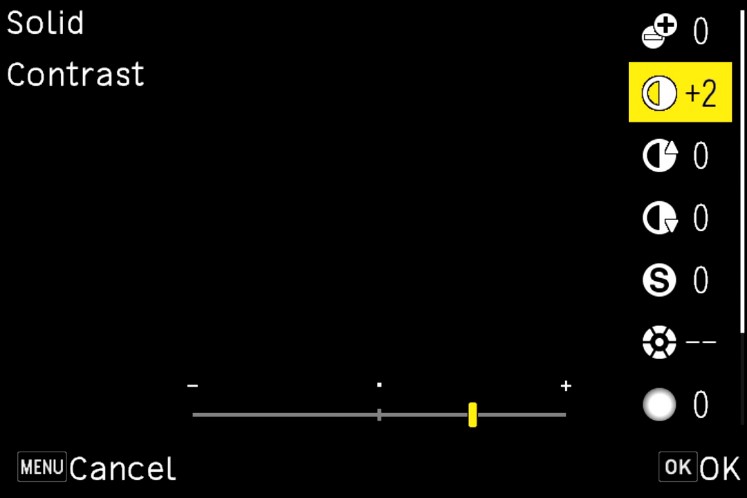
Preset Description Standard Captures images with normal image quality. Solid A black-and-white mode that delivers a modern look with firm outlines and crisp, high-contrast tones. Soft A monochrome mode with softened outlines and subtle, low-contrast tones.
Note: This mode cannot be selected in movie mode.High Contrast A monochrome mode characterized by pronounced black-and-white contrast, creating a powerful and striking look. Grainy A monochrome mode characterized by pronounced grain, creating a look similar to black-and-white prints.
Note: This mode is not available in movie mode.HDR Tone A monochrome mode that emphasizes highlights and shadows to create a dramatic look.
Note: Not available in movie mode.Custom 1 / Custom 2 / Custom 3 You can register up to three custom settings with customized parameters. - In Movie mode, Soft, Grainy and HDR Tone presets cannot be selected.
- Image Control settings are not applied to RAW image data.
- Custom settings can be registered in “ADJ Mode Settings” or “Fn Button Settings” under [Customize Settings] → 2: Operation Customization.
- The names of Custom 1–3 can be changed via GR WORLD, the dedicated application for the RICOH GR series.
-
Which Image Control options can be selected in movie mode?
The available Image Control options in movie mode are Standard, Solid, High Contrast, and Custom 1–3.
Soft, Grainy, and HDR Tone are not available.-
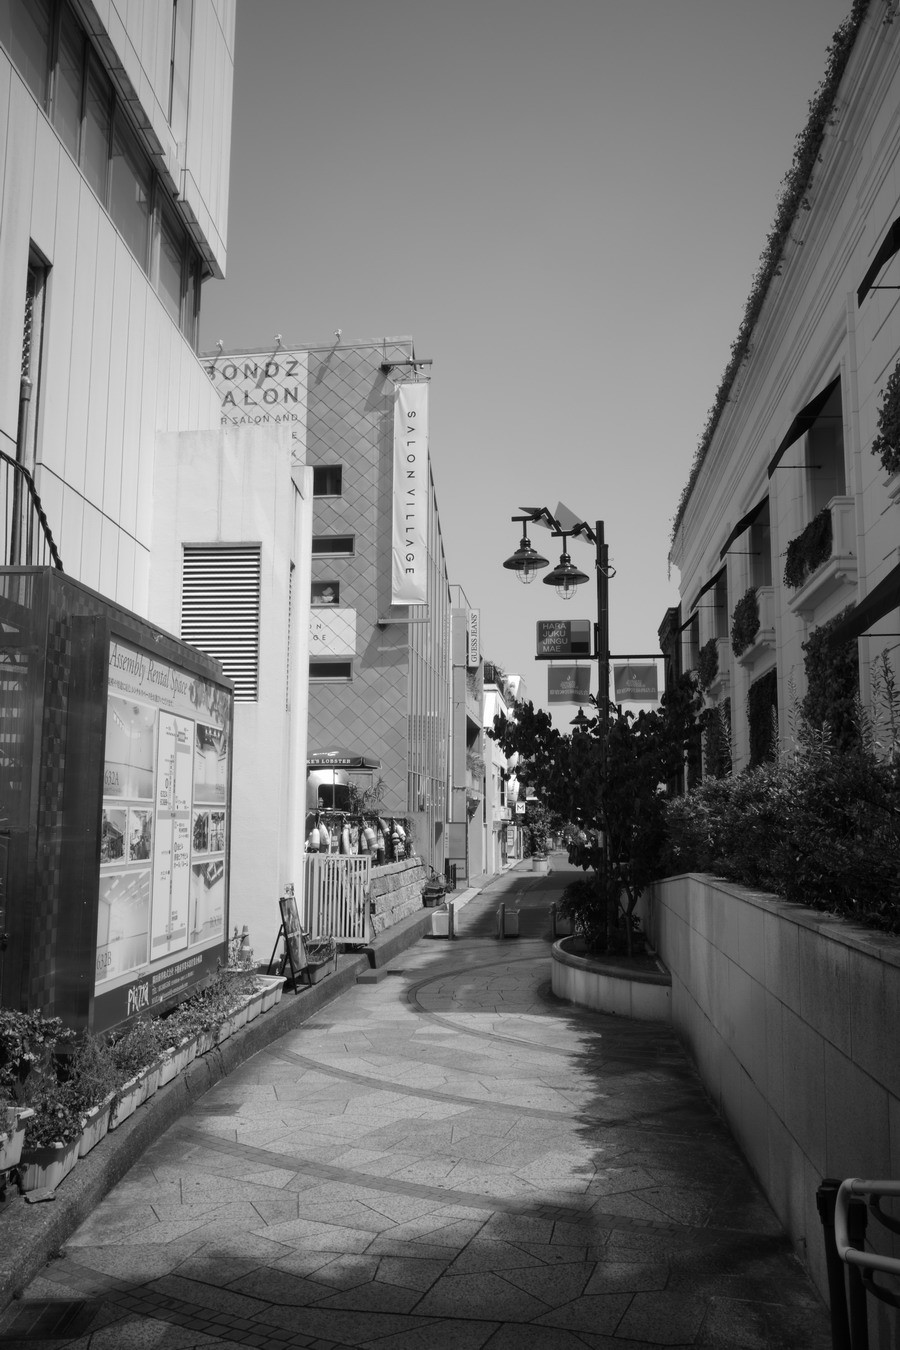
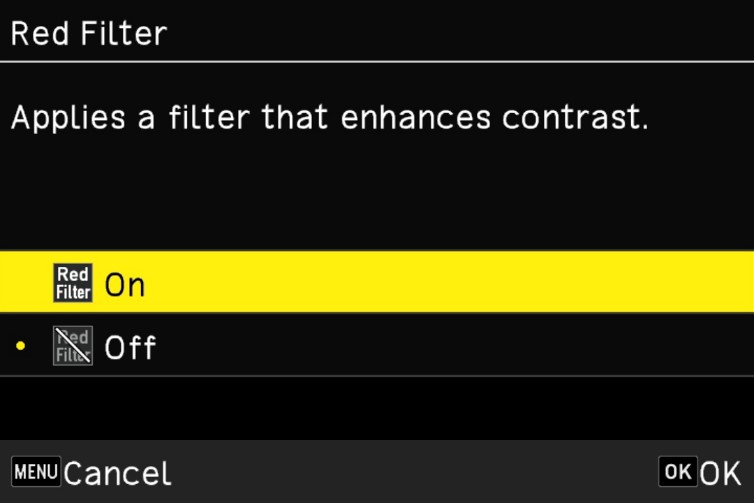
What are the effects of the red filter?
This filter enhances contrast. For example:
• It darkens blue skies to emphasize contrast with clouds.
• It brightens red subjects, making them stand out more clearly.
As a result, you can capture images with a bold and striking look.
Comparison (Red Filter: Off)
Comparison (Red Filter: On)

-
There is no “ND Filter” option in the Exposure Settings of the Still Image Settings menu. Why is that?
On the GR IV Monochrome, a red filter is installed in place of the ND filter used on the GR IV.
Therefore, instead of the [ND Filter] option in Exposure Settings, a [Red Filter] option is available in Shooting Settings.-
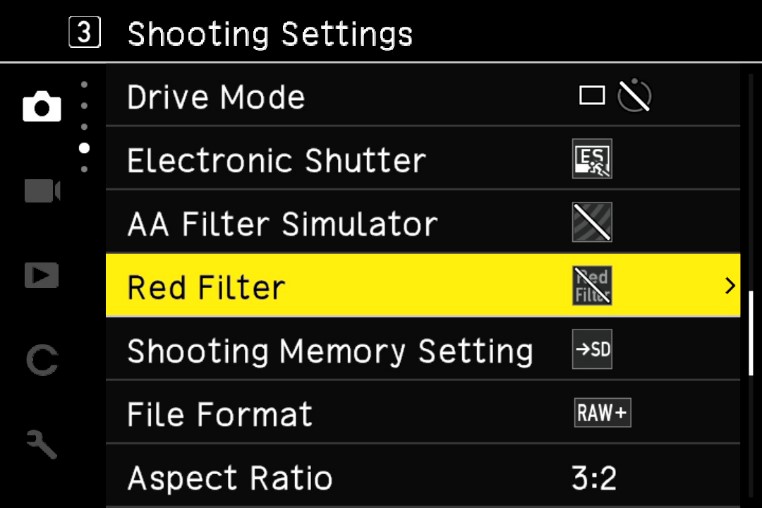
Where can the Red Filter be configured?
The Red Filter can be configured via the [Red Filter] item in Shooting Settings under the Still Image Settings menu.
Note: By default, the [Red Filter] function is assigned to the Fn button.
-
Is flash photography supported?
Flash photography is supported when using the separately sold external flash GF-2, which provides automatic flash exposure control.-
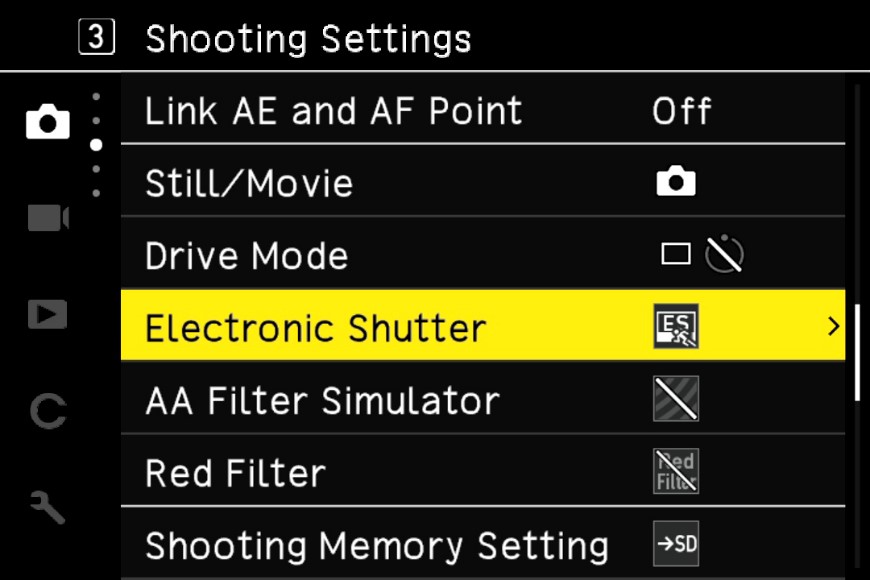
What is the electronic shutter?
This camera is equipped with an electronic shutter that allows you to select faster shutter speeds.
You can shoot with the aperture wide open at F2.8 while setting the shutter speed up to 1/16000 second.
Note: When the aperture is wide open at F2.8, the maximum shutter speed of the mechanical lens shutter is 1/2500 seconds.
By expanding the range of available exposure value combinations, you can achieve proper exposure even in very bright environments, such as a midsummer beach, by using the high-speed electronic shutter while keeping the aperture wide open.-
At what shutter speeds does the camera switch between the electronic shutter and the lens shutter?
When the aperture is set between F2.8 and F4.0, the lens shutter can be used at speeds of 1/2500 seconds or slower.
At shutter speeds from 1/3200 to 1/16000 seconds, the camera uses the electronic shutter.
When the aperture is set between F4.5 and F5.0, the lens shutter can be used at speeds of 1/3200 seconds or slower.
At shutter speeds from 1/4000 to 1/16000 seconds, the camera uses the electronic shutter.
When the aperture is set between F5.6 and F16, the lens shutter can be used at speeds of 1/4000 seconds or slower, and shutter speeds from 1/5000 to 1/16000 seconds are handled by the electronic shutter.-
What precautions should be taken when using the electronic shutter?
When the electronic shutter is used, fast-moving subjects—such as trains, cars, or during sports photography—may be recorded with diagonal skewing or rounded distortion.
* The flash (GF-2) cannot be used simultaneously.
* Shake Reduction and the low-pass selector are turned off.-
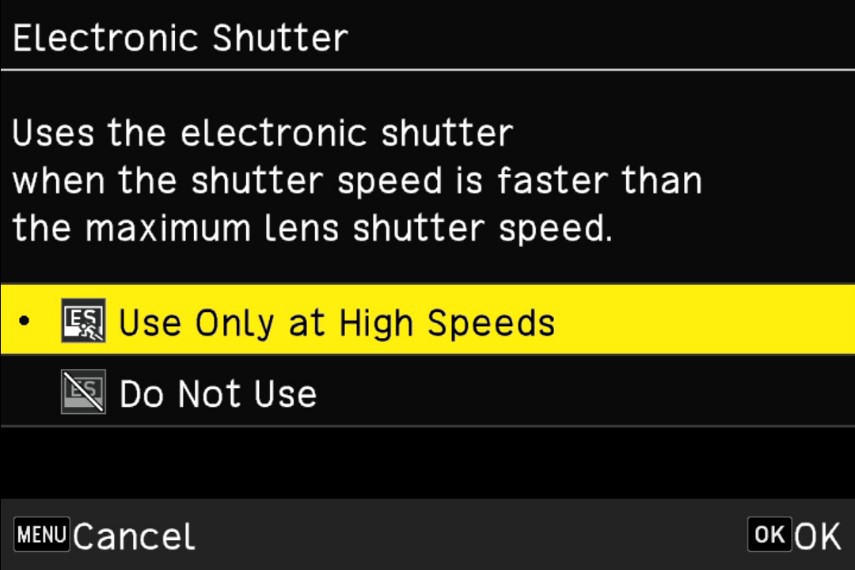
Can the electronic shutter be turned on or off?
Yes. In the [Electronic Shutter] menu, you can select either “Use only at high speeds” or “Do not use.”
Playback Functions
NOTE: For information on items not covered below, please refer to the GR IV FAQ.
https://www.ricoh-imaging.co.jp/english/support/qa/gr-4/index.html
-
What are the specifications of the playback functions?
The main playback function specifications are as follows:
Playback Methods Single image, multi-screen display (20 or 48 images), zoom display (up to 16×, 1:1 display, quick zoom), histogram display (Y histogram), grid display (9×9, 16×16), highlight warning, auto image rotation, folder display, display by shooting date JPEG Quality Adjustment Adjustment items: Brightness, Color Tone, Contrast, Sharpness RAW Development RAW image selection: single image / multiple images / folder / shooting dateRAW development parameters: JPEG recording size, aspect ratio, color space, image control, peripheral illumination correction, exposure compensation, high ISO noise reduction, shadow correction Editing Functions Delete, Protect, Rotate, Copy, Transfer, Resize, Crop (aspect ratio change, tilt correction), Level correction, Video trimming, Video splitting, Save video frame as JPEG -
What settings are available in the playback settings menu?
The following settings can be configured in the menu:
1. Playback Settings
Playback Memory Selection Choose between the internal memory (approx. 53 GB) or a memory card. Auto Image Rotation Can be set to On or Off. Playback Order Choose either File Number or Shooting Date. Playback Volume Select from 21 levels, 0 to 20.
2. File Operations
Delete Delete a single image, multiple images, or all images. Protect Protect a single image, multiple images, or all images. Rotate Rotate Right 90°, 180°, or Left 90°. Copy Copy all images stored in internal memory to an SD memory card. Transfer Transfer a single image or multiple images.
3. Image Editing
RAW Development Configure the JPEG recording size, aspect ratio, color space, image control, peripheral illumination correction, exposure compensation, high-ISO noise reduction, and shadow correction, then save the image as a new JPEG file. Resize Reduce the size of a JPEG image. Crop Cut out a portion of a JPEG image and save it. Level Correction Adjust highlights, midtones, and shadows in a JPEG image to correct brightness and contrast. JPEG Quality Adjustment Adjust brightness, saturation, hue, contrast, and sharpness of a JPEG image. Video Editing Trim Video: Specify start and end points and save the selected range as a new video.
Split Video: Specify a split point and save the two resulting videos as new files.-
Can data shot with the GR IV and GR IV HDF be played back on the GR IV Monochrome?
Yes, playback is possible. Images are displayed in the colors in which they were captured.
File operations in the Playback Settings, such as Delete, Protect, Rotate, Copy, and Transfer, are available; however, image editing functions such as RAW development are not supported.-
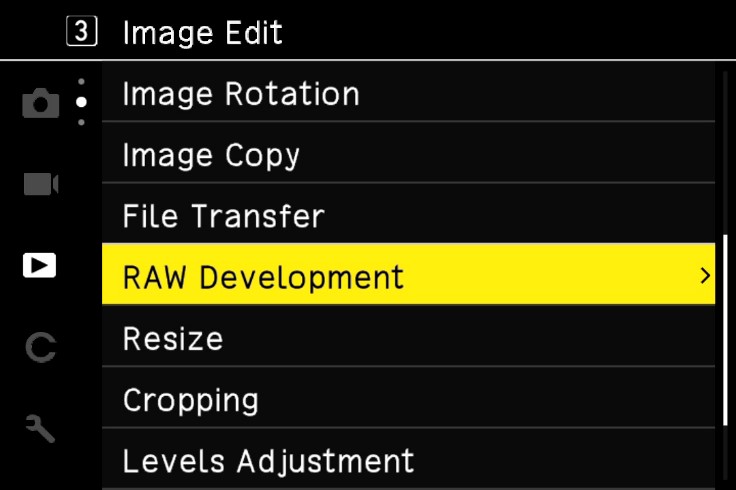
What is the RAW development function?
You can convert captured RAW image files to JPEG format and save them as new images after adjusting parameters.
To do this, select RAW Development in the 3: Image Editing menu under the playback settings, and save in JPEG format.
・Press the Drive / Right Button on the direct key to access the Parameter Selection Screen shown below.
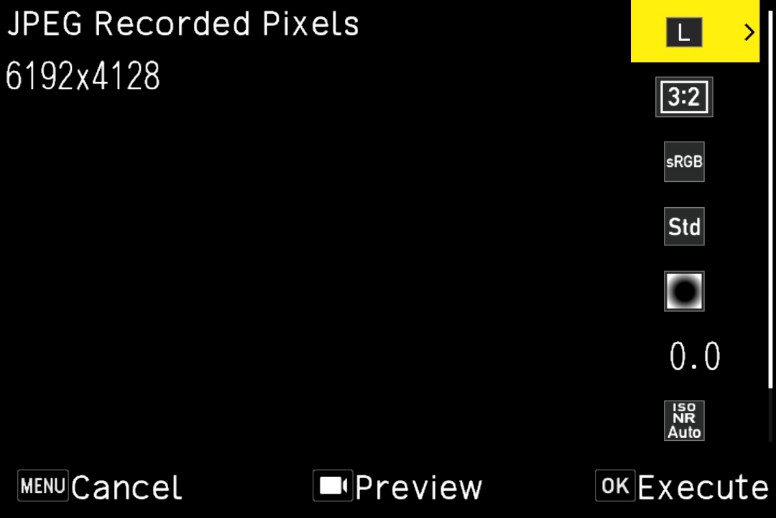
・The configurable items (parameters) are as follows:
“JPEG Recording Size,” “Aspect Ratio,” “Color Space,” “Image Control,” “Peripheral Illumination Correction,” “Sensitivity Adjustment,” “High-ISO Noise Reduction,” and “Shadow Correction”
* The settings used at the time of RAW capture are initially selected.
* Only settings that can be changed are selectable.
[Example: Changing Image Control Parameters]
On the above screen (JPEG Recording Size: 6192 × 4128, L), use the Up/Down direct keys to select the Image Control parameter (Standard).
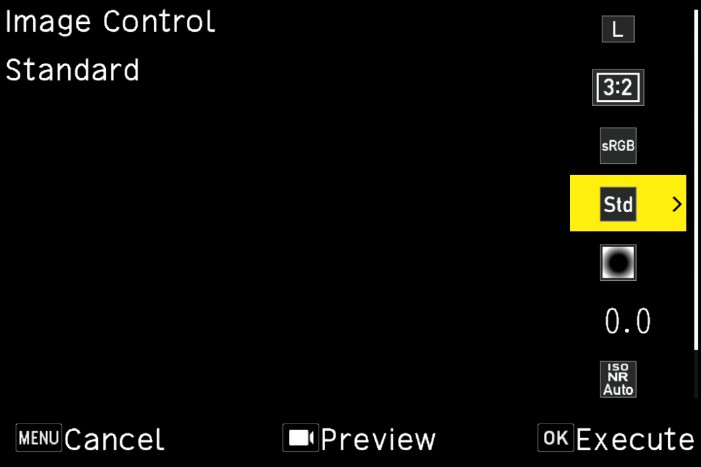
The screen below shows the selected state.
Press the Right direct key on the above screen to display the Image Control
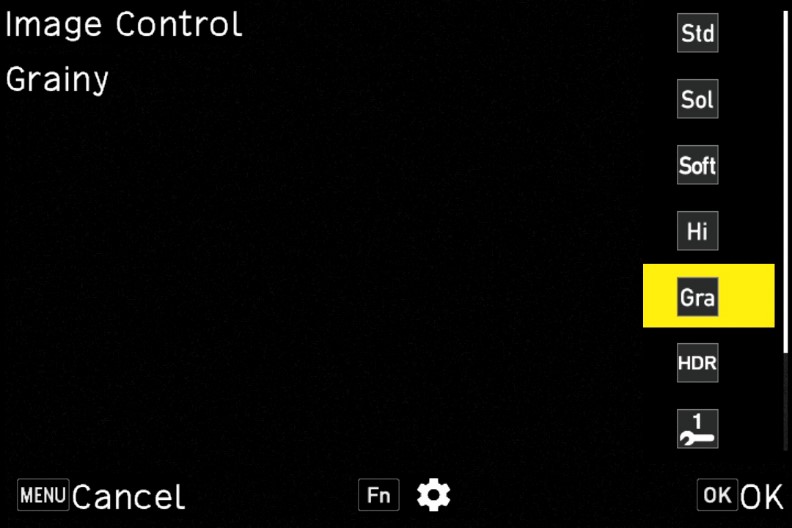
Selection screen below.
The screen below shows “Grainy” selected using the Up/Down direct keys on the above screen.
Press the Fn button on the above screen to display the Detail Settings screen below.
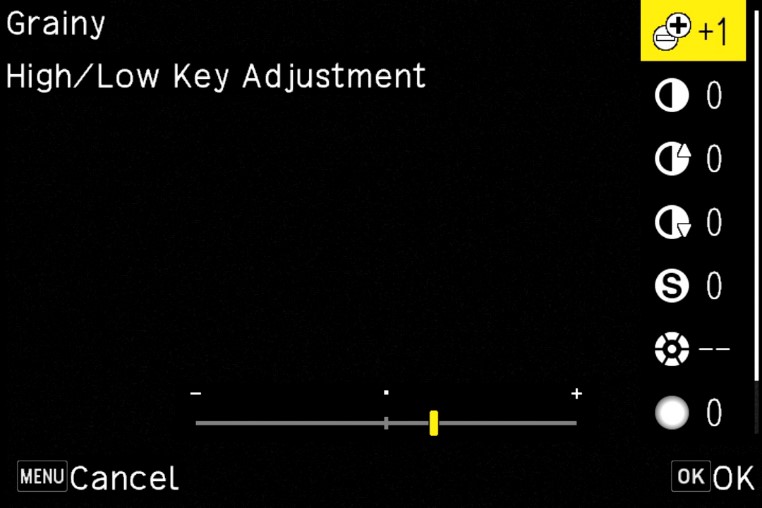
On the Detail Settings screen, use the Up/Down direct keys to select the item to adjust.
Use the Left/Right direct keys to change the detailed settings for “Key,” “Contrast,” “Sharpness,” “Color Tone,” “Shading,” and “Grain.”
* Only adjustable settings are available.
* Some items cannot be adjusted depending on the selected Image Control type.
- After configuring each item, press the OK button to return to the Parameter Selection screen.
- After completing all settings, press the OK button, then select and confirm the destination to save the image as a new JPEG file.
- Finally, select either Continue or Exit.
NOTE: For information on items not covered below, please refer to the GR IV FAQ.
https://www.ricoh-imaging.co.jp/english/support/qa/gr-4/index.html