
![]()


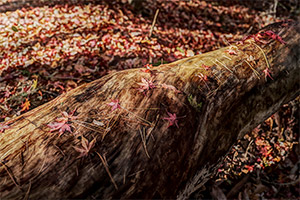
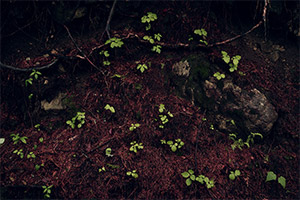
The remains of autumn lay on a fallen tree. I used the Advanced HDR mode to capture this image.
I was able to capture a more beautiful, finer-gradation image by optimizing the camera settings.
Depending on how you customize your camera settings, you can invent a totally new photographic style.
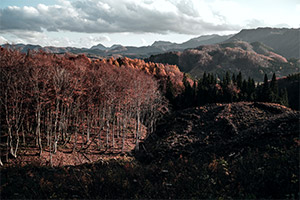
Beautiful mountains stood in the distance, beyond a beech forest. I tried to emphasize the contrast between light and dark areas, which are separated to both sides of this image.
I selected the Bleach Bypass mode in the Custom Image function to reproduce the distinctive tones and subtle details of the shadow areas.
Be careful with your exposure setting: if you raise the exposure too much, it may cause highlight areas to be completely washed out.
A majestic, gigantic tree with beautifully colored autumn leaves. Since its branches spread out sideways, I opted for a horizontal composition.
In order to express the subtle hues and texture, I handheld the camera, while activating the Pixel Shift Resolution System II.
I chose the Flat mode in the Custom Image function to more faithfully reproduce the colors, because the Bleach Bypass mode wasn’t designed to express the autumn colors of the leaves.
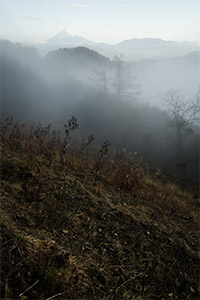
I spotted Mt. Fuji in the distance. I tried to express the difference between Mt. Fuji and the foreground by carefully choosing settings which would neither overexpose the highlights, nor underexpose the shadows.
In principle, when you want to avoid overexposing the highlights, you should lower the exposure while adjusting the remaining parameters via key control. You should slightly tone down the highlights whenever possible.
I came across a world of beauty and splendor.
I chose the Flat mode to more beautifully express warmer tones, and also to reproduce colors somewhat different from those produced by the Bleach Bypass mode.
When you want to show the subtle hues of autumn colors, I suggest using the Flat mode, with a slightly reduced saturation level.
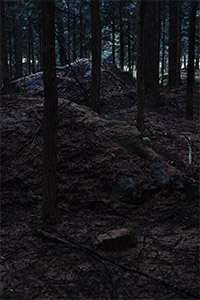
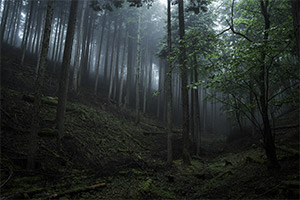
I captured this image of a dimly lit world. I could faithfully express the unique hue of this atmosphere because it was dark; if it were bright, this atmosphere would have been completely lost.
Even in a dark location like this, you can always find subtle shades. In this case, I effectively used the top and sides of the slopes to express the depth of field.
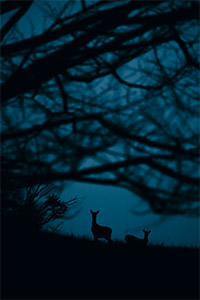
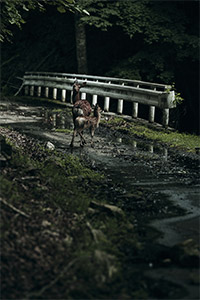
Night had arrived. A pair of deer stared at me from a world of deep blues.
I expressed the depth of field by including branches in the foreground, without zooming in on the deer too closely.
I also made effective use of the space to more beautifully express the silhouette of the deer.
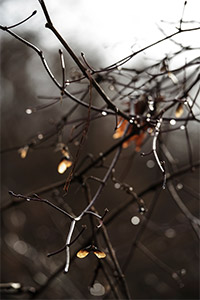
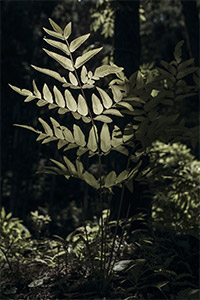
There was a seed of a Japanese maple tree, and I could see the light coming through its wings. This was an ordinary scene you can find in your neighborhood, without going deep into a forest.
I created a sense of depth by reducing the in-focus area.
I also controlled the brightness by setting the exposure level to zero (0) and reducing the Key parameter. By lowering the Key, I could depict the outline of the wings more clearly.
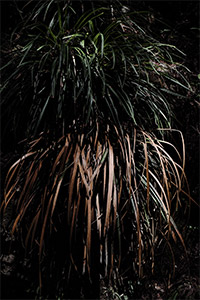
I found a bush of striped bamboos. It was easy to locate the light on a forest trail in the winter.
I created a sense of depth by placing solid objects in the foreground.
By the way, striped bamboo leaves make tasty tea.
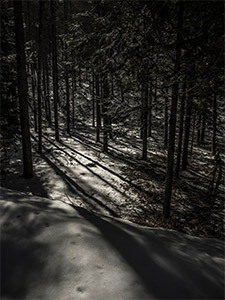
Snow had fallen on a deep forest, which almost appeared to be a monochromatic world.
I used shades of light — different in brightness from the foreground to the background — to express the depth of field.
The PENTAX 645Z’s imaging power becomes more evident in this season.
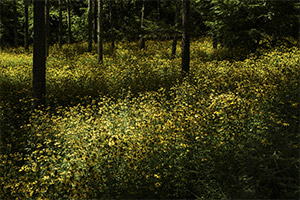
A field of cutleaf coneflowers, an invasive species that threatens native Japanese plants. Even so, and despite the fact that they have been designated for extermination, I was still overwhelmed by their beauty.
To emphasize the spread of this field of flowers, I opted for a horizontal composition, while enhancing the depth of the field by capturing a string of light and shade moving from foreground to background.
Also, by lowering the Key parameter, I toned down the light level of the entire image, except for top light.
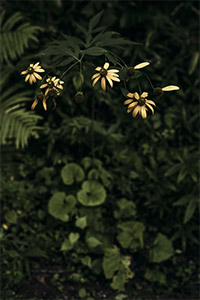
I moved in closer to a cluster of cutleaf coneflowers to capture this image. Although they are the same flowers, you can create a completely different outlook by changing the composition and Custom Image settings.
I pinpointed the focus on the flowers alone, while blurring the rest of the image, to help me express the depth of field more clearly.
I also emphasized yellow tints by lowering the Key parameter while raising the Highlight parameter. As the result, I was able to create a three-dimensional space in the image.
I came across these beams of light alongside a forest trail.
I emphasized the middle beam of light with a vertical composition.
I focused on the yellow-tinted leaves at the far end of the image, creating a visual effect in which the view gradually moves from the foreground to the far end.
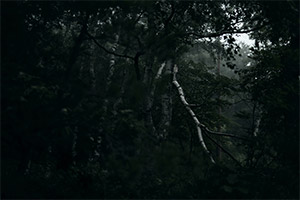
I found a spot of light in a forest of white birches. The light shining on the upper surface of a lone fallen tree created a beautiful image.
I decided to make the entire scene dimmer to emphasize the spot of faint, delicate light in the image.
I also emphasized the highlighted area on the right by including a large portion of the shaded area on the left.
Since the details in the lower left portion are not completely lost, you can vaguely identify white birches at the far end.
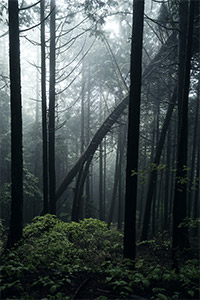
You often come across this kind of scene on a foggy forest trail. Although in a sense it’s not a special sight, I found it both stunning and beautiful.
I captured a considerable portion of the tree branches in the upper left corner of the image, in order to emphasize the downpouring of light. This way I could eliminate the vacant area at the upper left corner and create a stronger sense of depth.
The technical point here was to lower the exposure level, while raising the Key parameter of the mid-range light level.
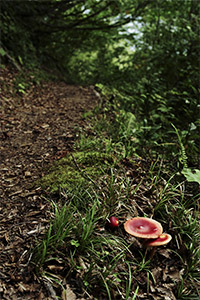
I found these cute amanita caesarea, or Caesar’s mushrooms.
Since the ambient light provided a sense of depth, I was able to easily create a sense of solidity against the background which was already out of focus.
If the entire image were captured in focus, it would have produced an overly complicated image with too much information.
Caution: Don’t touch wild mushrooms without proper knowledge.
I was walking through a tunnel of light.
If I captured the entire image in focus, it would have produced an image overcrowded with too many elements. So I focused on the foreground.
By slightly blurring the background, the entire image filled with its different levels of light seems better composed, and more pleasant to the viewer’s eye.
Since details are not completely lost in the shadow areas, you can still identify details.
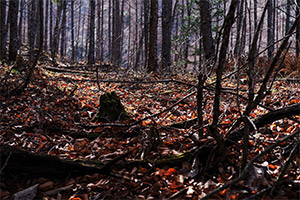
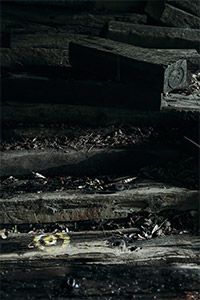
Abandoned logs. How long have they been here? The light shining on the fallen leaves looked so beautiful.
By creating stairs out of light, you can create a sense of solidity even on the flat plane of photography.
Even though I raised the Key parameter, I could make a clear distinction between highlights and shadows by darkening the shaded areas. If I raised overall contrast instead, the shaded areas would have become too dark.
I always try to use ambient light effectively, while refraining from overmanipulating my image.
I came across a deer and her fawn. Since they were already aware of my presence, I quickly switched lenses to capture this image.
Don’t get too hasty; even if there is little time available, be sure to compose the image properly and use correct settings.
I could capture this image only because they happened to be standing in a sunny spot. Otherwise, I wouldn’t have tried it.
No matter how attractive the subject appears to be, I always keep this in mind: make effective use of light to crop the image.
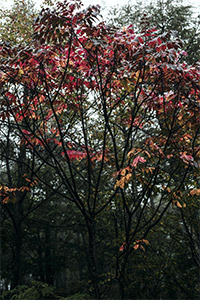
I found autumnal hues everywhere in the forest. A quiet space had become more colorful and vibrant.
I captured the contrast between deep greens and warm colors — beautiful shades that are not too flashy.
When you photograph a scene containing sunny spots or bright colors, you can be more successful by lowering the Key parameter.
Even in Bleach Bypass mode, you can recreate more vivid colors by raising the Saturation parameter, creating a completely different atmosphere from when the Saturation level is set low.
I captured this image when I accidentally looked down at my feet. I was impressed by the leaves highlighted by the sunlight.
I selected the Bleach Bypass mode to create subdued colors and a rich, yet not too strong impression in the image.
The clue was the harmony between the color tones and white balance. I tried to attract attention to the light by exaggerating the contrast in color between the leaves and the surrounding area.
Since the leaves were well illuminated by the sunshine, I lowered the contrast level.
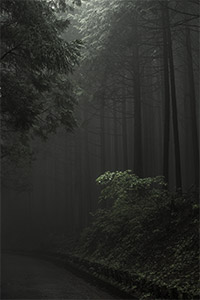
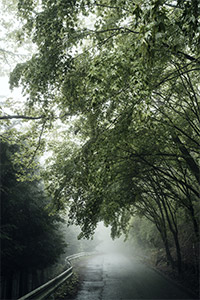
The forest was faintly veiled by mist. I assessed the lighting condition by lowering the exposure level.
I used the key function to emphasize the light, while being sure not to overexposure the rays filtering through the mist.
If I raised the key setting too much, the overall image would have been too bright.
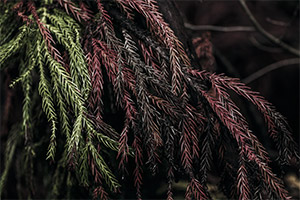
No matter how small or trivial an object is, you can create a fine work of art. I found this cedar tree very attractive because of the leaves of various colors.
While retaining the original colors, I chose the Bleach Bypass mode and slightly raised the saturation level to further emphasize the contrast of the different colors.
I lowered the exposure level, while raising the highlight level. I also raised the key setting slightly to optimize the intermediate light levels.
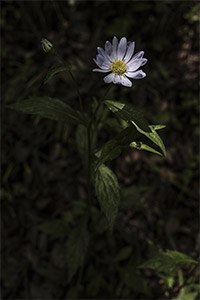
A flower can be best depicted three-dimensionally when captured from above. In order to emphasize the light cast from above, I composed the image in a way to capture the light at different density levels.
I was able to more clearly depict the highlight by lowering the key setting.
The surrounding dark areas should remain dark, but not too dark, which would spoil the overall sense of depth and three-dimensionality.
Honestly speaking, I believe that the faint light in the background is almost as important as the light cast on the flower.
The objective of this image composition was to express the depth, or the three-dimensionality, of the foreground.
The clue to this composition was the well-coordinated balance among the trees on the left side, the green leaves in the foreground, and the mist in the background.
If the green leaves in the foreground overlapped the trees on the left more, it would have spoiled the sense of three-dimensionality.
I raised the highlight setting to further dramatize the mist in the background.
I shifted the color balance of the overall image slightly, moving toward a cyan tone.
I also lowered the exposure level to emphasize the highlights, yet kept them from becoming completely whitewashed.
I prefer to process the image on the spot, rather than touch it up later in the studio, because I believe that there is no need to “fix” the originally beautiful image more than is absolutely necessary. I always try to bring out the rich atmosphere of the scene based on what I felt at the moment and in that space.
I tried to enhance the three-dimensionality of the lighted areas by meticulously optimizing the highlight level.
If the key setting had been raised too much, it might have narrowed the difference between the highlights and the intermediate light level areas, and caused the light to appear less dramatic.
Generally speaking, I prefer to balance the light levels after lowering the exposure level, although this depends on the original lighting conditions. This also lets me select a faster shutter speed.
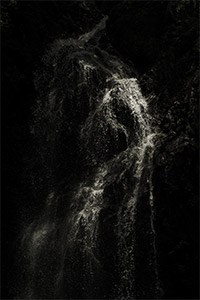
If the flow of water were expressed as a line, I could not have created this sense of three-dimensionality.
I was lucky to find the unique shutter opportunity to capture this impressive image, because leaves in the dense, dark forest are rarely illuminated like this by the sunlight.
I photographed the backside of the leaves from a slightly upward angle, and shifted the focus to the spot of highest interest.
After assessing the difference in light levels between the leaves and the surrounding areas, I made minute parameter adjustments.
Although this scene depicts a portion of a forest familiar to me, I can create beautiful images by isolating a particular light.
I was fascinated by the contrast between the dried-out old leaves and green, fresh new leaves.
I tried to make a clear distinction between the upper and lower clusters of leaves, and also between the bush and the background.
In this case, it was important to balance key and highlight settings. I had to lower the exposure level to make the shadow areas darker.
Since the sunlight was strong, I lowered the highlight setting.
In contrast to the well-lit foreground, the background was dark and shadowed. By taking advantage of the difference in the light levels between the two, I tried to emphasize the sense of depth and three-dimensionality.
When all the factors are favorable, such as in this image, the assessment of various settings is easy and simple.
Raise the key setting after lowering the exposure level, and you can raise the overall light level to emphasize the highlights.
You should be careful not to lower the key setting without lowering the exposure level to enhance the highlights, because this could result in washed-out highlights.


Born on April 24, 1990, in Kawasaki City , Kanagawa Prefecture.
Graduated from Tama Art University, majoring in Environmental Design.
Currently employed by SEO Co., Ltd.
Since his childhood, Takumichi Seo has surrounded himself with music, nature and various design works, resulting in the development of a distinctive sensibility and visual sense. Using the images he photographed, he has designed posters, CD jackets and various advertising media, while also composing background musical pieces. As part of his musical work, he sometimes gives improvised piano performances at his photo exhibitions.
Career history
- 2016
- First photo exhibition held in Ginza, Tokyo, followed by eight other exhibitions.
- 2017
- April Opens permanent gallery, Imaging Gallery GLEAM, in Hiyoshi, Yokohama. September Holds exhibition, A.W.P Selection 2017: Photographers to Lead the Next Generation, at the RICOH Imaging Square GINZA in Tokyo, followed by three other exhibitions.
- 2018
-
April
Publishes his first photo book, Dear Silence: The Forest of Tranquility.
Holds exhibition commemorating the publication of his first photo book at RICOH Imaging Square SHINJUKU in Tokyo. June Holds exhibition commemorating the publication of his first photo book at RICOH Imaging Square OSAKA, followed by three other exhibitions.