
RICOH R10
- Top
- Features
- Externals
- Specifications
- Option
- Sample Images


Feature4: Usability and design
Large, high-definition 3.0-inch HVGA LCD monitor for easy viewing
The 3.0-inch 460,000-dot LCD monitor is convenient both when shooting and viewing images. Its high contrast and wide viewing angle make for easy viewing even when shooting outdoors.
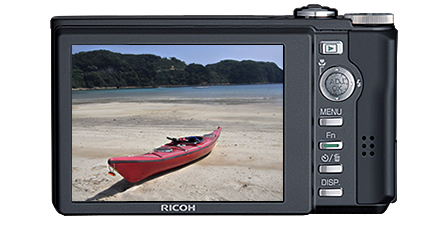
* Simulated image
Mode dial for quick, sure shooting mode changes
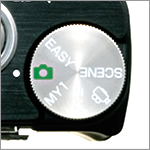
The mode dial lets you quickly switch between the various shooting modes (easy shooting mode, auto shooting mode, and “My Settings” modes MY1 and MY2). It is easy to select the best mode to match the shooting scene and purpose.
ADJ./OK button enables speedy menu settings
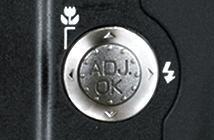
Four frequently used functions from the shooting menu, such as exposure compensation, white balance, and ISO sensitivity, can be assigned to the ADJ./OK button. This makes it possible to quickly access the assigned functions and easily change settings while shooting.
Create your own custom specs with “My Settings” mode!
When a function such as AE lock, step zoom, or backlight compensation is set in advance for the Fn button, which enables "one push" switching between modes, you can respond instantly to sudden shutter chances.
Using “My Settings”!
Two groups of settings can be registered as “My Settings.” You can then immediately call up those settings by moving the mode dial to MY1 or MY2.
My Settings registration pattern (1),
settings for shooting product photos for net auction use:
Pic Quality/Size N640, macro mode, focal length 50 mm, flash off
My Settings registration pattern (2),
settings for black and white photos for blog use:
Pic Quality/Size F3648, B&W, flash off, dual size
Fn (function) button makes it simple to shoot just the way you want
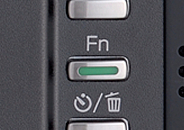
When a function such as AE lock, step zoom, or backlight compensation is set in advance for the Fn button, which enables "one push" switching between modes, you can respond instantly to sudden shutter chances.
Functions which can be set for each shooting mode
Auto shooting mode
•Target shift •AE lock •Step zoom •Auto Bracket •WB-BKT •CL-BKT •Minimum aperture
Scene modes
•Macro target •AE lock •Step zoom •Auto Bracket •WB-BKT •CL-BKT •Minimum aperture
Easy shooting mode
•Backlight compensation •Macro target
Using the Fn button!
Tip No. 1: Assigning and using "macro target"
In scene mode or easy shooting mode, when doing macro shooting the AF target can be shifted without moving the camera. This is very convenient when using a tripod since the focus can be locked at the position where the macro target is moved.
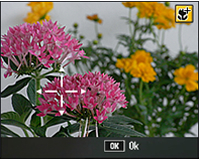
* Simulated image
Using the Fn button!
Tip No. 2: Assigning and using "step zoom"
The ability to specify the optical zoom focal length in seven fixed steps, (28 mm, 35 mm, 50 mm, 85 mm, 105 mm, 135 mm, and 200 mm equivalent) will help you make good use of lens effects for each scene.
Using the Fn button!
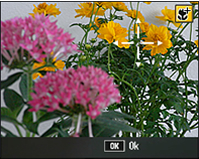
Tip No. 3: Assigning and using "AE lock"
Locking the exposure setting (aperture value and shutter speed) enables you to shoot the image with the exact brightness you want.
Select one of two zooming speeds with the zoom lever
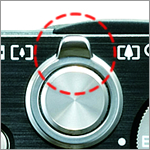
With zoom lever operation it is possible to switch zoom speed between low-speed zooming and high-speed zooming. Turning the zoom level just slightly gives low-speed zooming, and turning it further switches to high-speed zooming.
This convenient speed option lets you choose whether to find your zoom position slowly and carefully or with all haste.
- Top |
- Features |
- Externals |
- Specifications |
- Option |
- Sample Images