"Macro," also called "close-up photography," means taking pictures from as close as possible to the subject. This type of photography makes the subject appear larger as you move closer to it, giving you a detailed, high-definition result.
Ricoh, based on the concept of "making macro photography easy and fun" for everyone, equips its cameras with a macro function that lets you take pictures from as close as 1 cm away from your subject.
"1 cm macro" means that you can get as close as 1 cm away from your subject from the 28 mm wide-angle end. The macro function on most models made by other companies can only be used on the short focal length end, but Ricoh digital cameras let you use macro in the entire zoom focal length range, all the way to the tele (telephoto) end (as you move further toward the tele end, the minimum distance gets slightly longer).
Using it is a piece of cake, too – to switch to macro mode, all you have to do is press the "flower icon" on the operation panel.
Using Macro on Objects Around You
What makes macro photography so fun is that unlike normal scenery photography, it puts you closer to your subject, creating an exciting close-up world. Everyday objects, flowers on the side of the road, you name it - everything looks surprisingly fresh and different when viewed up close. When you capture an image in macro mode using a high-precision digital camera, those old ho-hum, normal objects won't look so ho-hum and normal anymore.
This pendant is no bigger than 2 cm, but from about 5 cm away, macro really brings out the fine, intricate textures.
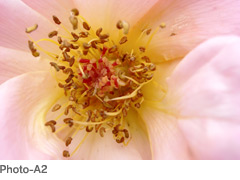
The center of a rose. To me, stamens and pistils used to just be words in science textbooks, but from up close, you can see how they create such a mysterious, natural formation.
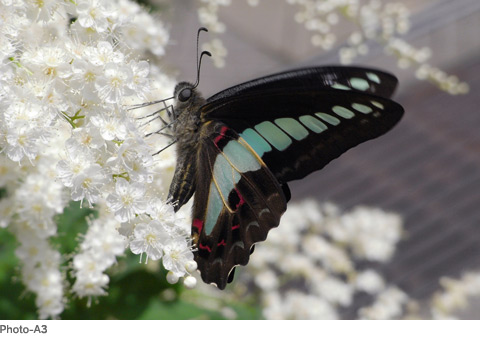
As I was taking some shots of a fragrant rowan, a butterfly came to sample the nectar. After some anxious waiting, I released the shutter as soon as the chance arrived.
Macro Shooting Techniques (Advanced) - The AF Target Shift Function and Zoom Macro
Next, we'll introduce the AF target shift function and the zoom macro function, which really come in handy during macro photography,.
◎The AF Target Shift Function
This function makes AF alignment much more accurate. For instance, when your subject is in the foreground or the background on the right or left side of the frame and you take the picture from straight ahead, the camera sometimes ends up focusing on the center of the image. You might, however, want the camera to focus on the left, right, foreground, or background – that's when you should make use of the AF target shift function, which lets you choose the AF focus point.
After switching to macro mode, press the ADJ. button and hold the arrow key to the side until you see a directional icon appear on the screen. Then, move the AF target to align it with your subject and shoot. An accurate AF focus point is a must in macro photography. Since you're shooting at a close range, regular AF lock can sometimes cause slight errors.
* For more information, refer to the AF Target section in the manual.
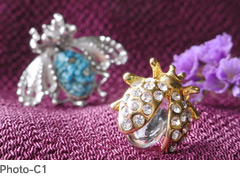
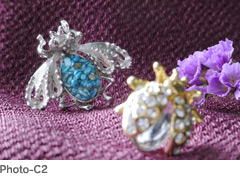
In the sample on the left, the AF target is focused on the brooch on the right foreground; in the sample on the right, the AF target is aligned with the brooch in the left background.
This function is particularly useful when you want to make your subject appear even larger than in normal macro photography. You can access zoom macro in scene mode. When you switch into this mode, the camera moves automatically into digital zoom, and you can use the zoom lever to show the zoom factor on the LCD monitor. When the zoom is set, compose your picture and release the shutter. The macro function makes it easy to enjoy the world of extended macro photography – be sure to try it out.
Photo: Nao Nishitsuji: ●CX2 ●1/20 ●F4.5 ●ISO200 ●EV+0.0 ●WB: AUTO
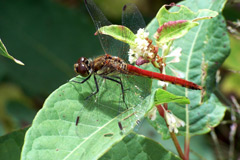
Macro with Insects
By ushering you into a world that you've never seen so up close and personal, macro photography opens your photographic eyes not only to nature's wonderful trees and flowers, but also the insects and bugs that populate our world. Ricoh digital cameras make macro photography possible in the entire focus range, from the wide-angle end to the tele end. Tele end macro really comes to life when you're taking pictures of butterflies, dragonflies, bees and other insects that tend to fly away when you get too close.
The minimum shooting distance for a CX2 at 300 mm on the tele end is 28 cm. One significant advantage of this function is that you can take pictures from the minimum shooting distance to any shooting distance you choose without having to switch out of macro mode.