Taken with: CX3 ●ISO200 ●1/870sec. ●F3.7 ●EV0.0 ●WB:MANUAL
Looking up from the narrow alleyway, I saw a beautiful sunset so I took the shot by striking a balance between the building and the sky.
Taken with: GR DIGITAL III ●ISO100 ●1/1620sec. ●F6.3 ●EV-0.3 ●WB:MANUAL
At a wide open spot, I photographed the swiftly flowing clouds. Putting in a bit of the tree emphasized the vastness of the sky.
Synchronizing your state of mind to nature's pace, be aware of the cloud flow.
Look up at the sky and when you think "Oh!" take the shot.
Taken with: CX3 ●ISO200 ●1/760sec. ●F4.5 ●EV0.0 ●WB:MANUAL
Taken with: GR DIGITAL III ●ISO100 ●1/870sec. ●F7.1 ●EV-0.7 ●WB:AUTO
Taken with: GR DIGITAL III ●ISO100 ●1/710sec. ●F7.1 ●EV-0.5 ●WB:MANUAL
GR DIGITAL III ●ISO100 ●1/930sec. ●F7.1 ●EV-0.3 ●WB:AUTO
A clear and cloudless blue sky can be a wonderful thing to behold, but that feeling can be quite hard to put into a photograph. So I suggest cultivating an awareness of clouds. While leisurely watching the wide-open sky, sometimes you will find a cloud that elicits an "Oh!" So one secret of sky photography is to shoot whatever it was that caused that "Oh!" feeling. Don't bother thinking about why you thought "Oh!" Just press the shutter. Zoom in and zoom out, taking a number of images. Later you can pick the one image that best expresses the feeling you had at the time.
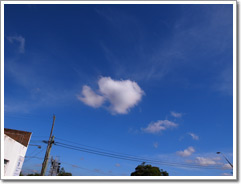
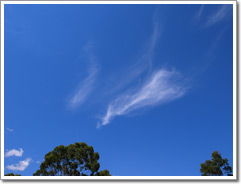
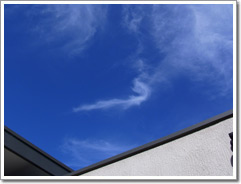
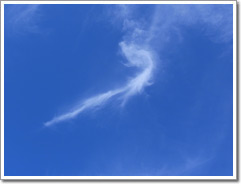
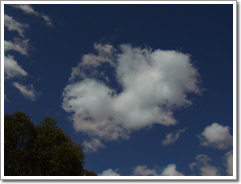
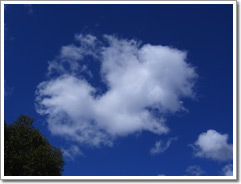
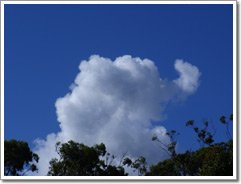
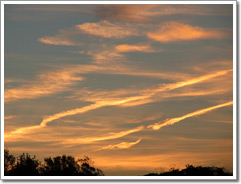
Search for interesting cloud shapes
Taken with: GR DIGITAL III ●ISO100 ●1/1000sec. ●F6.3 ●EV-0.3 ●WB:MANUAL
When you find a cloud with a shape that strikes your fancy, first of all take a shot. Next, look around and find something to combine with that cloud, and take another shot. Where I was standing, shooting horizontally would have put too many things in the image so I took a vertical shot, combining the telephone pole with the cloud.
Taken with: CX3 ●ISO100 ●1/540sec. ●F8.0 ●EV0.0 ●WB:MANUAL
Taken with: CX3 ●ISO100 ●1/1520sec. ●F3.5 ●EV-0.5 ●WB:MANUAL
Taken with: CX3 ●ISO100 ●1/1070sec. ●F4.2 ●EV-0.5 ●WB:MANUAL
When you find a cloud with an interesting shape, a cloud with a shape that strikes your fancy, try isolating a section of the sky with that cloud as the central element. Next, look around you and find something—tree, flower, building, house roof, etc.—that you can combine with that cloud in an image. This will communicate the size of the cloud and provide a sense of scale to the image. The result will be a photograph that gives a feel for the atmosphere of the place and time, perhaps even telling a kind of story. As you shoot your cloud from various perspectives and at various angles, you should find the one image that makes you say "This is it!"
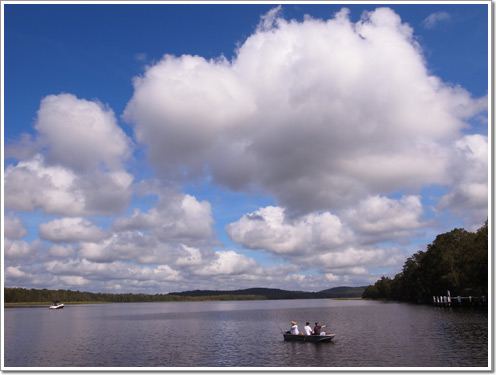
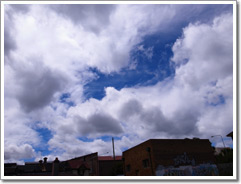
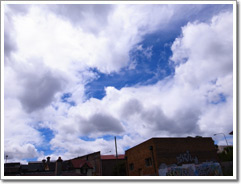
Make the sky a big part of the landscape
Taken with: GR DIGITAL III ●ISO100 ●1/810sec. ●F7.1 ●EV0.0 ●WB:AUTO
Water locations such as rivers, lakes, and the seashore offer superb opportunities for shooting a wide expanse of sky. Making the sky a large portion of the image will give an even more expansive feel to your photograph.
Taken with: CX3 ●ISO100 ●1/1070sec. ●F8.0 ●EV0.0 ●WB:MANUAL
While shooting landscapes, always keep in mind that the sky can play a starring role in giving your image a wide-open feel.
Be particular about blue and white
Taken with: CX3 ●ISO80 ●1/1070sec. ●F8.4 ●EV-0.7 ●WB:AUTO
Taken with: CX3 ●ISO100 ●1/1000sec. ●F8.7 ●EV0.0 ●WB:MANUAL
With the white balance on auto, I thought the sky color was a bit muddy so I changed to the sunlight setting. The resulting blues and whites were both clear.
Taken with: CX3 ●ISO100 ●1/660sec. ●F10.1 ●EV0.0 ●WB:MANUAL
Taken with: CX3 ●ISO100 ●1/930sec. ●F10.1 ●EV-0.5 ●WB:MANUAL
Leaving the exposure up to the camera, the clouds became too white, losing their three-dimensionality as a result. So I tried -0.5 exposure compensation. This gave the clouds a fluffy feel.
Taken with: GR DIGITAL III ●ISO100 ●1/1620sec. ●F7.1 ●EV0.0 ●WB:MANUAL
Taken with: GR DIGITAL III ●ISO100 ●1/1150sec. ●F7.1 ●EV+0.5 ●WB:MANUAL
When the composition is centered on the sky, the ground portion tends to go black and lose detail. In this image, I wanted to properly show the buildings so I used +0.5 exposure compensation.
When shooting on auto, there are times when the sky just isn't the proper transparent blue. When that happens, try changing the white balance from auto to outdoors (sunlight) mode. This should remove the muddiness and give you a beautiful blue sky. In addition, by changing the image setting on the menu screen from standard to vivid, you should be able to recreate a sky of even more brilliant blue. I personally always set my camera to vivid regardless of whether I am shooting landscapes or snapshots.
When photographing the sky, the state of the light can be complex, and when the exposure is left up to the camera, you can end up with a sky that is either too bright or too dark. When it is too bright, the white clouds lose their fluffy three-dimensional feel. If you check the image on the picture display and see that this is the case, please try re-taking the picture using the exposure compensation function. A -0.3 to +0.5 setting should give depth to the clouds.
There are many cases where the level of brightness of sky and ground are very different so if you give priority to the sky, things on the ground are often dark. If you want to brighten up the ground even if it means losing some of the texture of the sky, try shooting with a + exposure compensation setting.
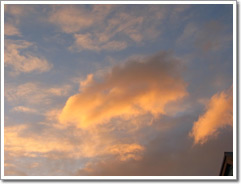
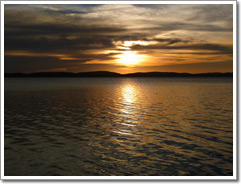
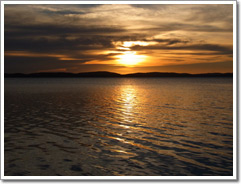
Photograph the sunset glow
Taken with: GR DIGITAL III ●ISO200 ●1/620sec. ●F6.3 ●EV-0.3 ●WB:AUTO
At sunset, the light changes moment to moment. Don't limit yourself to just shooting the entire sky, look to every corner and when you find an interesting cloud, try shooting just that. Never forget the feeling that every sunset is a once-in-a-lifetime encounter.
Taken with: CX3 ●ISO200 ●1/1520sec. ●F8.9 ●EV-0.3 ●WB:AUTO
Taken with: CX3 ●ISO200 ●1/1520sec. ●F8.9 ●EV-0.3 ●WB:MANUAL(Cloudy)
Taken with: CX3 ●ISO200 ●1/250sec. ●F5.6 ●EV-0.5 ●WB:AUTO
Taken with: CX3 ●ISO200 ●1/570sec. ●F4.5 ●EV0.0 ●WB:MANUAL(Cloudy)
Sunsets are the greatest joy in the life of a sky photographer. As it gets progressively darker, the shutter speed will inevitably slow so you need a tripod, but for a compact camera the tripod does not have to be particularly extravagant. You will also need to use a tripod to avoid blurring when shooting telephoto with a zoom lens. Since each setting produces a different balance of red and gold, try taking multiple shots while changing the white balance setting from auto to outdoors to cloudy. It is important to select the mode that you think best fits that day's sunset. Keep in mind that if you do not adjust the white balance, you are probably not going to take powerful sunset photographs. The basic mode for me is "cloudy" since it tends to produce vivid red tones.