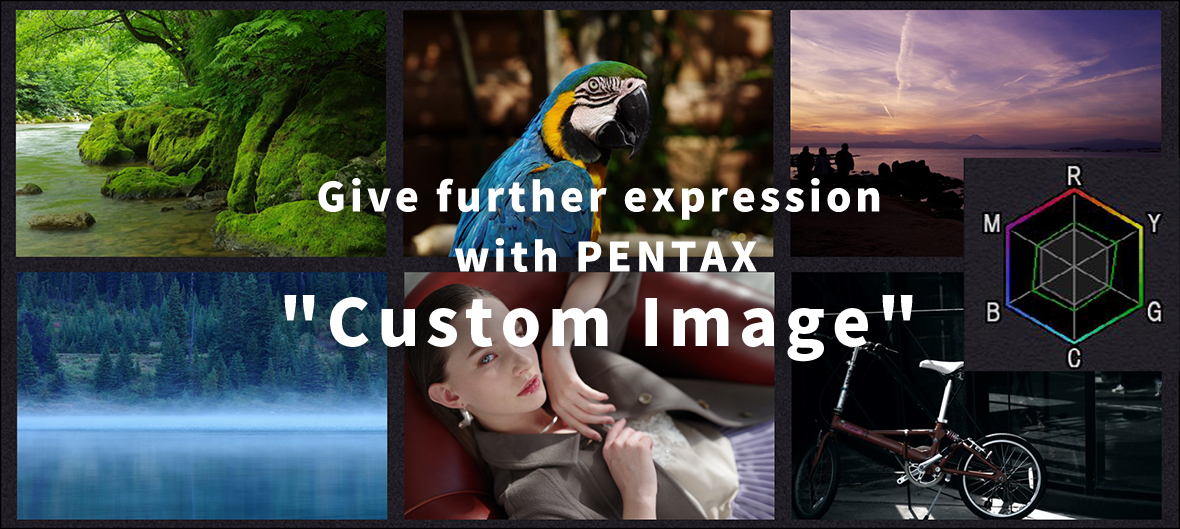
What is Custom Image?
All PENTAX digital SLR cameras currently on the market feature the creative Custom Image function,* which lets you alter the finishing touch of an image you’ve captured, just like changing the film type. In addition to the easy selection of the Custom Image mode best suited for a given scene or subject — one of the great advantages of digital photography — it also gives you the flexibility of customizing any selected Custom Image mode by shifting various parameters.
* All the features and functions introduced in this article are based on PENTAX digital SLR cameras available as of June 2022. Older models may not provide some Custom Image modes and/or functions.

Custom Image parameters
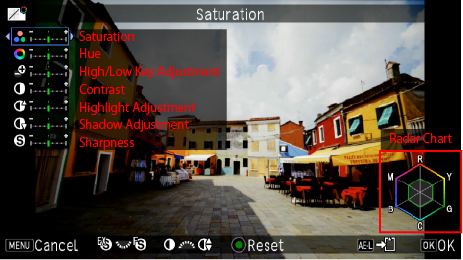
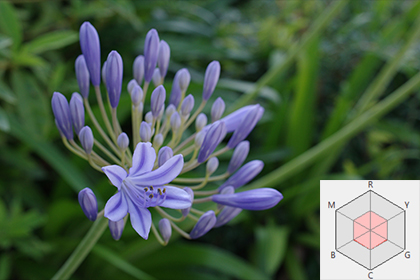
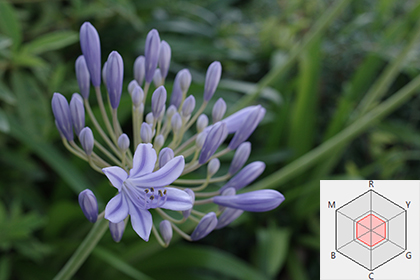
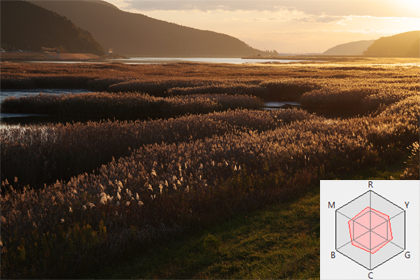
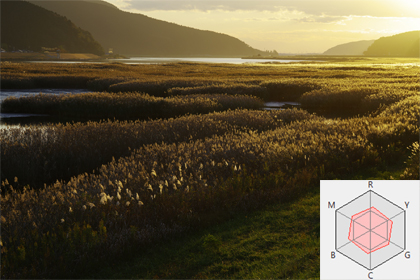
Radar chart: This chart indicates the relative status of colors (that is, which colors are emphasized over others) using a color wheel. Each Custom Image mode provides different levels of R (red), Y (yellow), G (green), C (cyan), B (blue) and M (magenta) to create a distinctive finishing touch that applies a specific color scheme.
Saturation
This parameter controls the strength of different colors.
Since each Custom Image mode has its own unique color balance,
images are captured with different finishing touches, even when the saturation level is standardized.
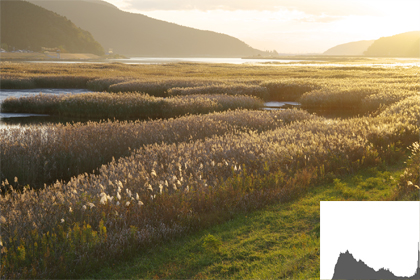
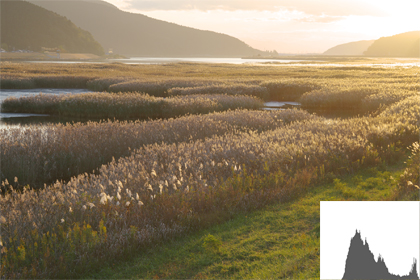
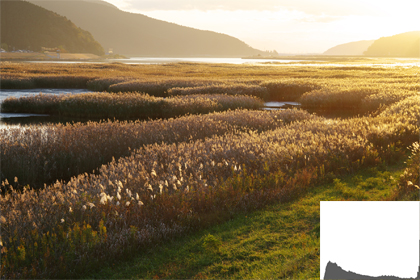
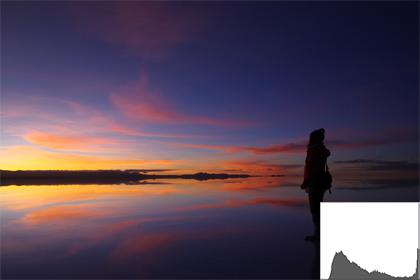
〔Original image〕
〔Saturation at -2〕
〔Saturation at +2〕

Hue
This parameter controls the shades of colors.
When the parameter is shifted to the plus side, the color wheel turns clockwise.
When it’s shifted to the minus side, the wheel turns counterclockwise. You can use these shifts to adjust the shade of color.
In the Muted and Bleach Bypass modes, this parameter is replaced by Tone.
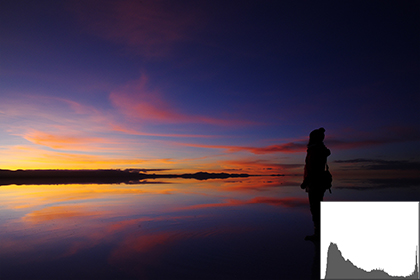
〔Original image〕

〔Hue shifted to - side〕
〔Hue shifted to + side〕
Although this parameter affects all hues, the yellow hue is enhanced when this parameter is shifted to the plus side, or the red hue is enhanced when it’s shifted to the minus side.
Key
This parameter controls the brightness of an image, mainly for neutral tones.
It has very little effect on the brightest and darkest areas of the image.
〔Original image〕
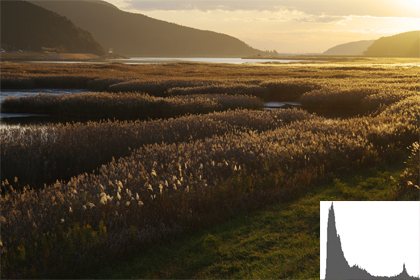
〔Low-key image:
key shifted to -side〕
〔High-key image:
key shifted to + side〕
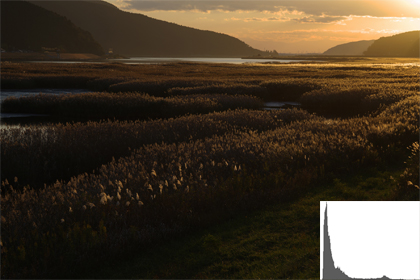
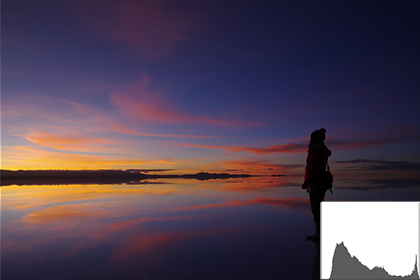
Technical pointer: Difference between exposure control and key control
〔Example: key
shifted to + side〕
When the key is shifted to the plus side, only neutral-tone areas are made brighter, while highlights are not affected. You can see in this image that the sky retains more details than the image at left.
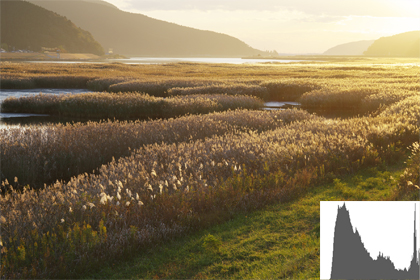
〔Example: exposure
shifted to + side〕

When the exposure is shifted to the plus side, the entire image becomes brighter, from the shadows to the highlights. Since the exposure is shifted excessively to the plus side, the sky may lack detail.
Contrast
This parameter controls the difference
in brightness between light and shaded areas.
When shifted to the plus side, it emphasizes the difference between light and shade.
When shifted to the minus side, it reduces the difference.
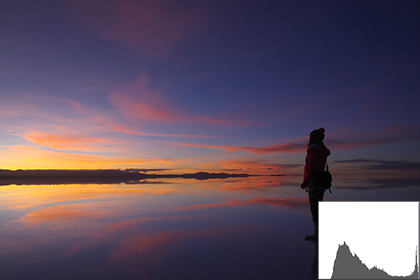
〔Original image〕
〔Contrast shifted to – side〕
〔Contrast shifted to + side〕
Highlight
This parameter controls the brightness
of areas brighter than neutral-tone areas.
It can be recalled by turning the front e-dial while the minute setting menu is displayed on the screen.
〔Original image〕

〔Highlight shifted to - side〕
〔Highlight shifted to + side〕
By shifting this parameter to the minus side, you can depict the highlight areas in the sky with milder tones.
Shadow
This parameter controls the brightness
of areas darker than neutral-tone areas.
It can be recalled by turning the front e-dial while the minute setting menu is displayed on the screen.
〔Original image〕

〔Shadow shifted to - side〕
〔Shadow shifted to + side〕
By shifting this parameter to the plus side, you can make shaded areas brighter.
Sharpness
This parameter controls the subject’s outline. When shifted to the plus side,
it emphasizes the outline. When shifted to the minus side, it weakens the outline.
Select the desired sharpness mode by turning the rear e-dial while the minute setting menu is displayed on the screen.


Compared with the standard Sharpness mode, the Fine Sharpness and Extra-fine Sharpness modes define the outline more clearly.
By adjusting the parameters using the minute setting menu, you can use the Custom Image function more effectively to create the intended finishing touch. PENTAX makes sure that, by fine-tuning the Custom Image function, your finishing touch operation doesn’t degrade image quality after parameter adjustments are made.
Since the color balance varies from one Custom Image mode to another, you can create a diversity of creative expressions by mixing parameter settings. Try to find the parameter combination that best meets your preference or creative intention.